
Blog
This step-by-step guide will walk you through the process of setting up your shop in At The Yard, empowering you to maximise your reach, connect with potential customers and seamlessly manage payments. Get ready to expand your businesses horizons and unlock new opportunities in the equestrian community!
If you haven't already, visit At The Yard's website and request a trial account. A member of our team will review your request. Once reviewed your account will be created and you'll gain access to the full suite of features and services At The Yard has to offer.
Upon logging in (as an admin), locate the "Manage Shop" menu item within the admin menu. Clicking on it will take you to the shop configuration page from where you can set up and manage your shop.
To streamline transactions and automate payment processing we've integrated a number of payment gateways with At The Yard.
Before you begin you'll need to have an account with one of these payment providers. If you don't already have one you'll need to create one (see links below):
We recommend Stripe for the majority of clients as it offers some extra features. However SumUp is available, upon request, for markets where Stripe is not available (e.g. Channel Islands).
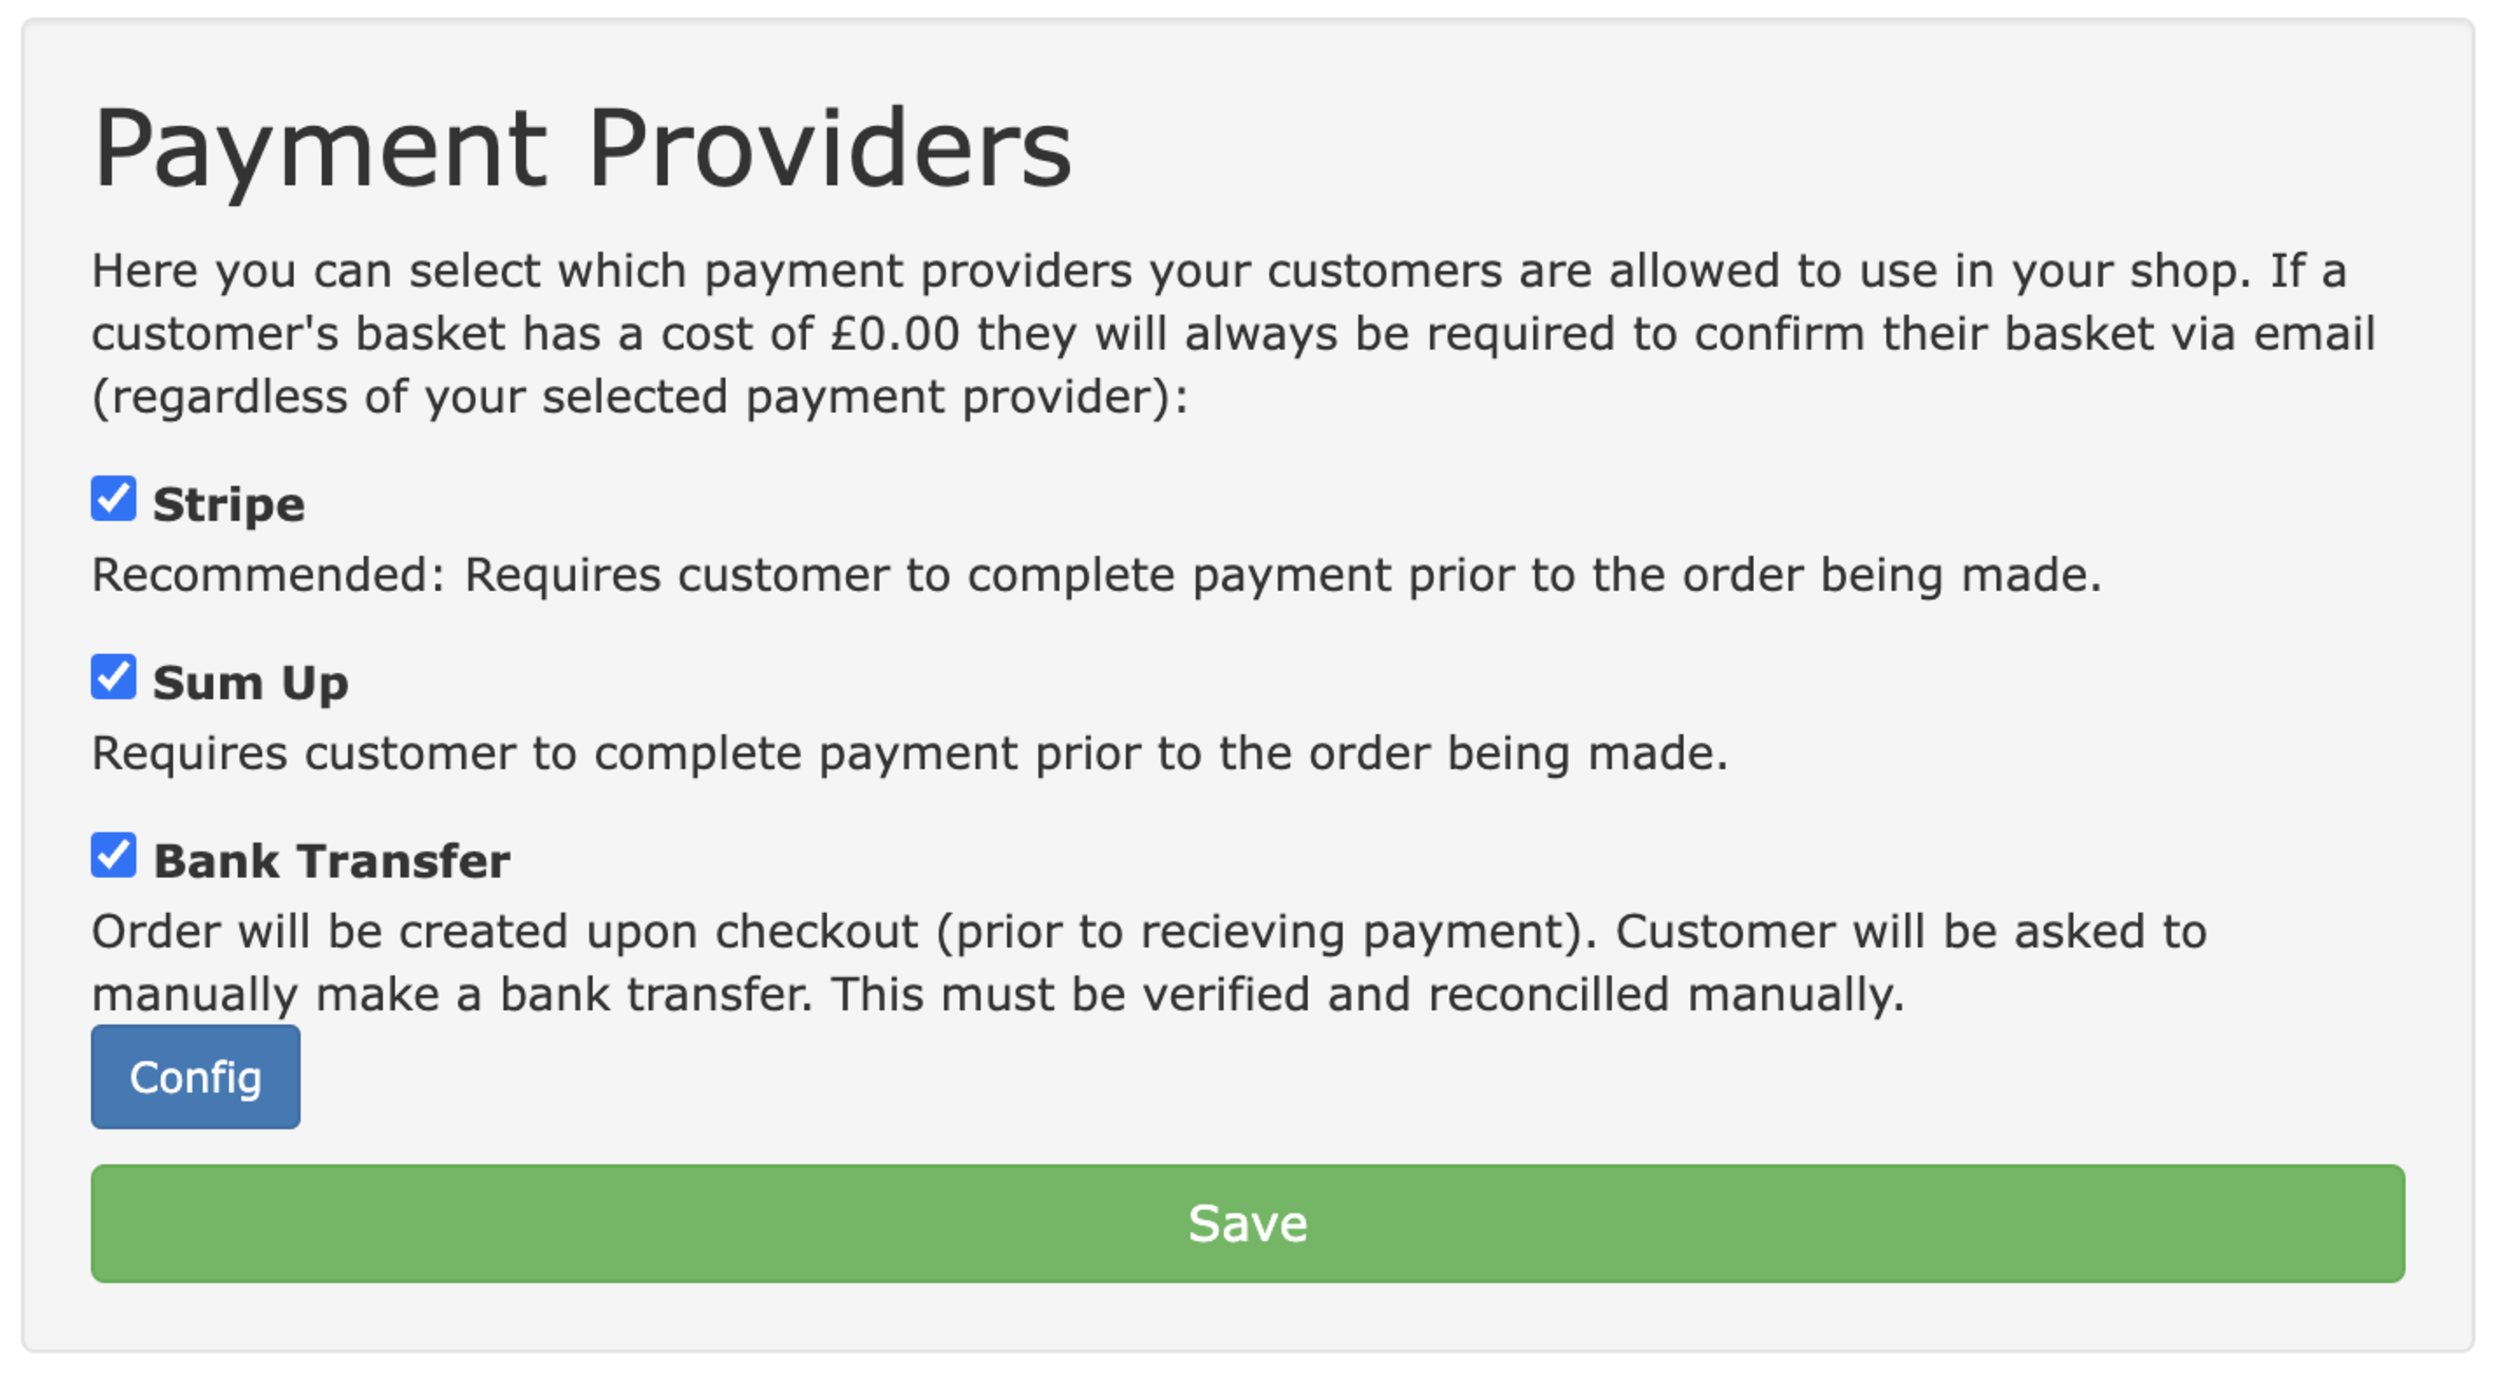
Once you've got your account at a provider you'll need to return to the Shop Configuration page in At The Yard to connect At The Yard to the payment provider. To do this go to payment providers panel where you'll see the link complete a configuration step in the integrations panel.
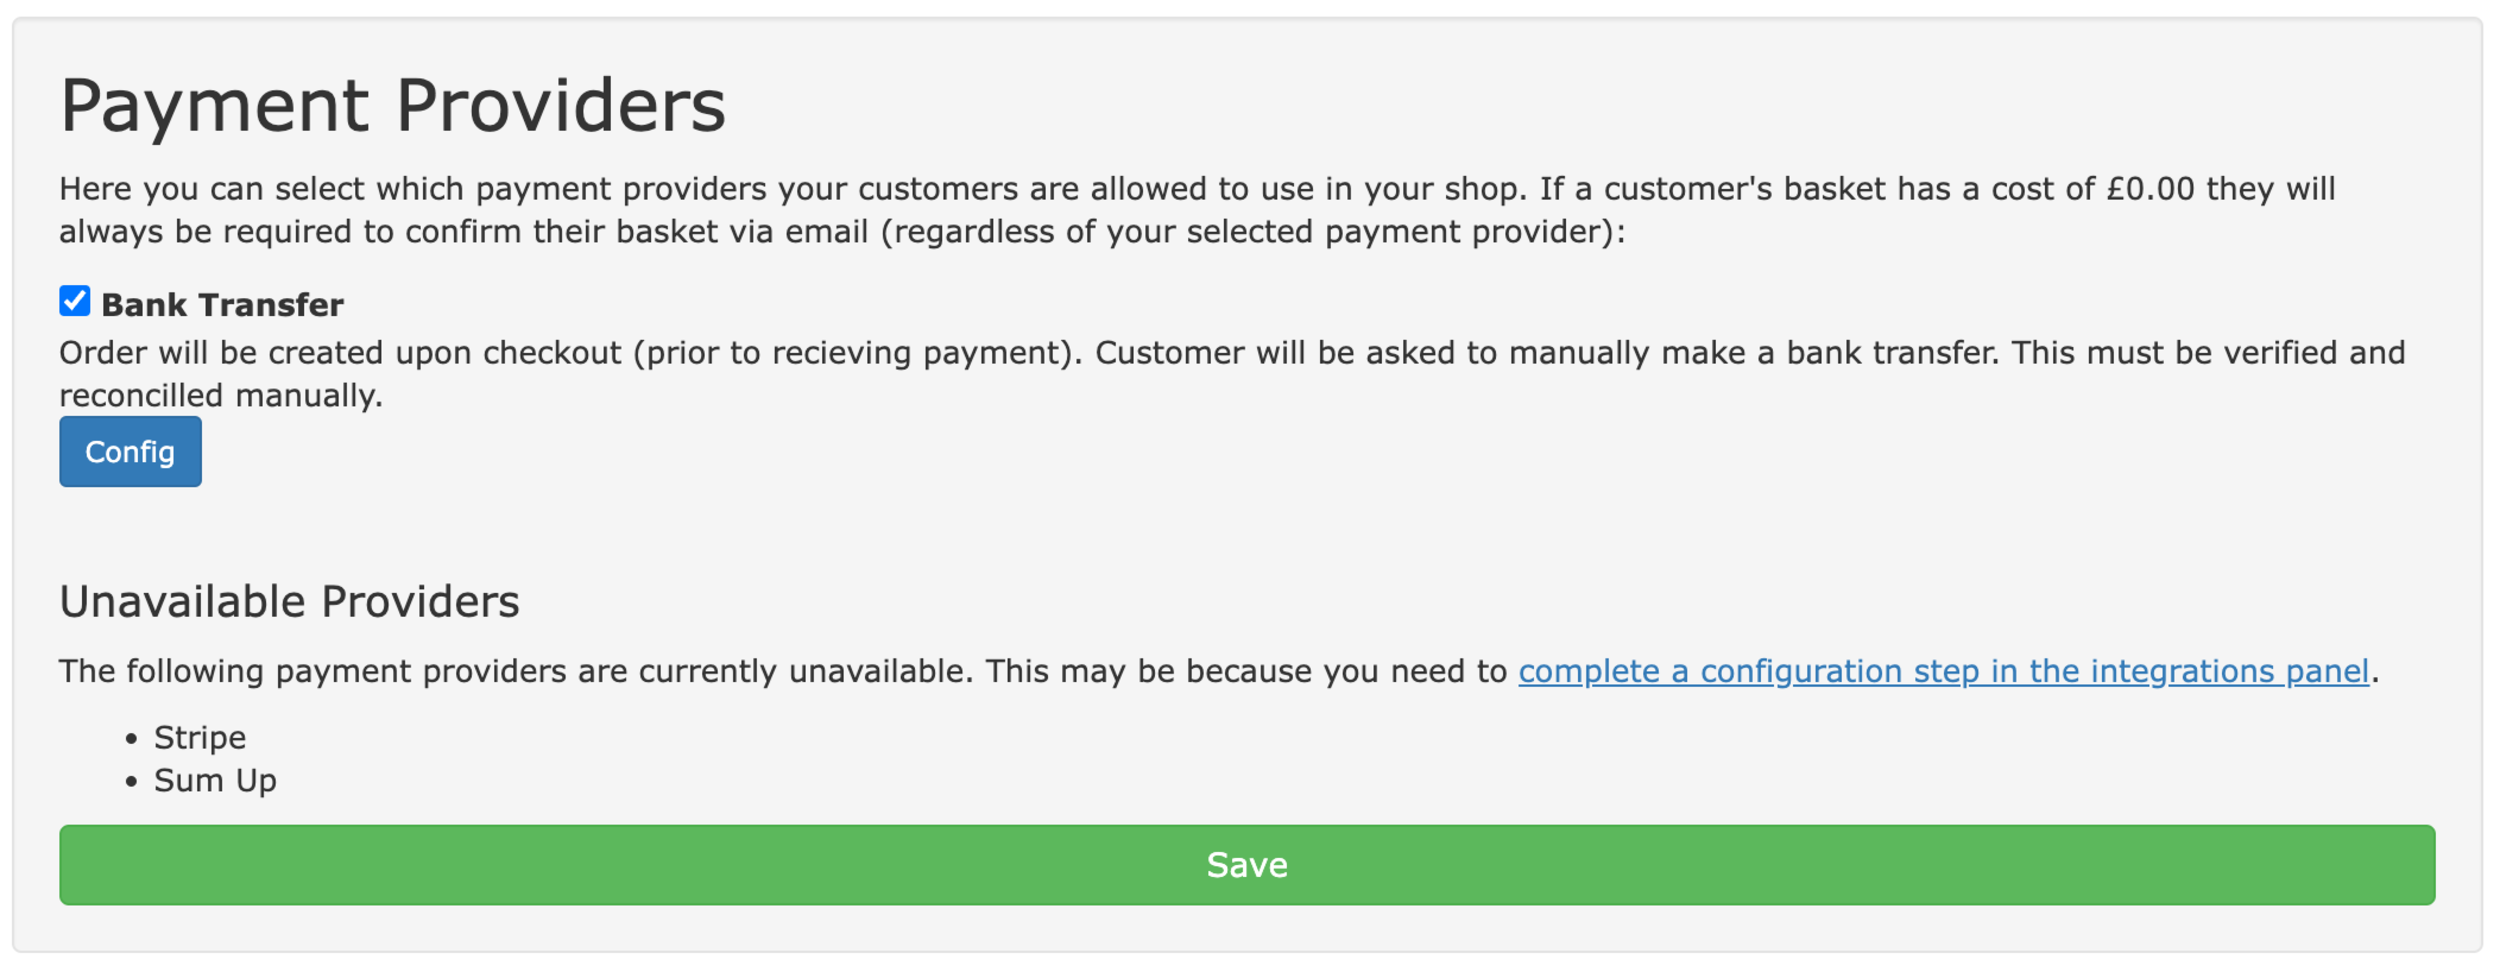
The link takes you to At The Yard's integration page. The first step is to enable your payment provider of choice by clicking 'Enable'. Then find the link 'Connect with Stripe/SumUp' and click on it to proceed to the next step.
Follow the instructions the payment provider gives you until you return to At The Yard. Your provider is now connected! You can return to the shop management page where you'll now have the option to tick your choice of payment provider (remember to click Save once you're done).
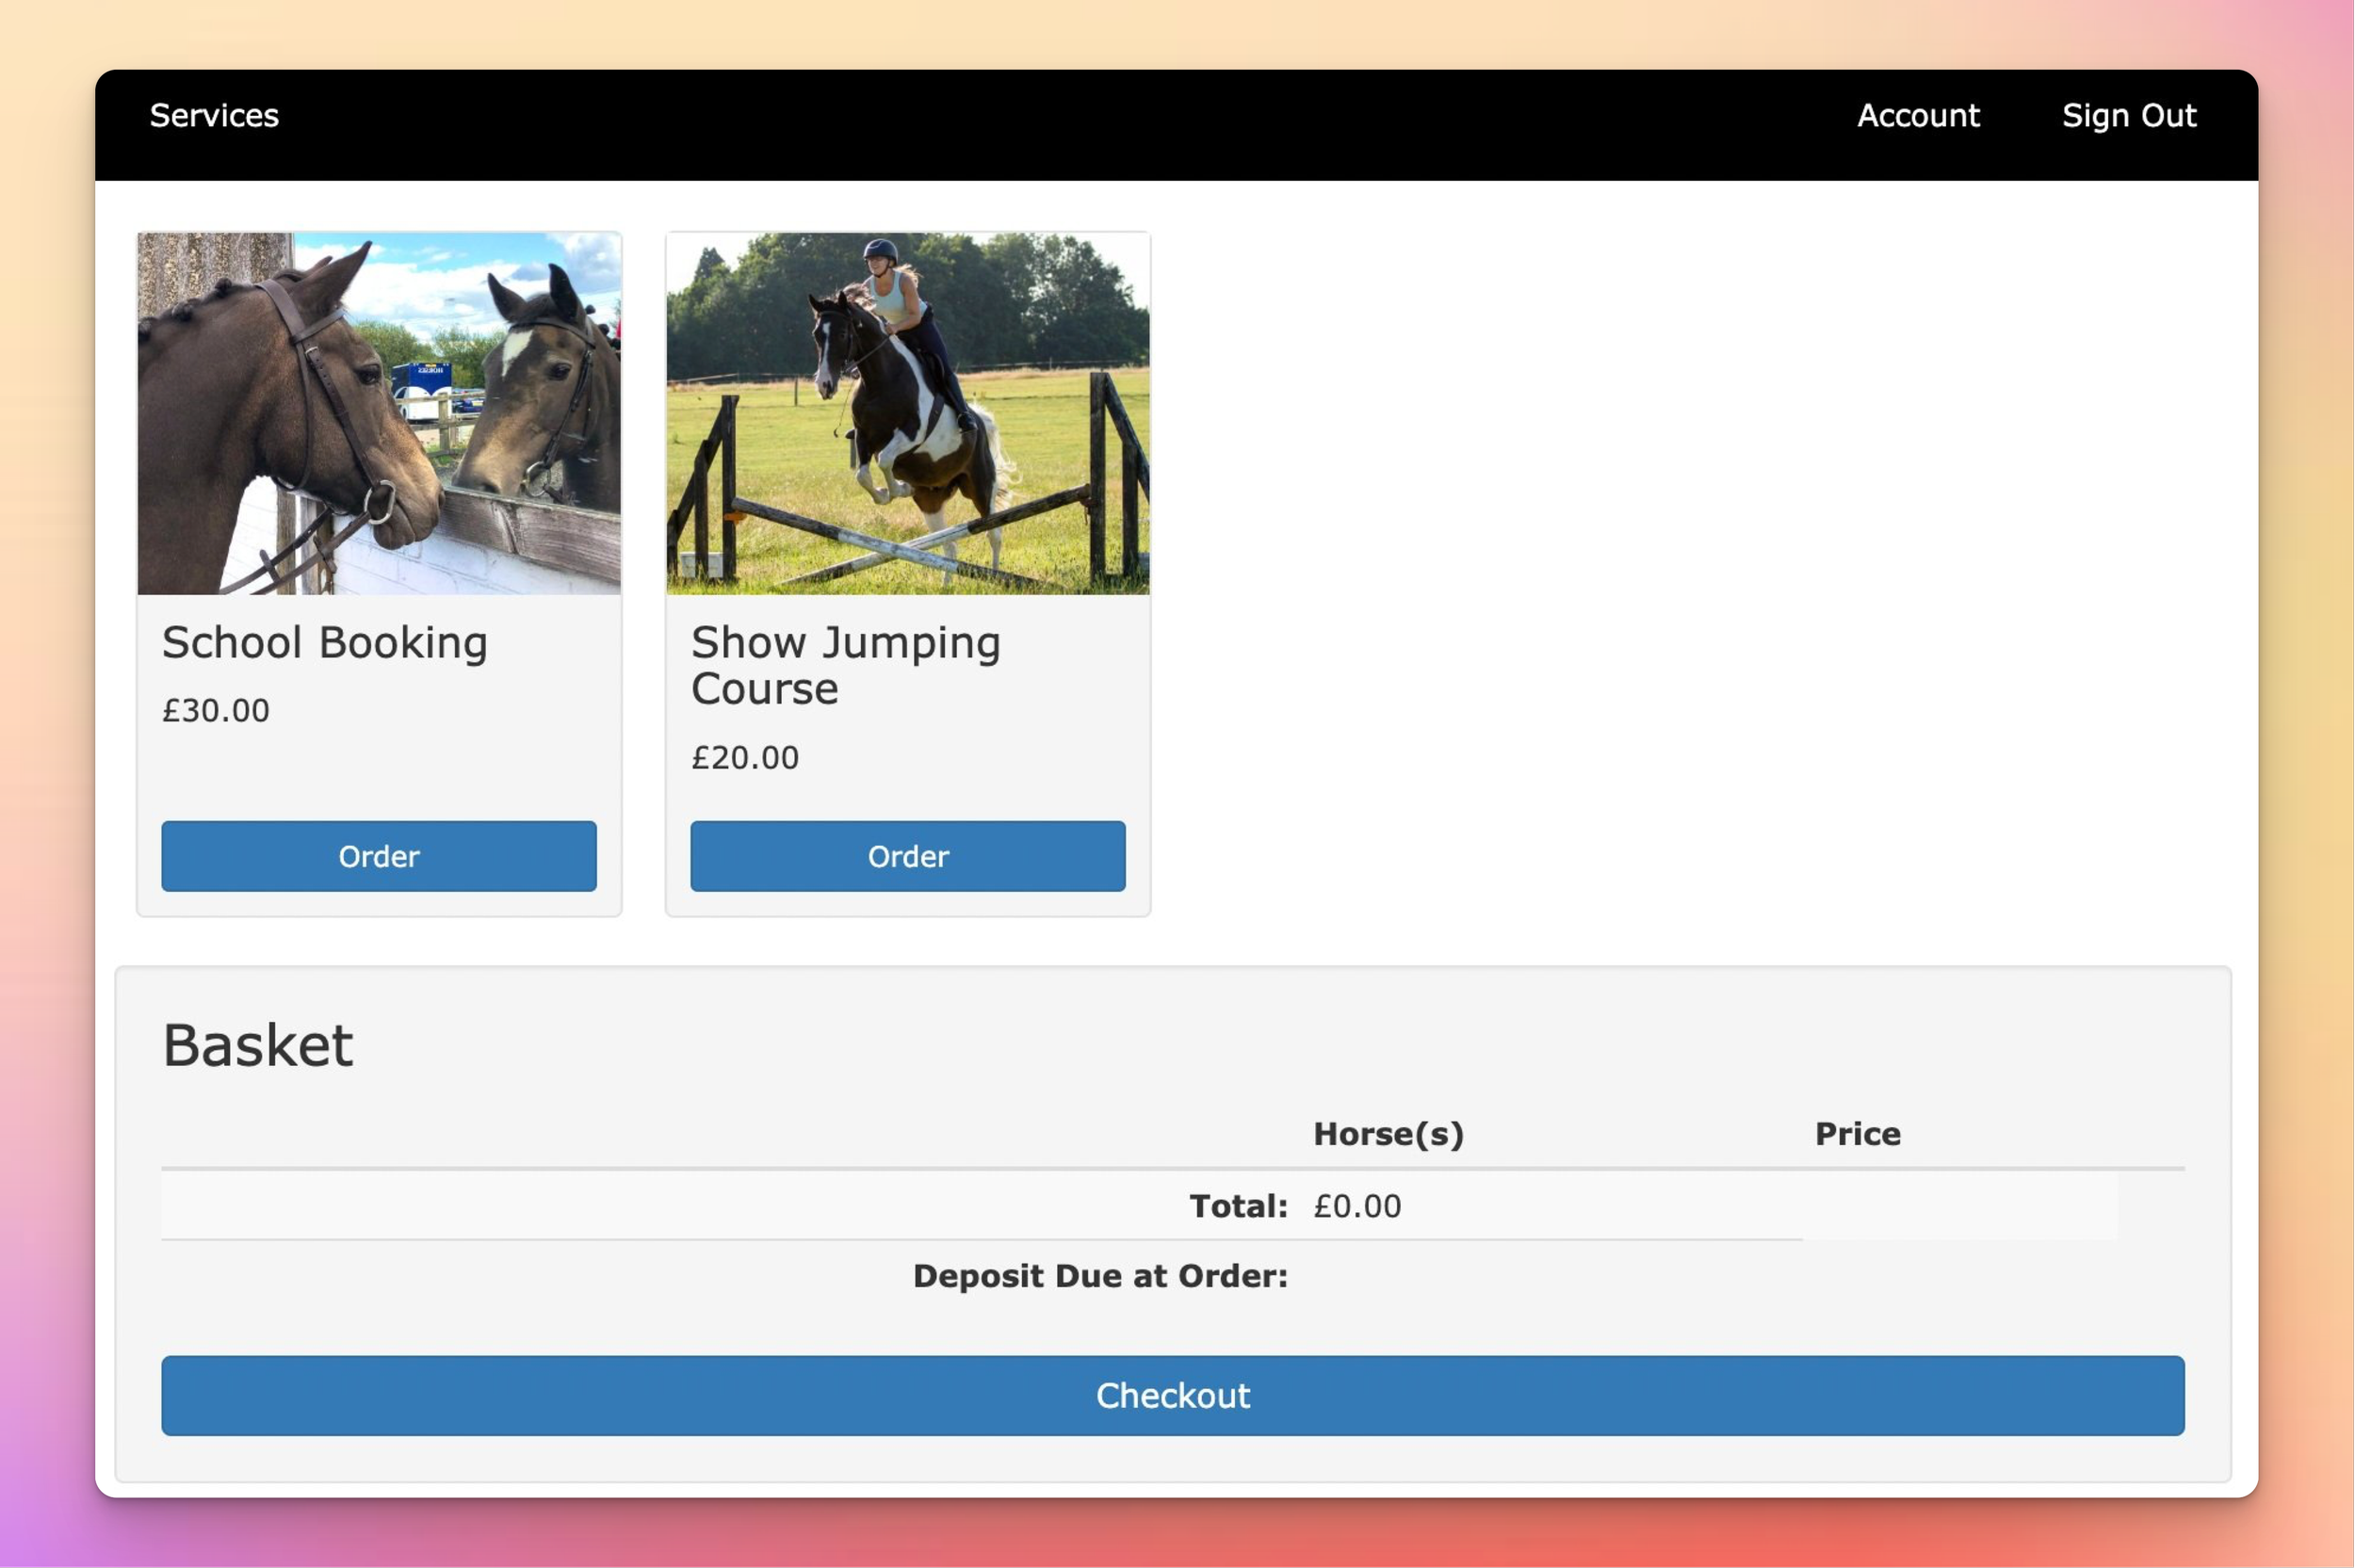
Before you can publish anything in your shop you first need to set them up in At The Yard as a service. This can be done on the Services page (listed under the admin menu tab). You can use existing services or create new ones exclusively for the shop.
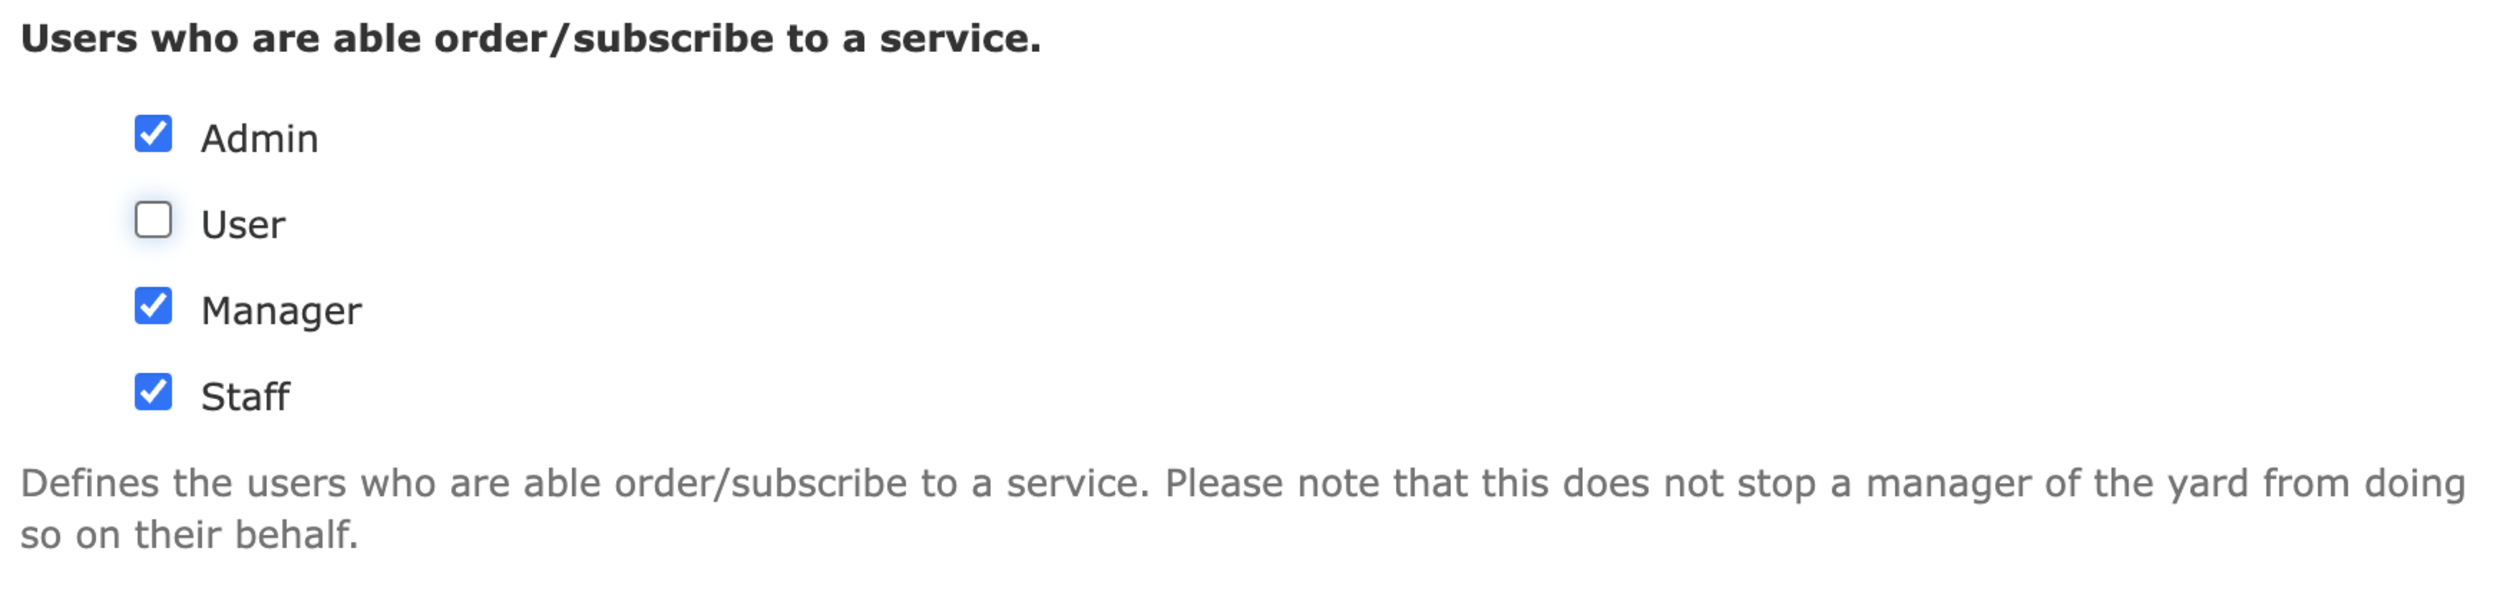
Helpful Tip: To make the service only available in the shop, and not to your existing livery users, remove the tick from User in 'Users who are able order/subscribe to a service' option when creating the service (shown below).
As with all services in At The yard you can specify the availability and any relevant ordering policies for the service, ensuring a smooth and efficient scheduling process for your customers.
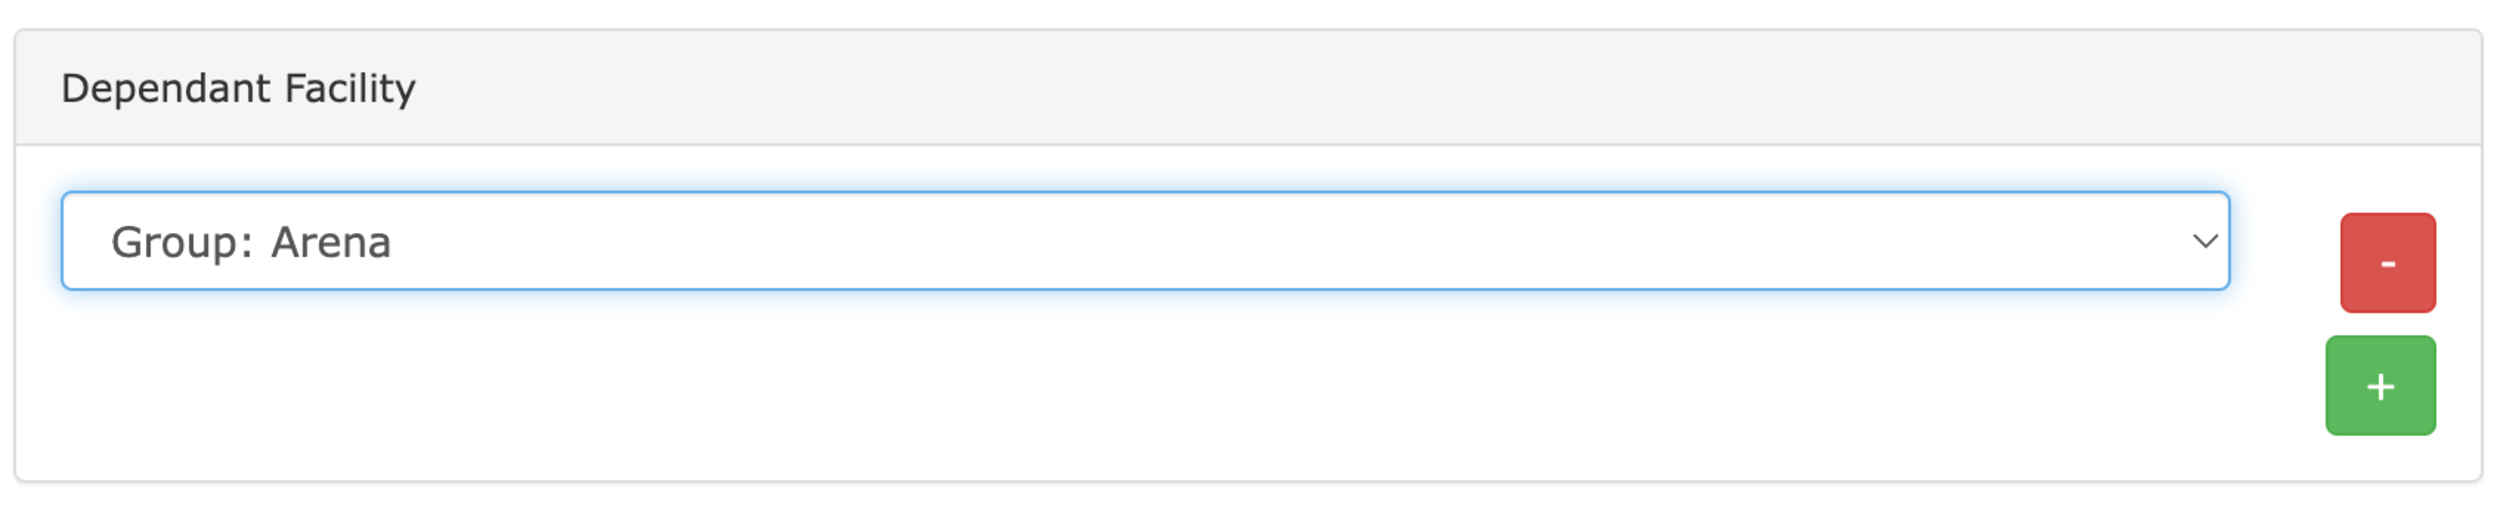
When publishing a facility (sand school, arena etc) you will first need create a new service with the Allow ordering by calendar? option set. This will allow users to pick from a calendar. This can be linked to your existing facility with the Dependant Facility feature (as shown below).
Now you've created the services you're ready to publish each of them. To do this go to the shop manager and click Publish New Service at the bottom of the service publications panel.
To showcase your offerings effectively you'll want to include a detailed description, high-quality images and all the information a prospective customer needs when making a booking.
To support this each publication has a number of options available to you which we've outlined below:
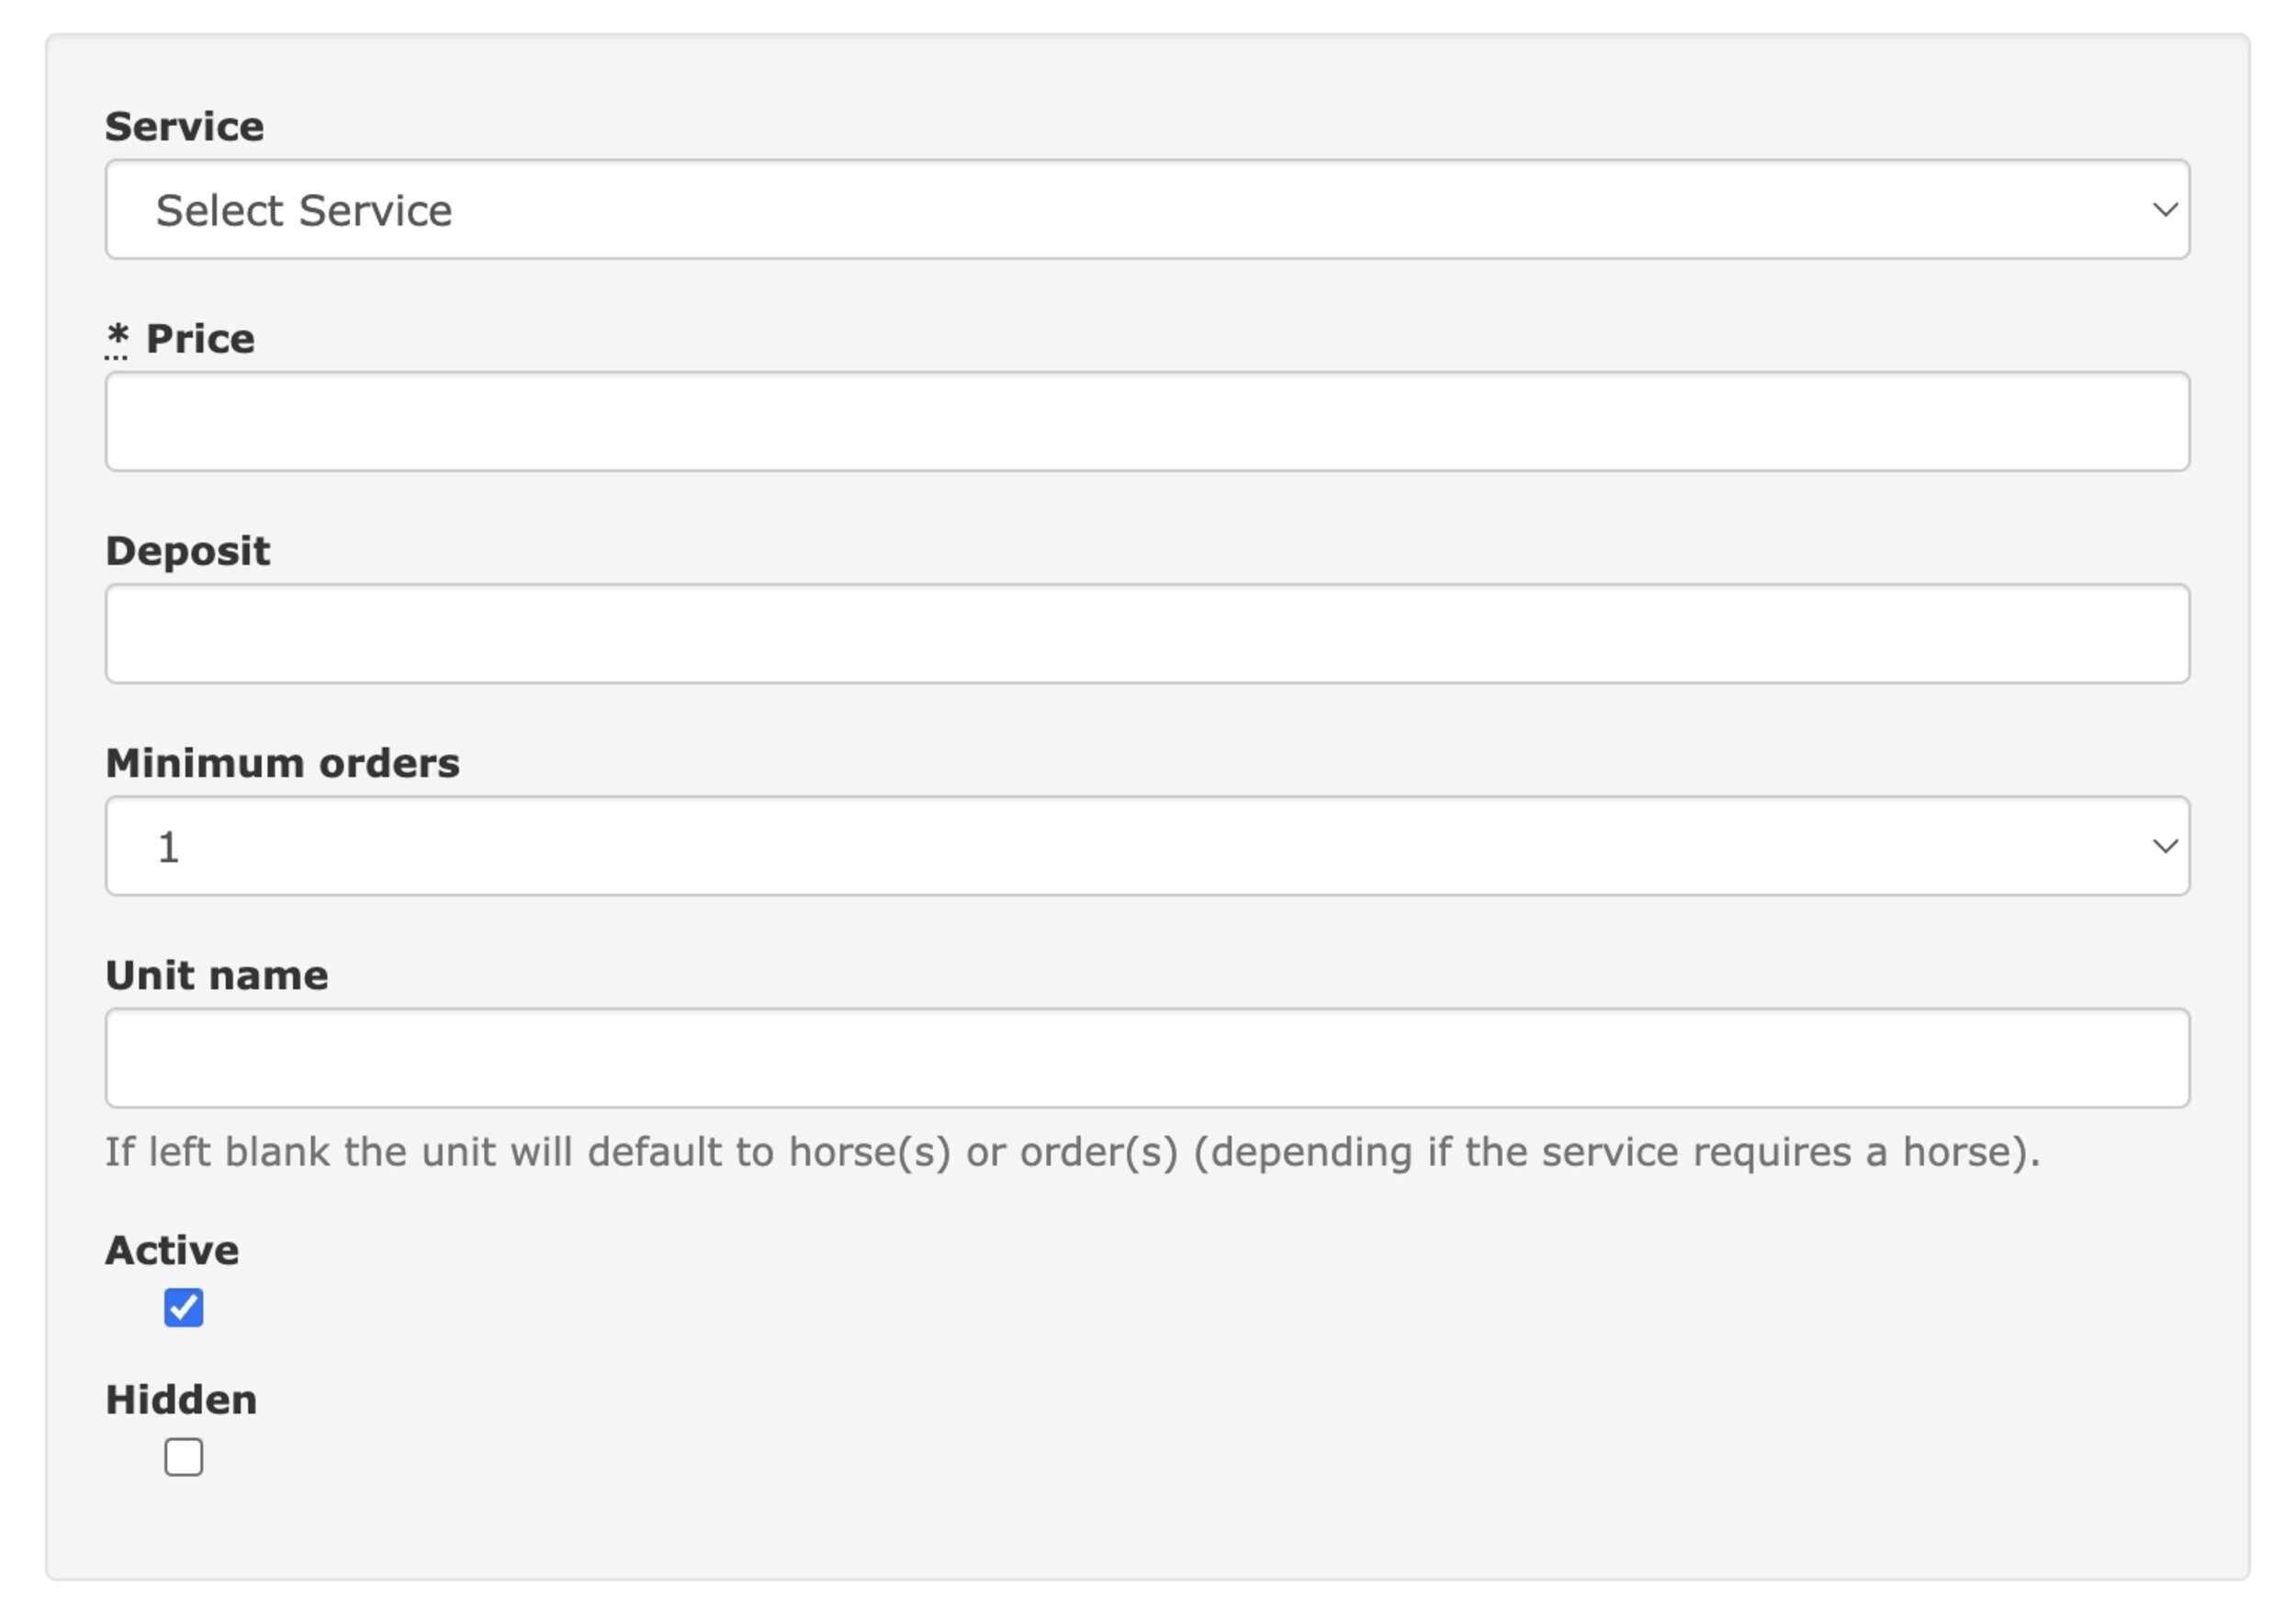
Service: Select the new or existing service.
Price: Select the price your customers will be charged in the shop for a single order/booking.
Deposit: If you wish to only take a deposit (leaving the rest to collect manually when they arrive) enter the amount here.
Minimum Orders: You can require the customer to order more than 1 unit of a service by changing this value (this needs to be combined with a corresponding pricing option shown below).
Unit Name: Use if you need to change the name of the unit (for example to 'rounds' if you're hosting a clear round competition).
Active: When unchecked it stops users from ordering this service.
Hidden: When checked the service is available but is hidden from the front page of the shop. Customers can still access the service if they have the web address shared with them.
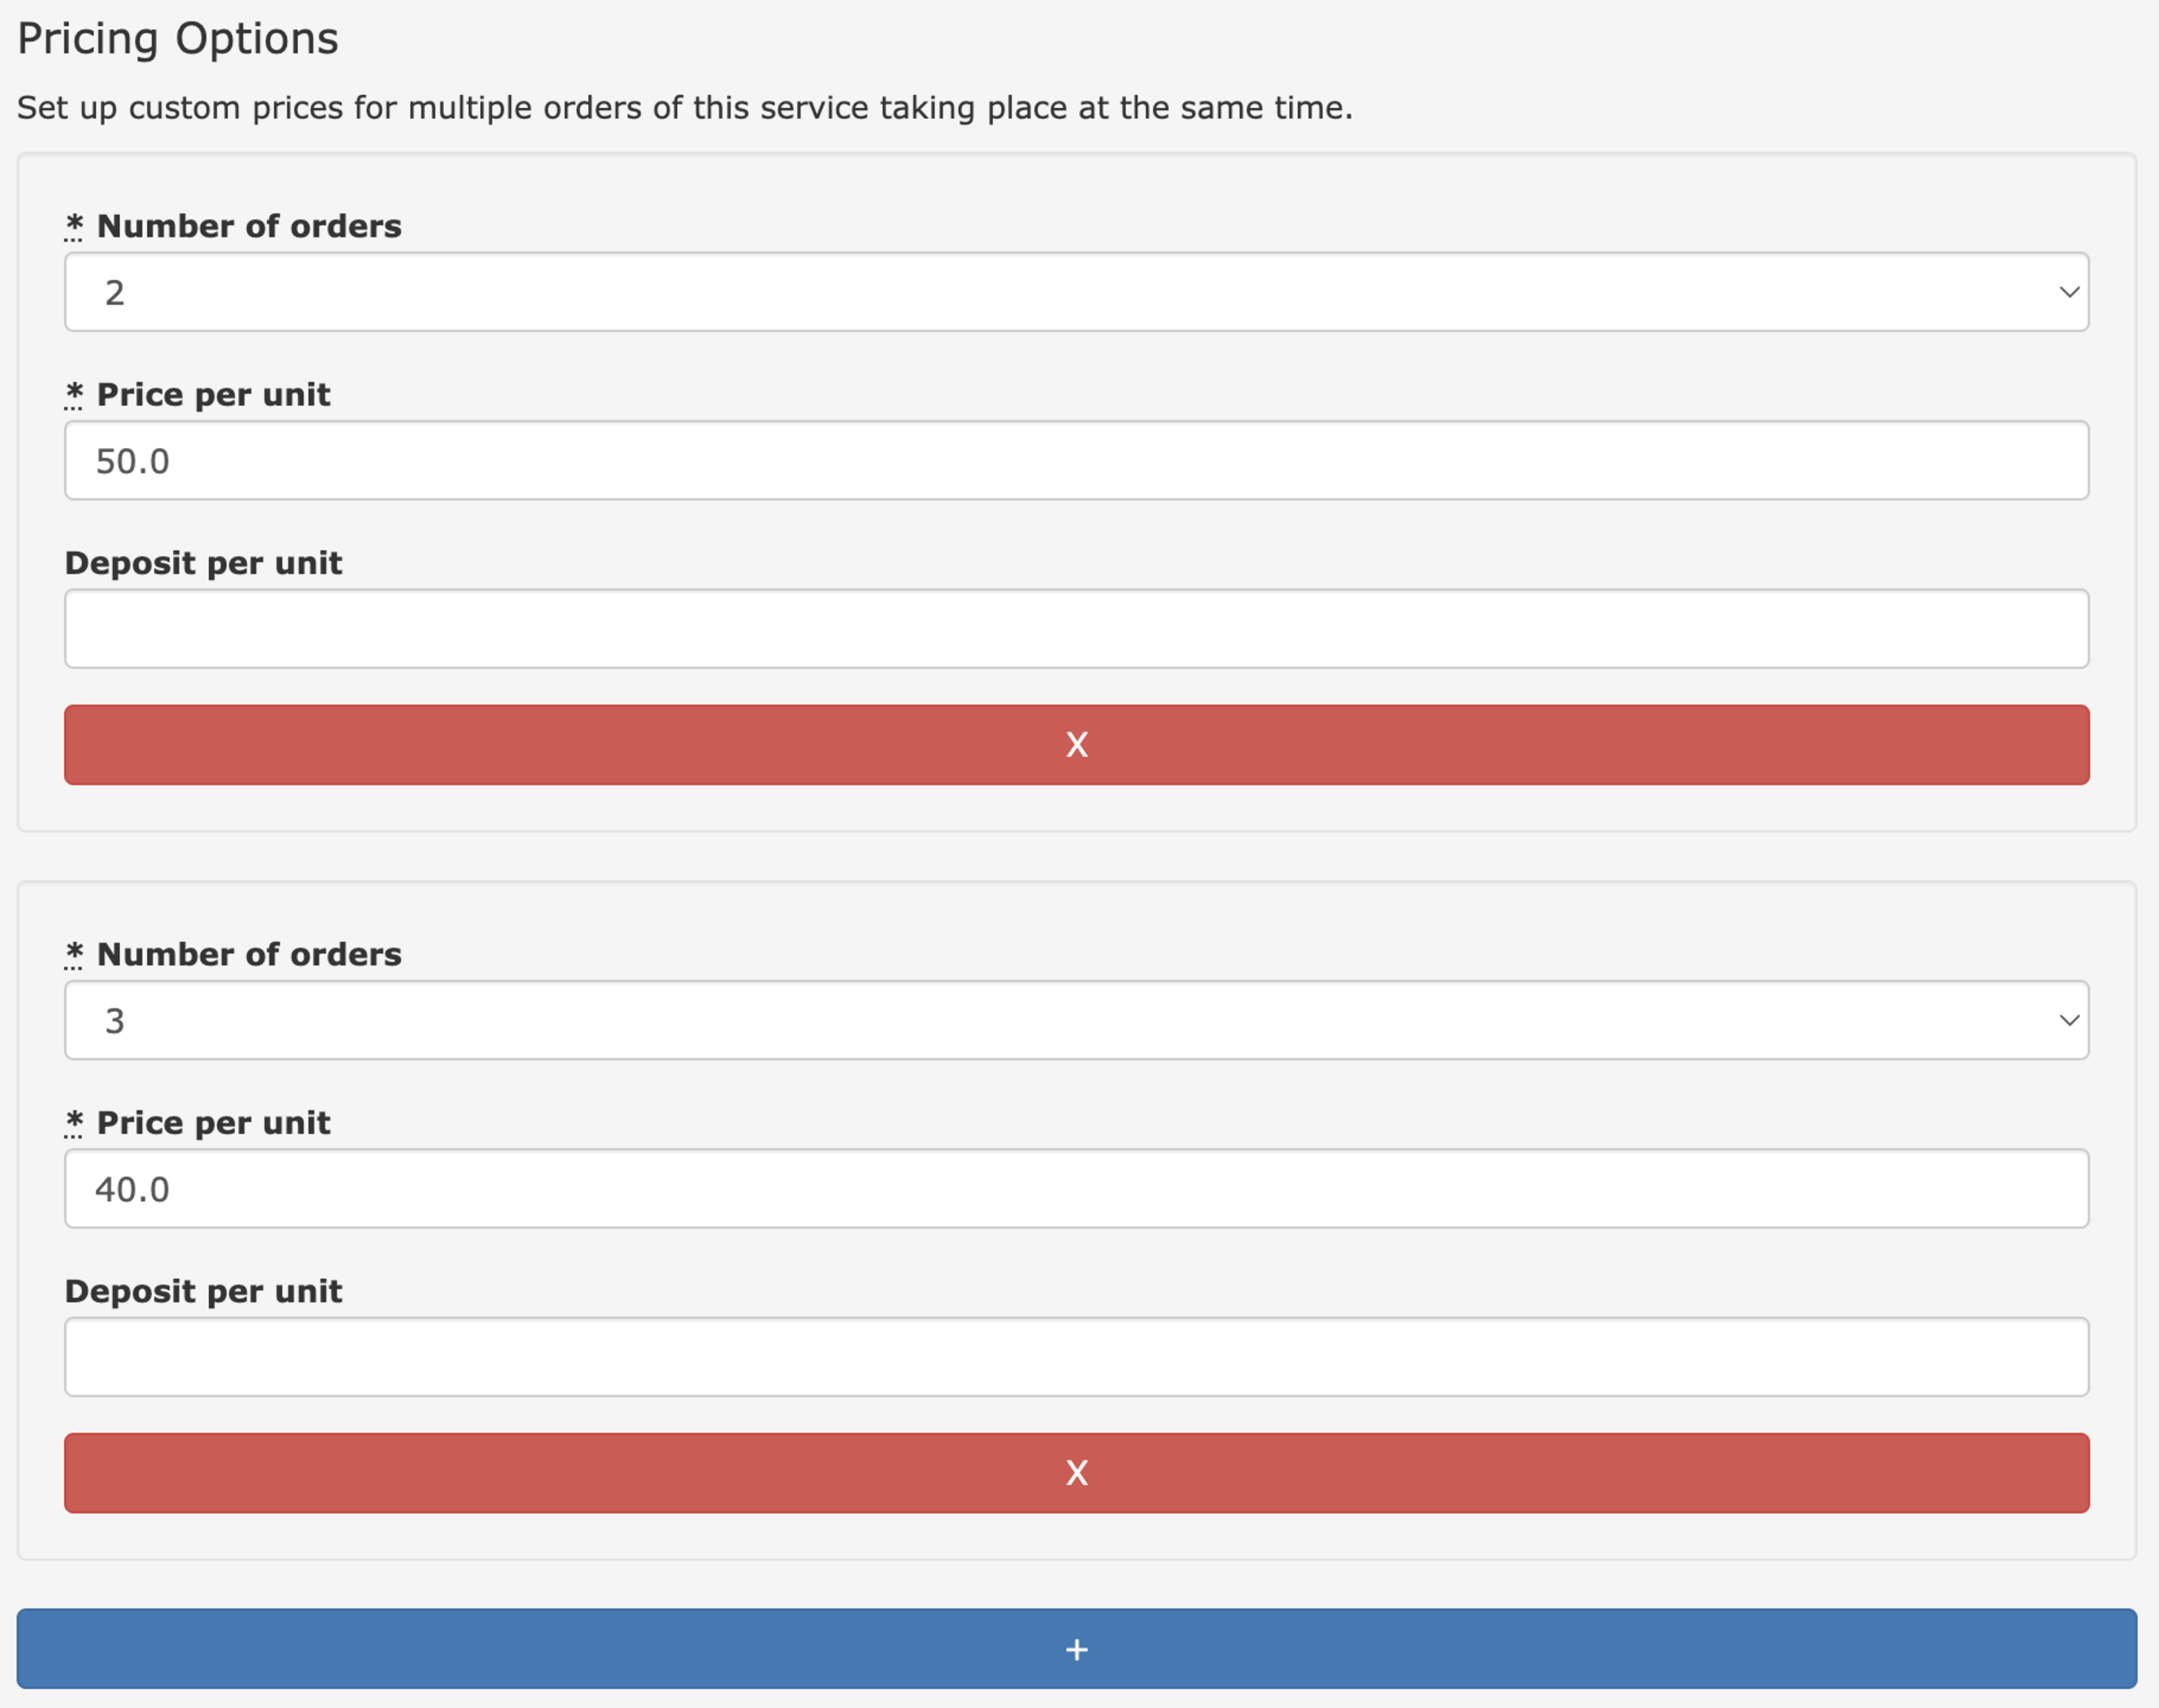
Pricing Options give you more flexibility in pricing your services for customers, allowing you to set a different price dependant on the number of orders they make.
Please Note: It is important that you create a pricing option for every different size of order you want to support. If you, for example, create a pricing option for 2, 3 and 5 orders (4 has been skipped) then they're will be no option for a customer to order 4 of that service.
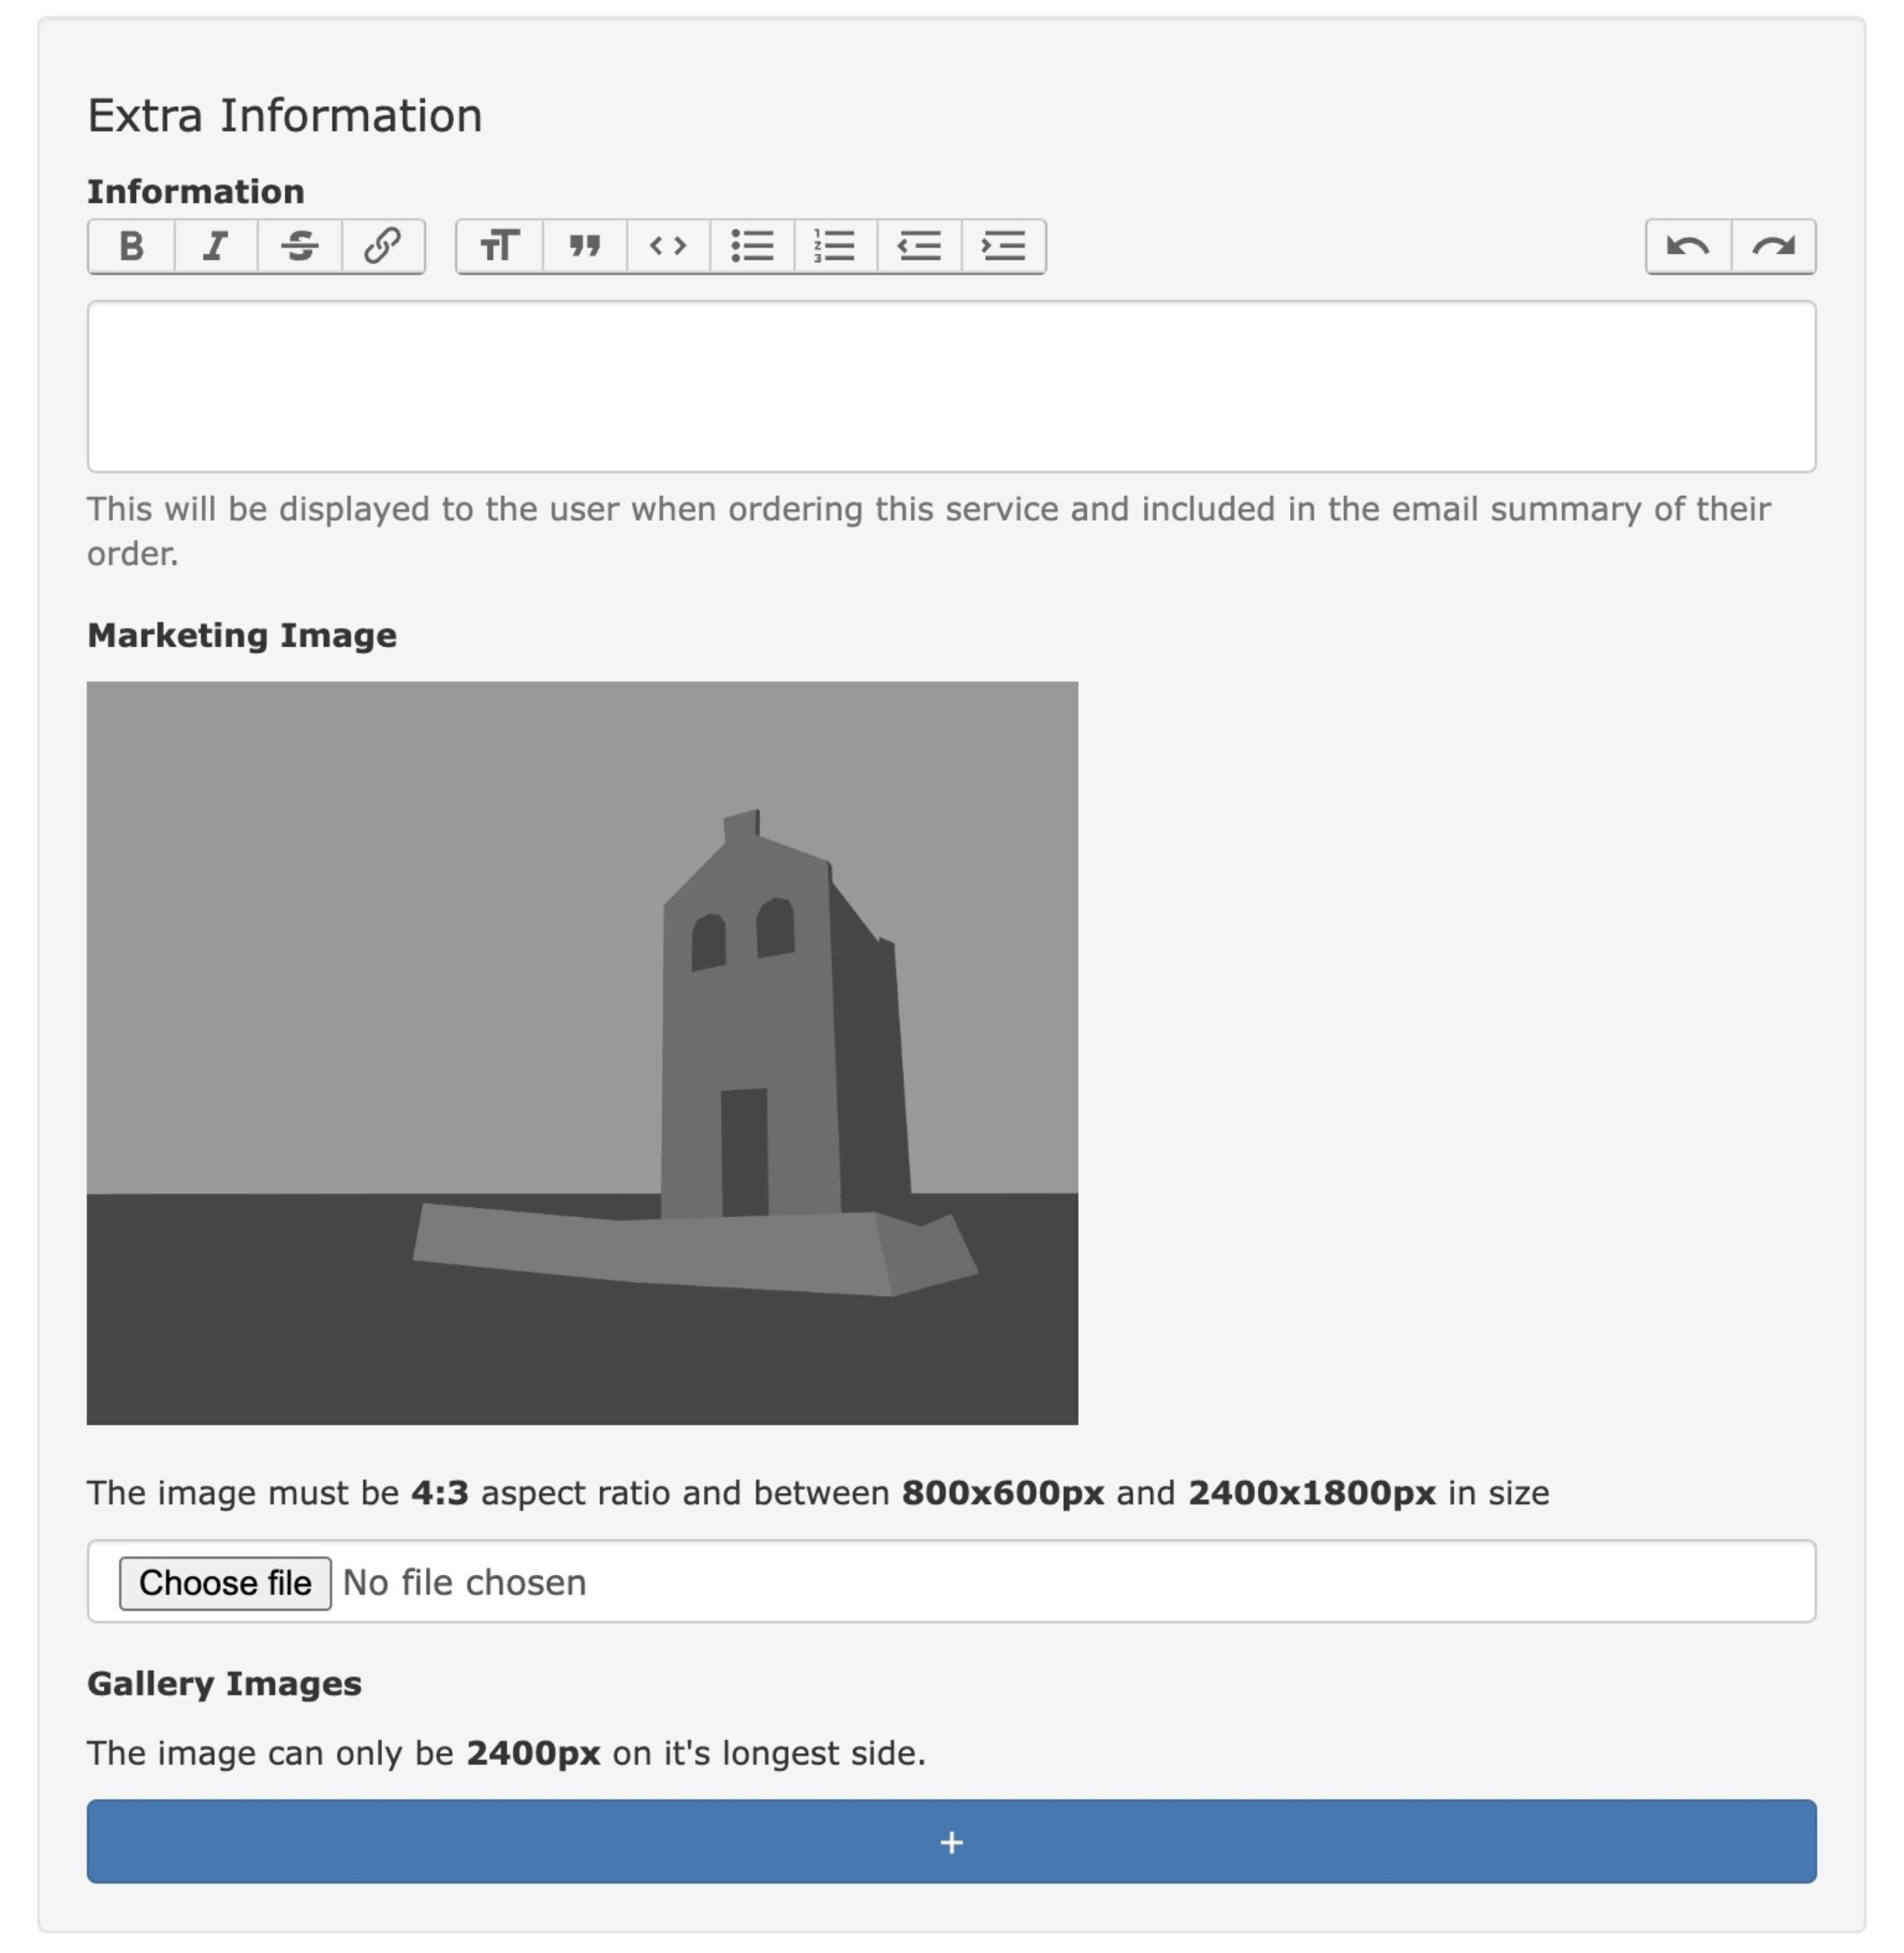
Information: Here you can provide all the additional information a customer might need to know when they're ordering a service.
Marketing Image: This is the image that will show on the front page of the shop.
Gallery Images: You can upload as many images as you want here to showcase this service/facility at it's best.
Once you've finished adding all of your services you're almost ready to go. Take a moment to take a look over the ordering of the services in your shop - you can make adjustments up and down by using the green and orange arrows.

Finally do one last review of everything. Proofread your descriptions, double-check your pricing and once you're satisfied, hit the Enable Shop button on the shop management page and watch your shop go live with At The Yard!
The web address for the shop will be shown at the top or left of the shop configuration page (it'll end in /shop).
Now that your shop is up and running, it's time to spread the word. Leverage your existing networks, social media platforms, and equestrian communities to promote your new shop.
Setting up your shop with At The Yard is a straightforward process that can significantly expand your equestrian business horizons. By following these steps, you can create an enticing shop, showcase your services and facilities, automate payment processing, and tap into a broader community of riders and enthusiasts.