
Blog
This step-by-step guide will walk you through the process of setting up your shop in At The Yard, empowering you to maximise your reach, connect with potential customers and seamlessly manage payments. Get ready to expand your businesses horizons and unlock new opportunities in the equestrian community!
If you haven't already, visit At The Yard's website and request a trial account. A member of our team will review your request. Once reviewed your account will be created and you'll gain access to the full suite of features and services At The Yard has to offer.
Upon logging in (as an admin), locate the "Manage Shop" menu item within the admin menu. Clicking on it will take you to the shop configuration page from where you can set up and manage your shop.
To streamline transactions and automate payment processing we've integrated a number of payment gateways with At The Yard.
Before you begin you'll need to have an account with one of these payment providers. If you don't already have one you'll need to create one (see links below):
We recommend Stripe for the majority of clients as it offers some extra features. However SumUp is available, upon request, for markets where Stripe is not available (e.g. Channel Islands).
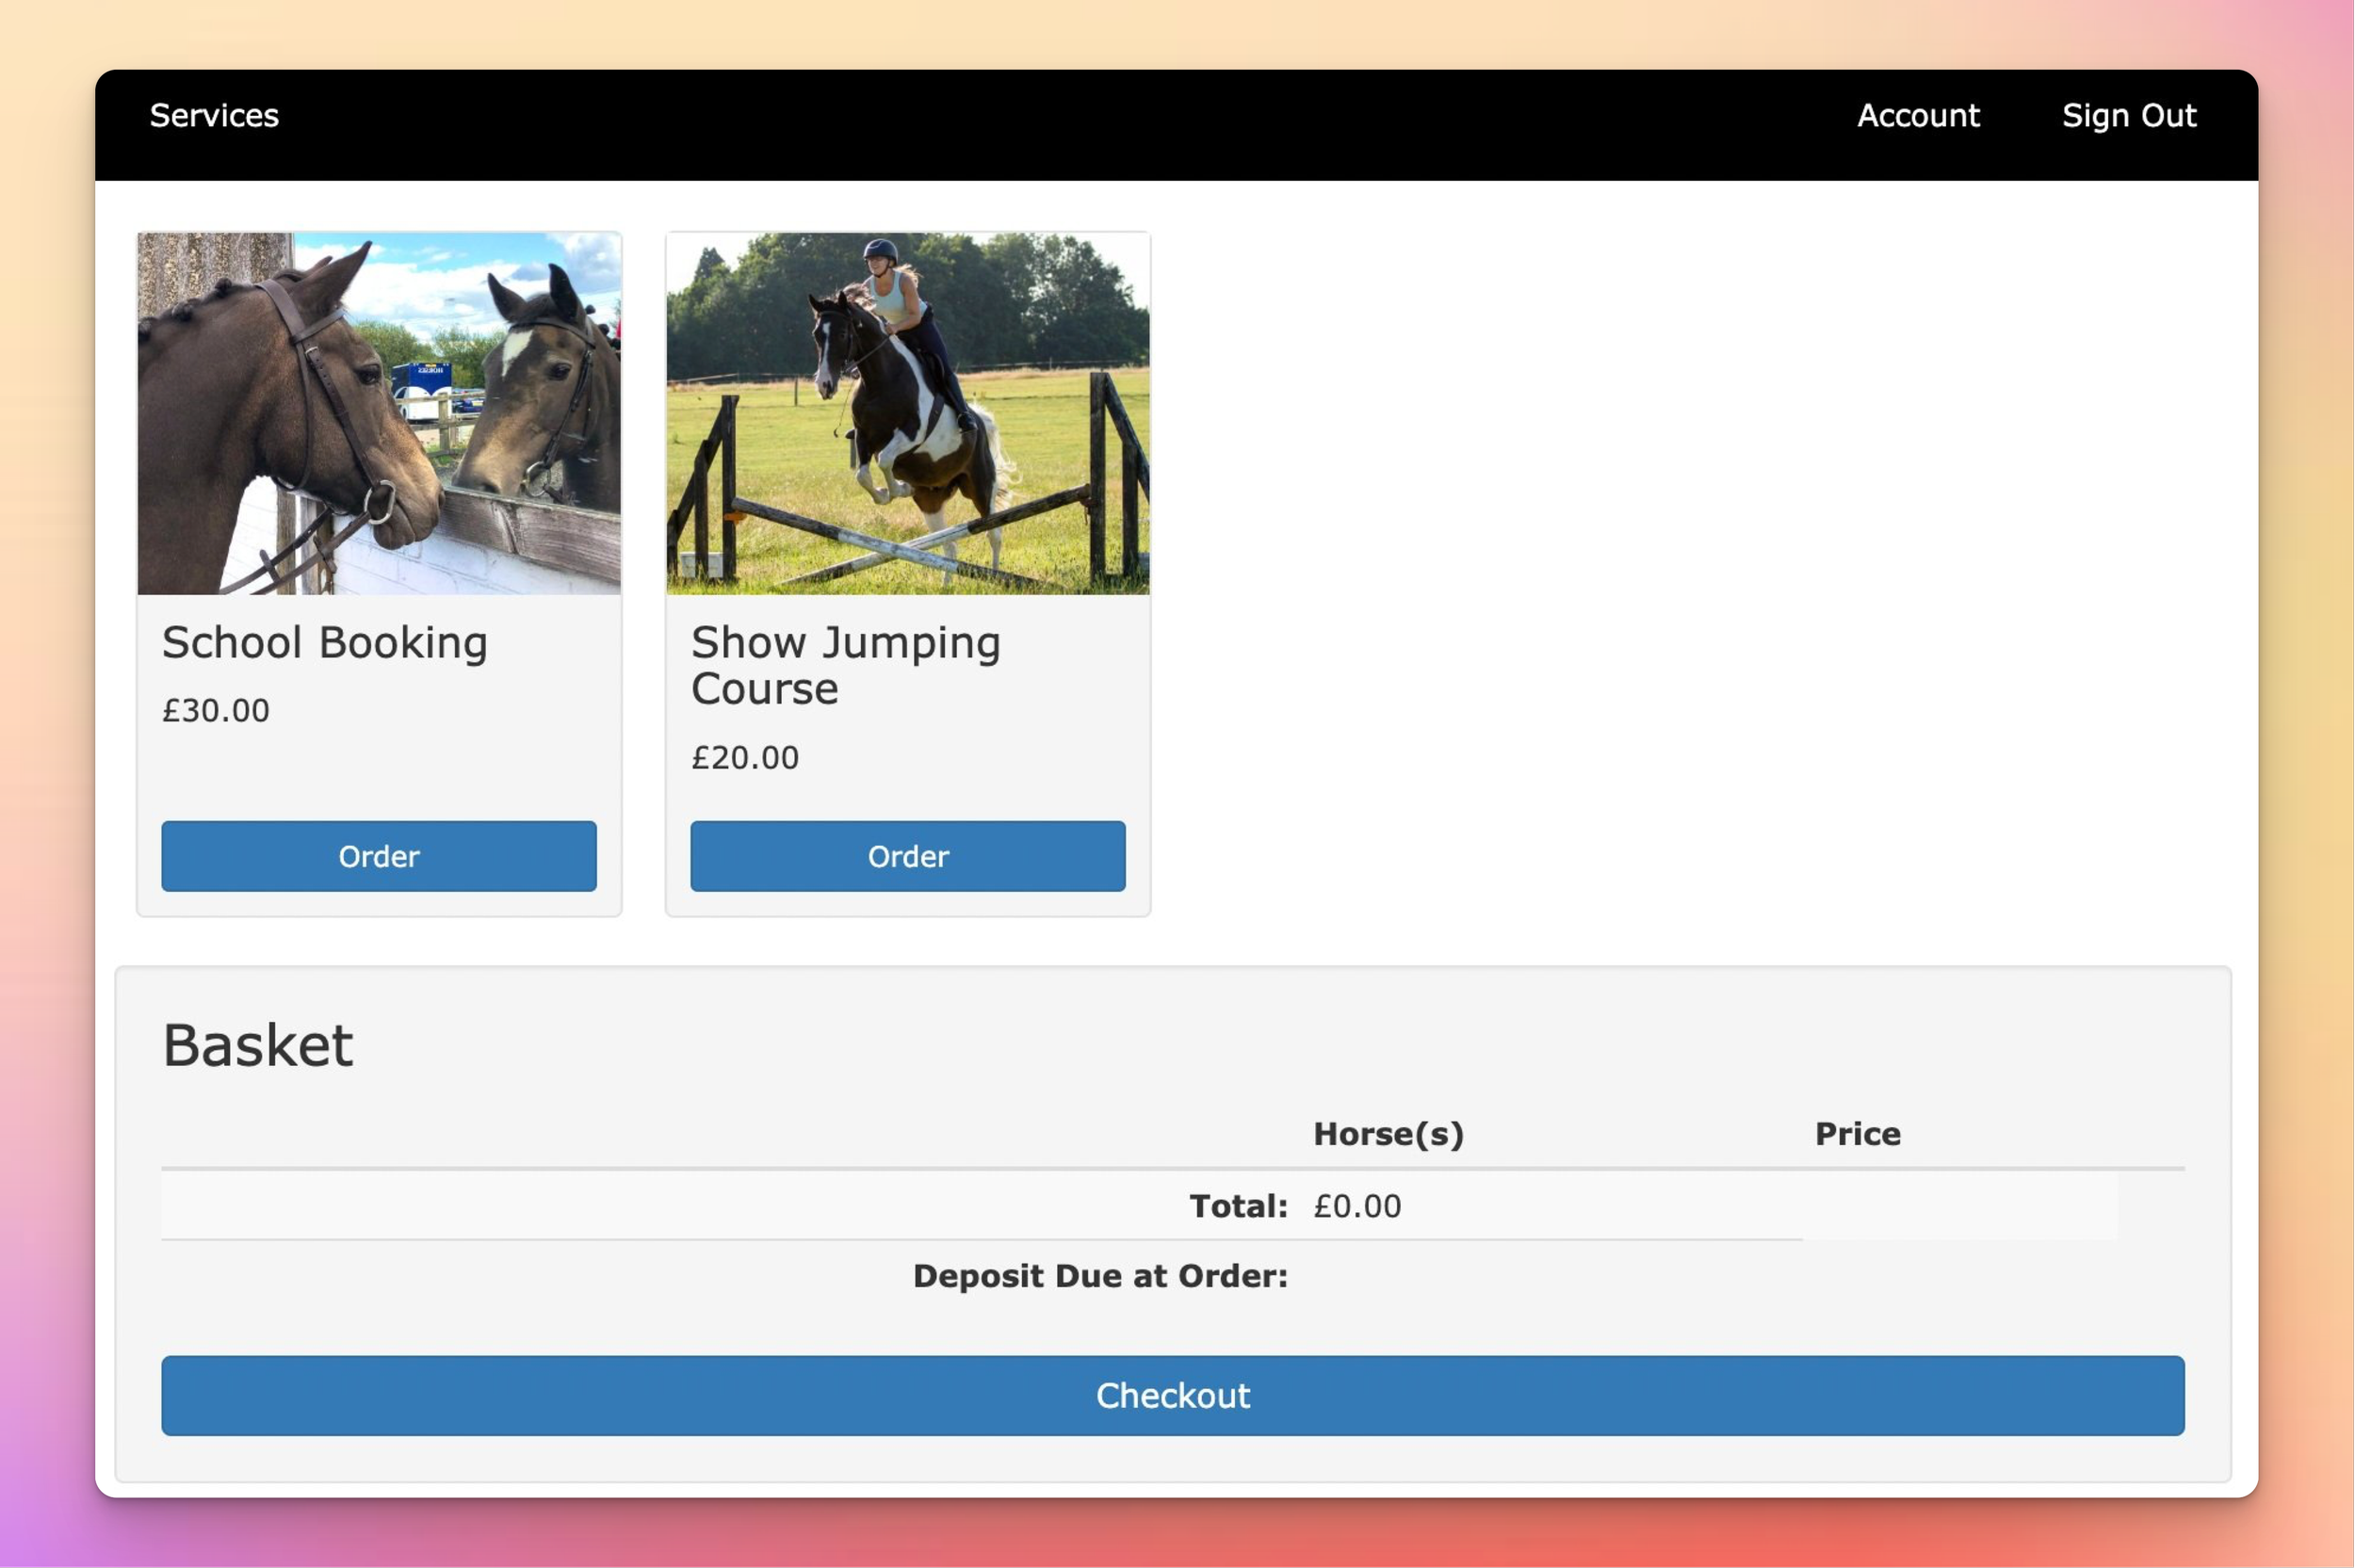
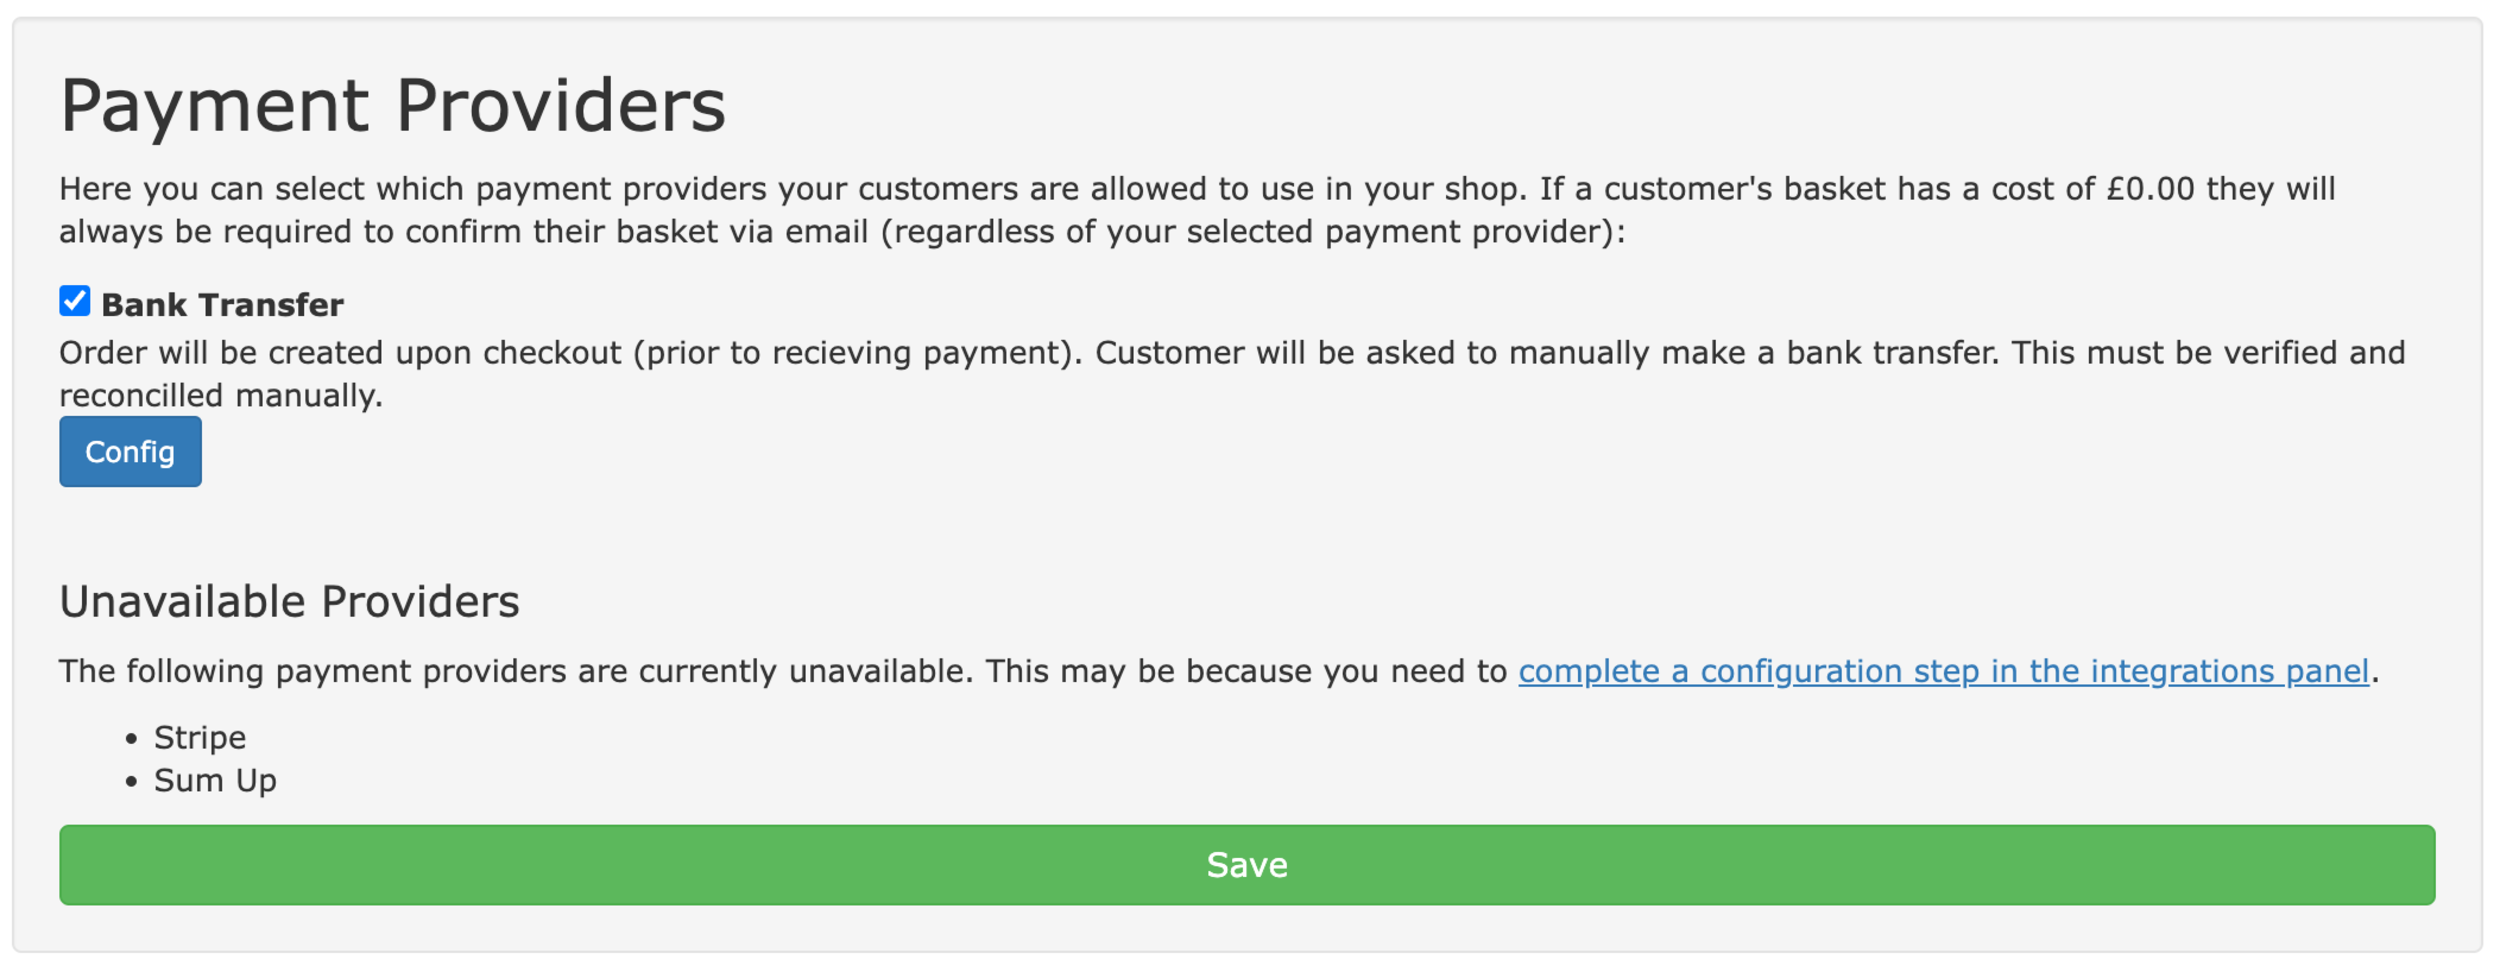
Once you've got your account at a provider you'll need to return to the Shop Configuration page in At The Yard to connect At The Yard to the payment provider. To do this go to payment providers panel where you'll see the link complete a configuration step in the integrations panel.
The link takes you to At The Yard's integration page. The first step is to enable your payment provider of choice by clicking 'Enable'. Then find the link 'Connect with Stripe/SumUp' and click on it to proceed to the next step.
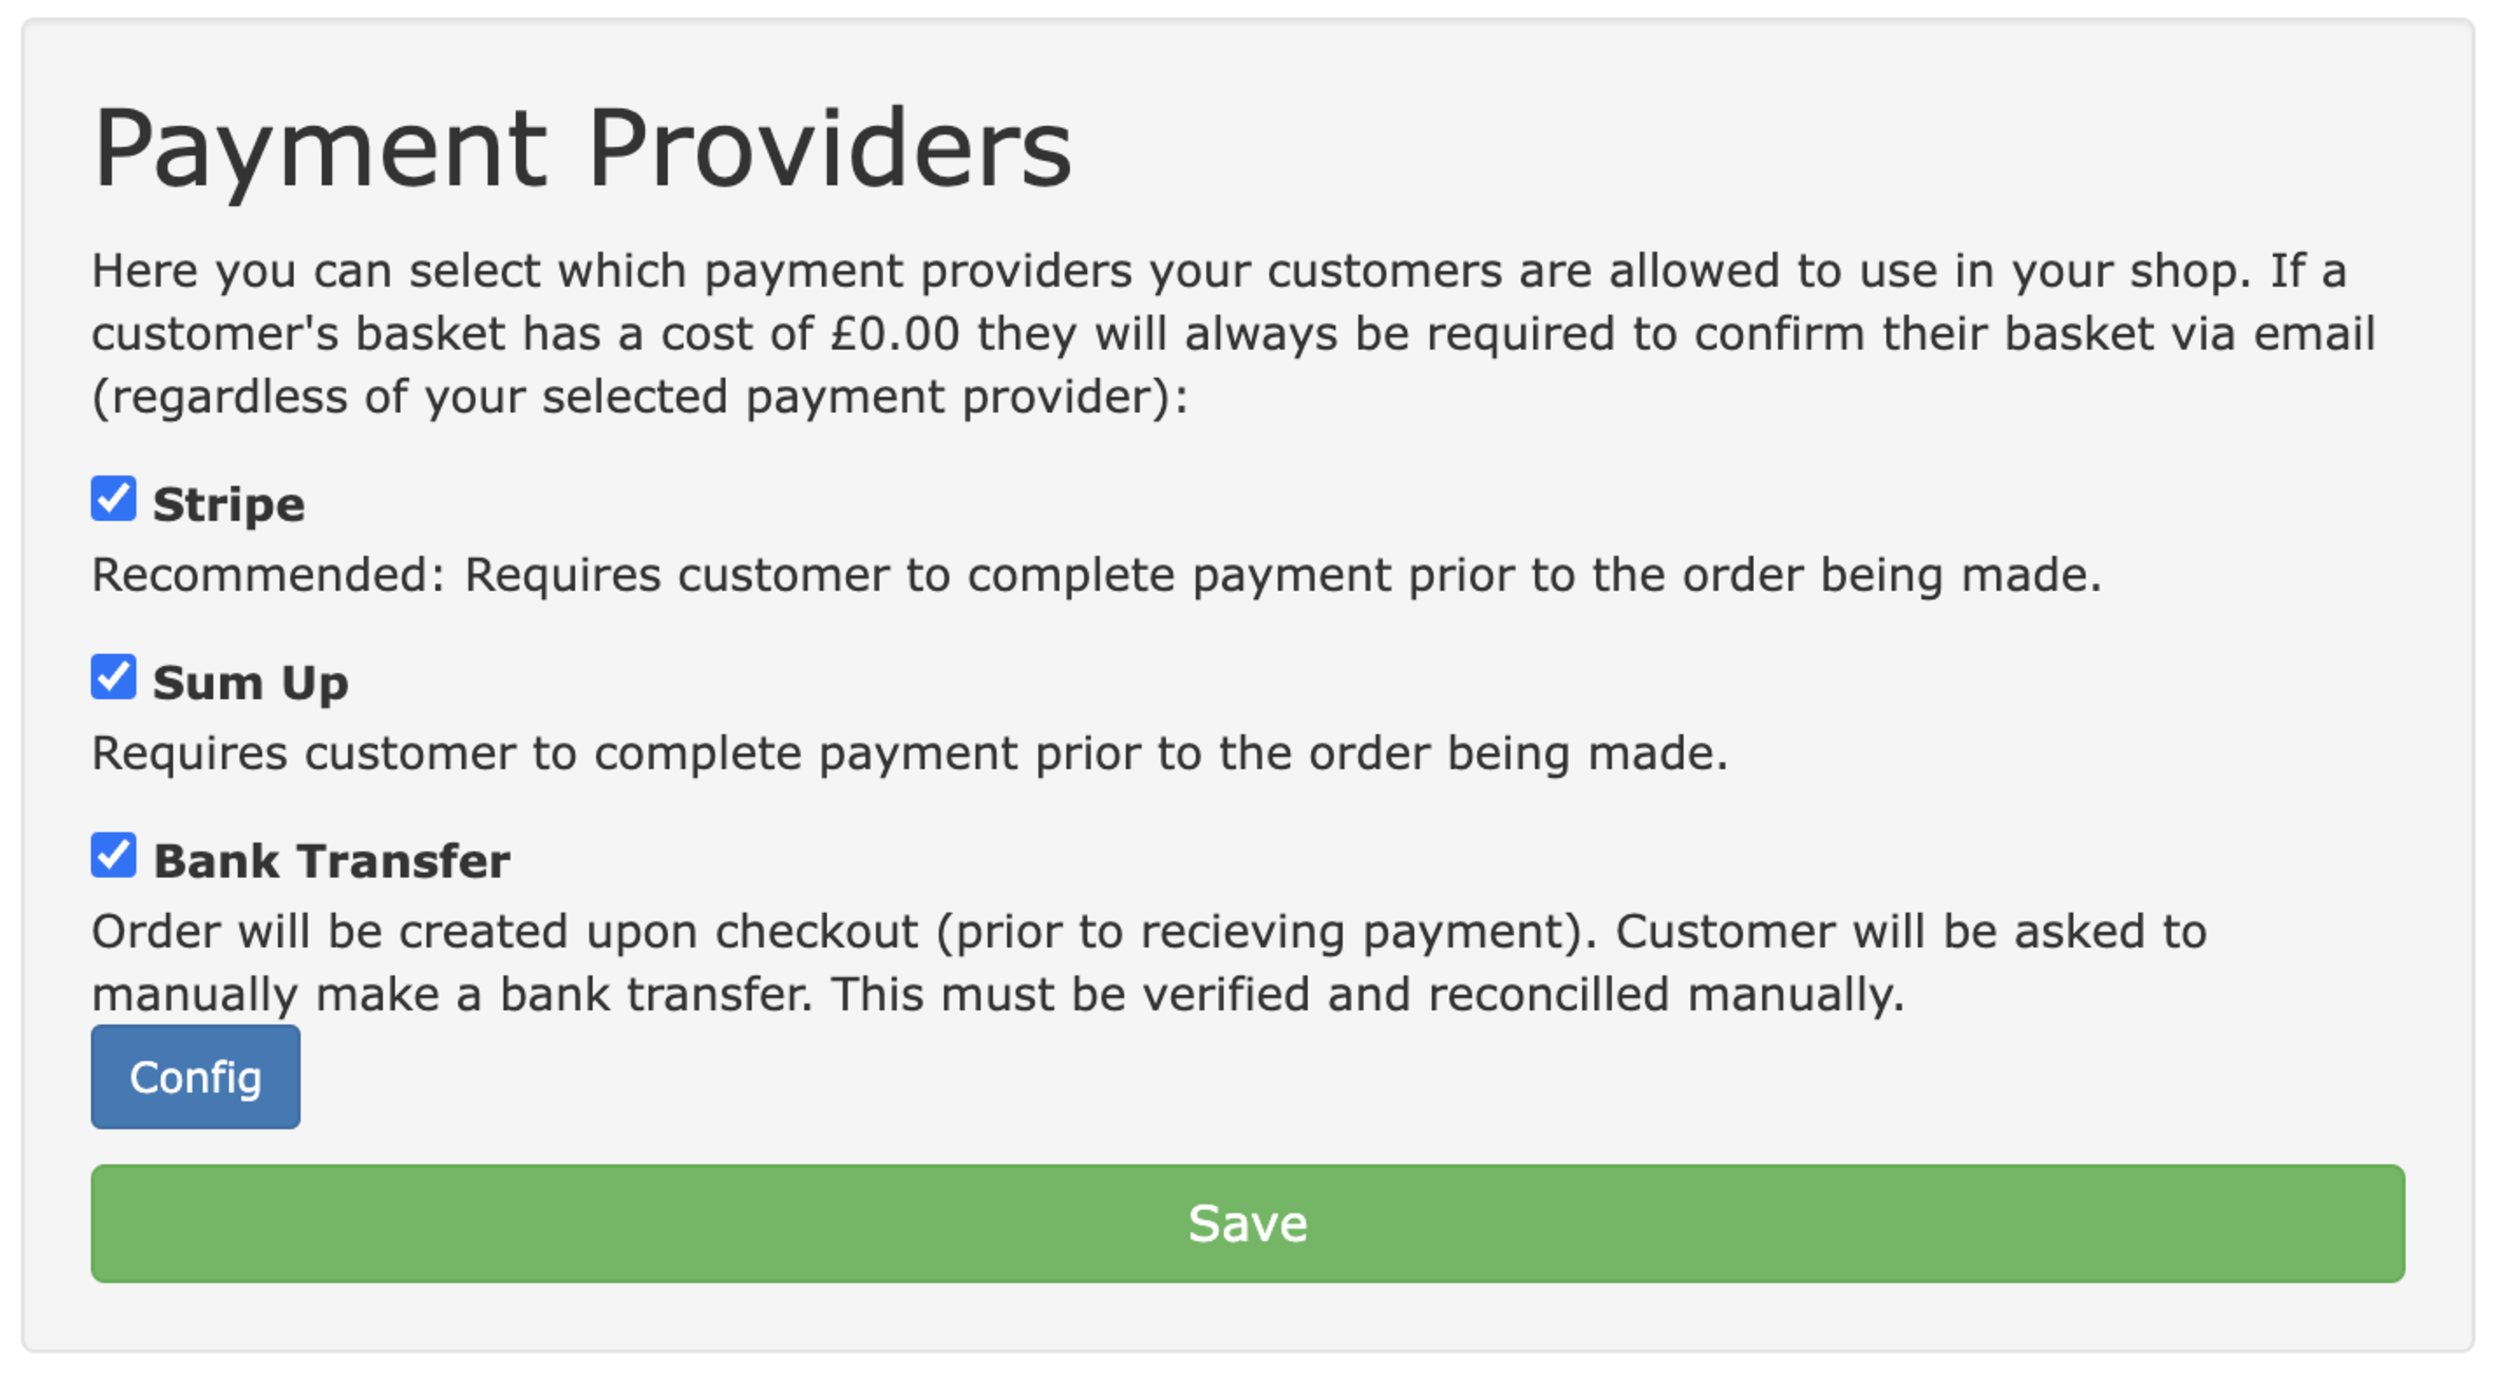
Follow the instructions the payment provider gives you until you return to At The Yard. Your provider is now connected! You can return to the shop management page where you'll now have the option to tick your choice of payment provider (remember to click Save once you're done).
Before you can publish anything in your shop you first need to set them up in At The Yard as a service. This can be done on the Services page (listed under the admin menu tab). You can use existing services or create new ones exclusively for the shop.
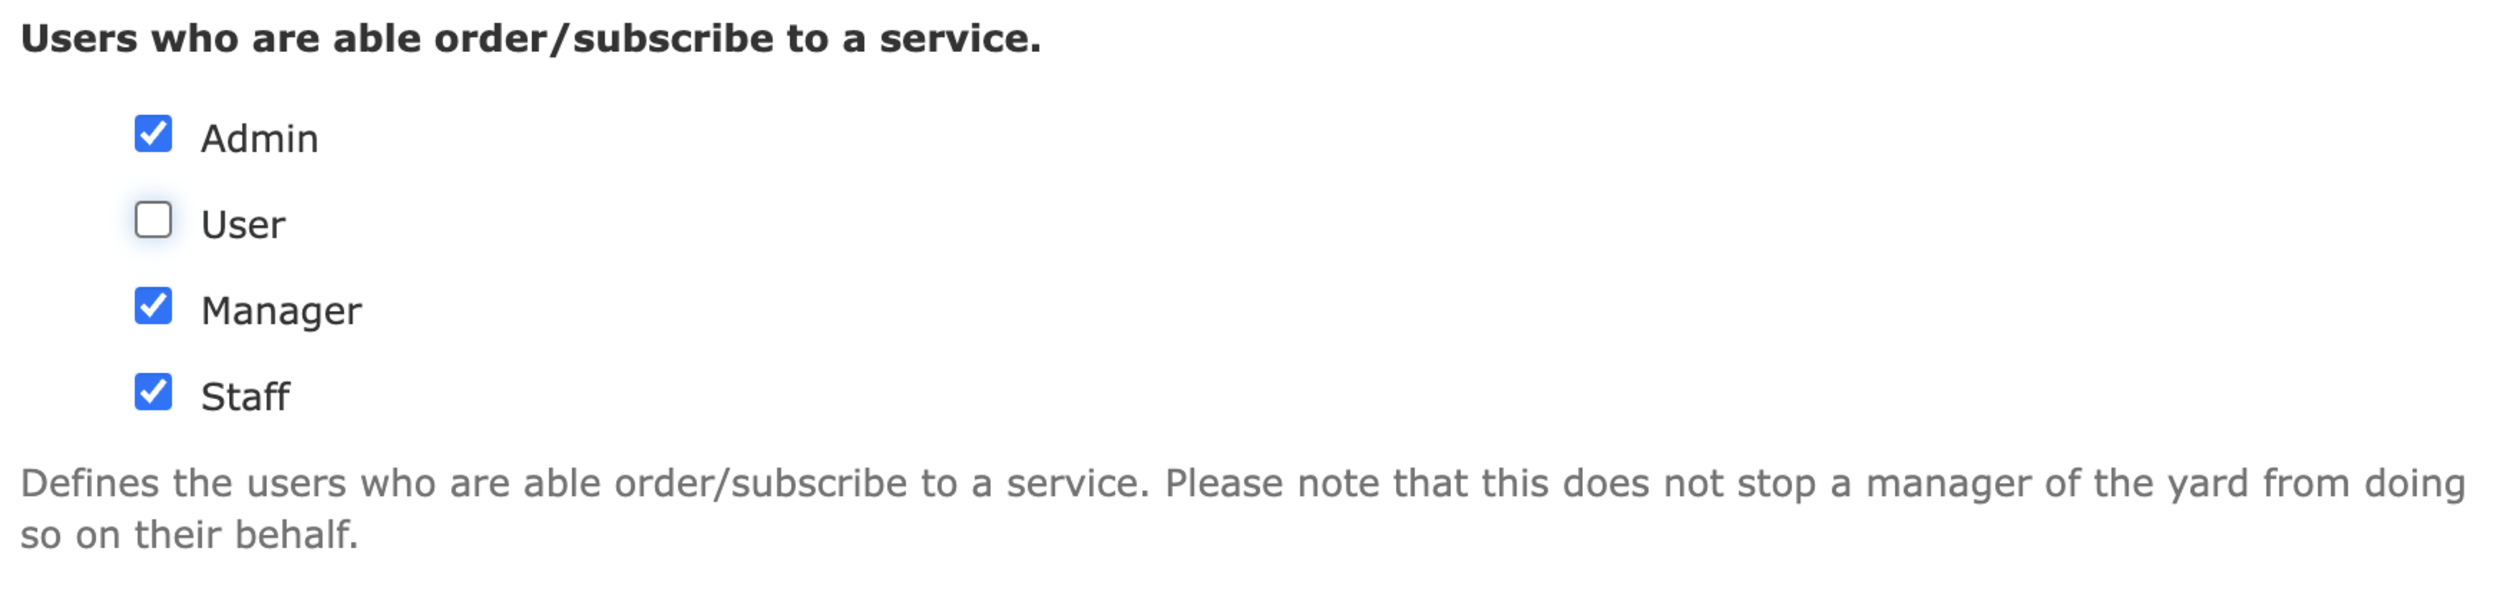
Helpful Tip: To make the service only available in the shop, and not to your existing livery users, remove the tick from User in 'Users who are able order/subscribe to a service' option when creating the service (shown below).
As with all services in At The yard you can specify the availability and any relevant ordering policies for the service, ensuring a smooth and efficient scheduling process for your customers.
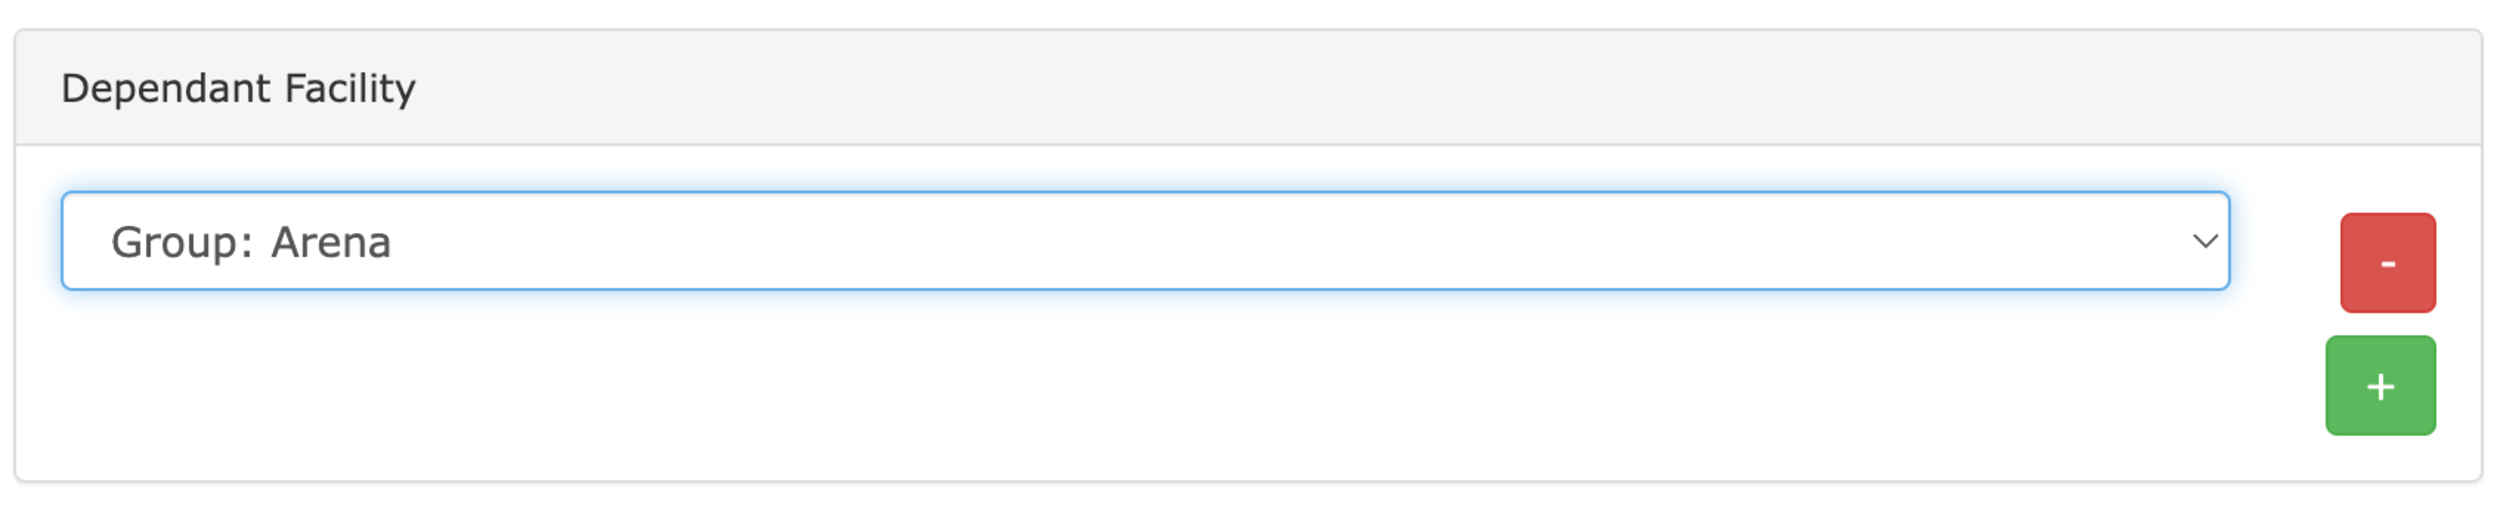
When publishing a facility (sand school, arena etc) you will first need create a new service with the Allow ordering by calendar? option set. This will allow users to pick from a calendar. This can be linked to your existing facility with the Dependant Facility feature (as shown below).
Now you've created the services you're ready to publish each of them. To do this go to the shop manager and click Publish New Service at the bottom of the service publications panel.
To showcase your offerings effectively you'll want to include a detailed description, high-quality images and all the information a prospective customer needs when making a booking.
To support this each publication has a number of options available to you which we've outlined below:
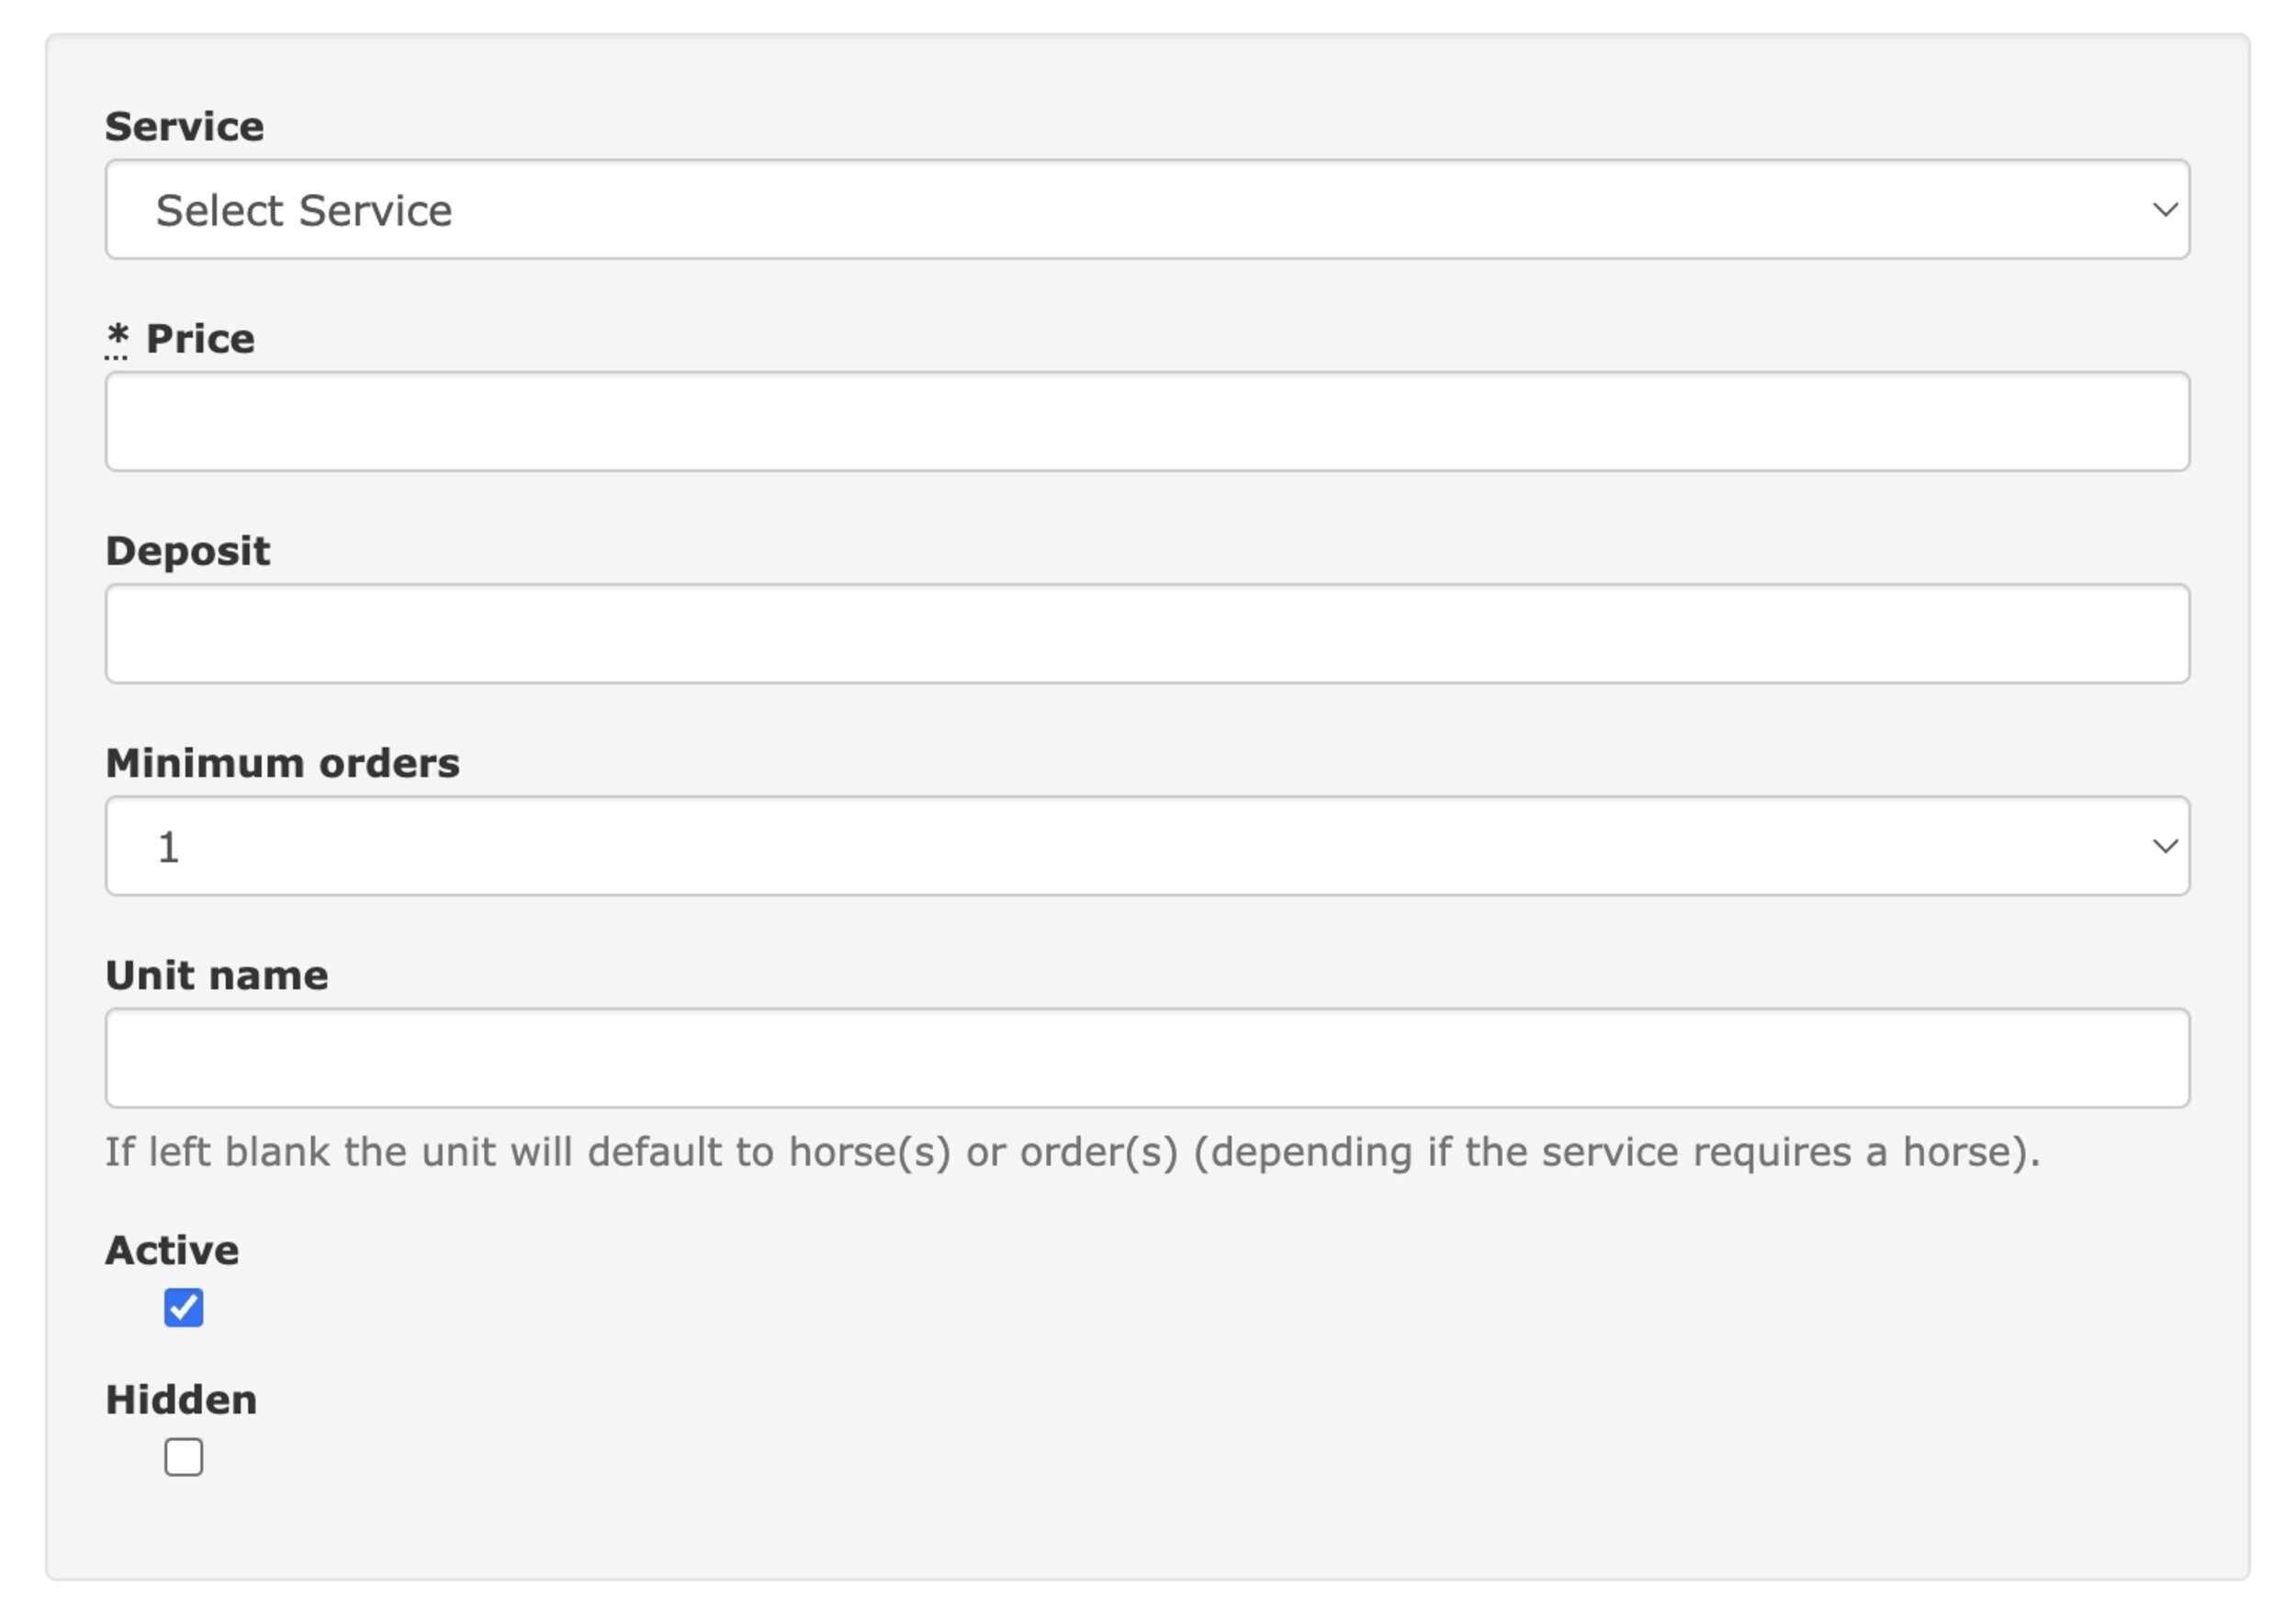
Service: Select the new or existing service.
Price: Select the price your customers will be charged in the shop for a single order/booking.
Deposit: If you wish to only take a deposit (leaving the rest to collect manually when they arrive) enter the amount here.
Minimum Orders: You can require the customer to order more than 1 unit of a service by changing this value (this needs to be combined with a corresponding pricing option shown below).
Unit Name: Use if you need to change the name of the unit (for example to 'rounds' if you're hosting a clear round competition).
Active: When unchecked it stops users from ordering this service.
Hidden: When checked the service is available but is hidden from the front page of the shop. Customers can still access the service if they have the web address shared with them.
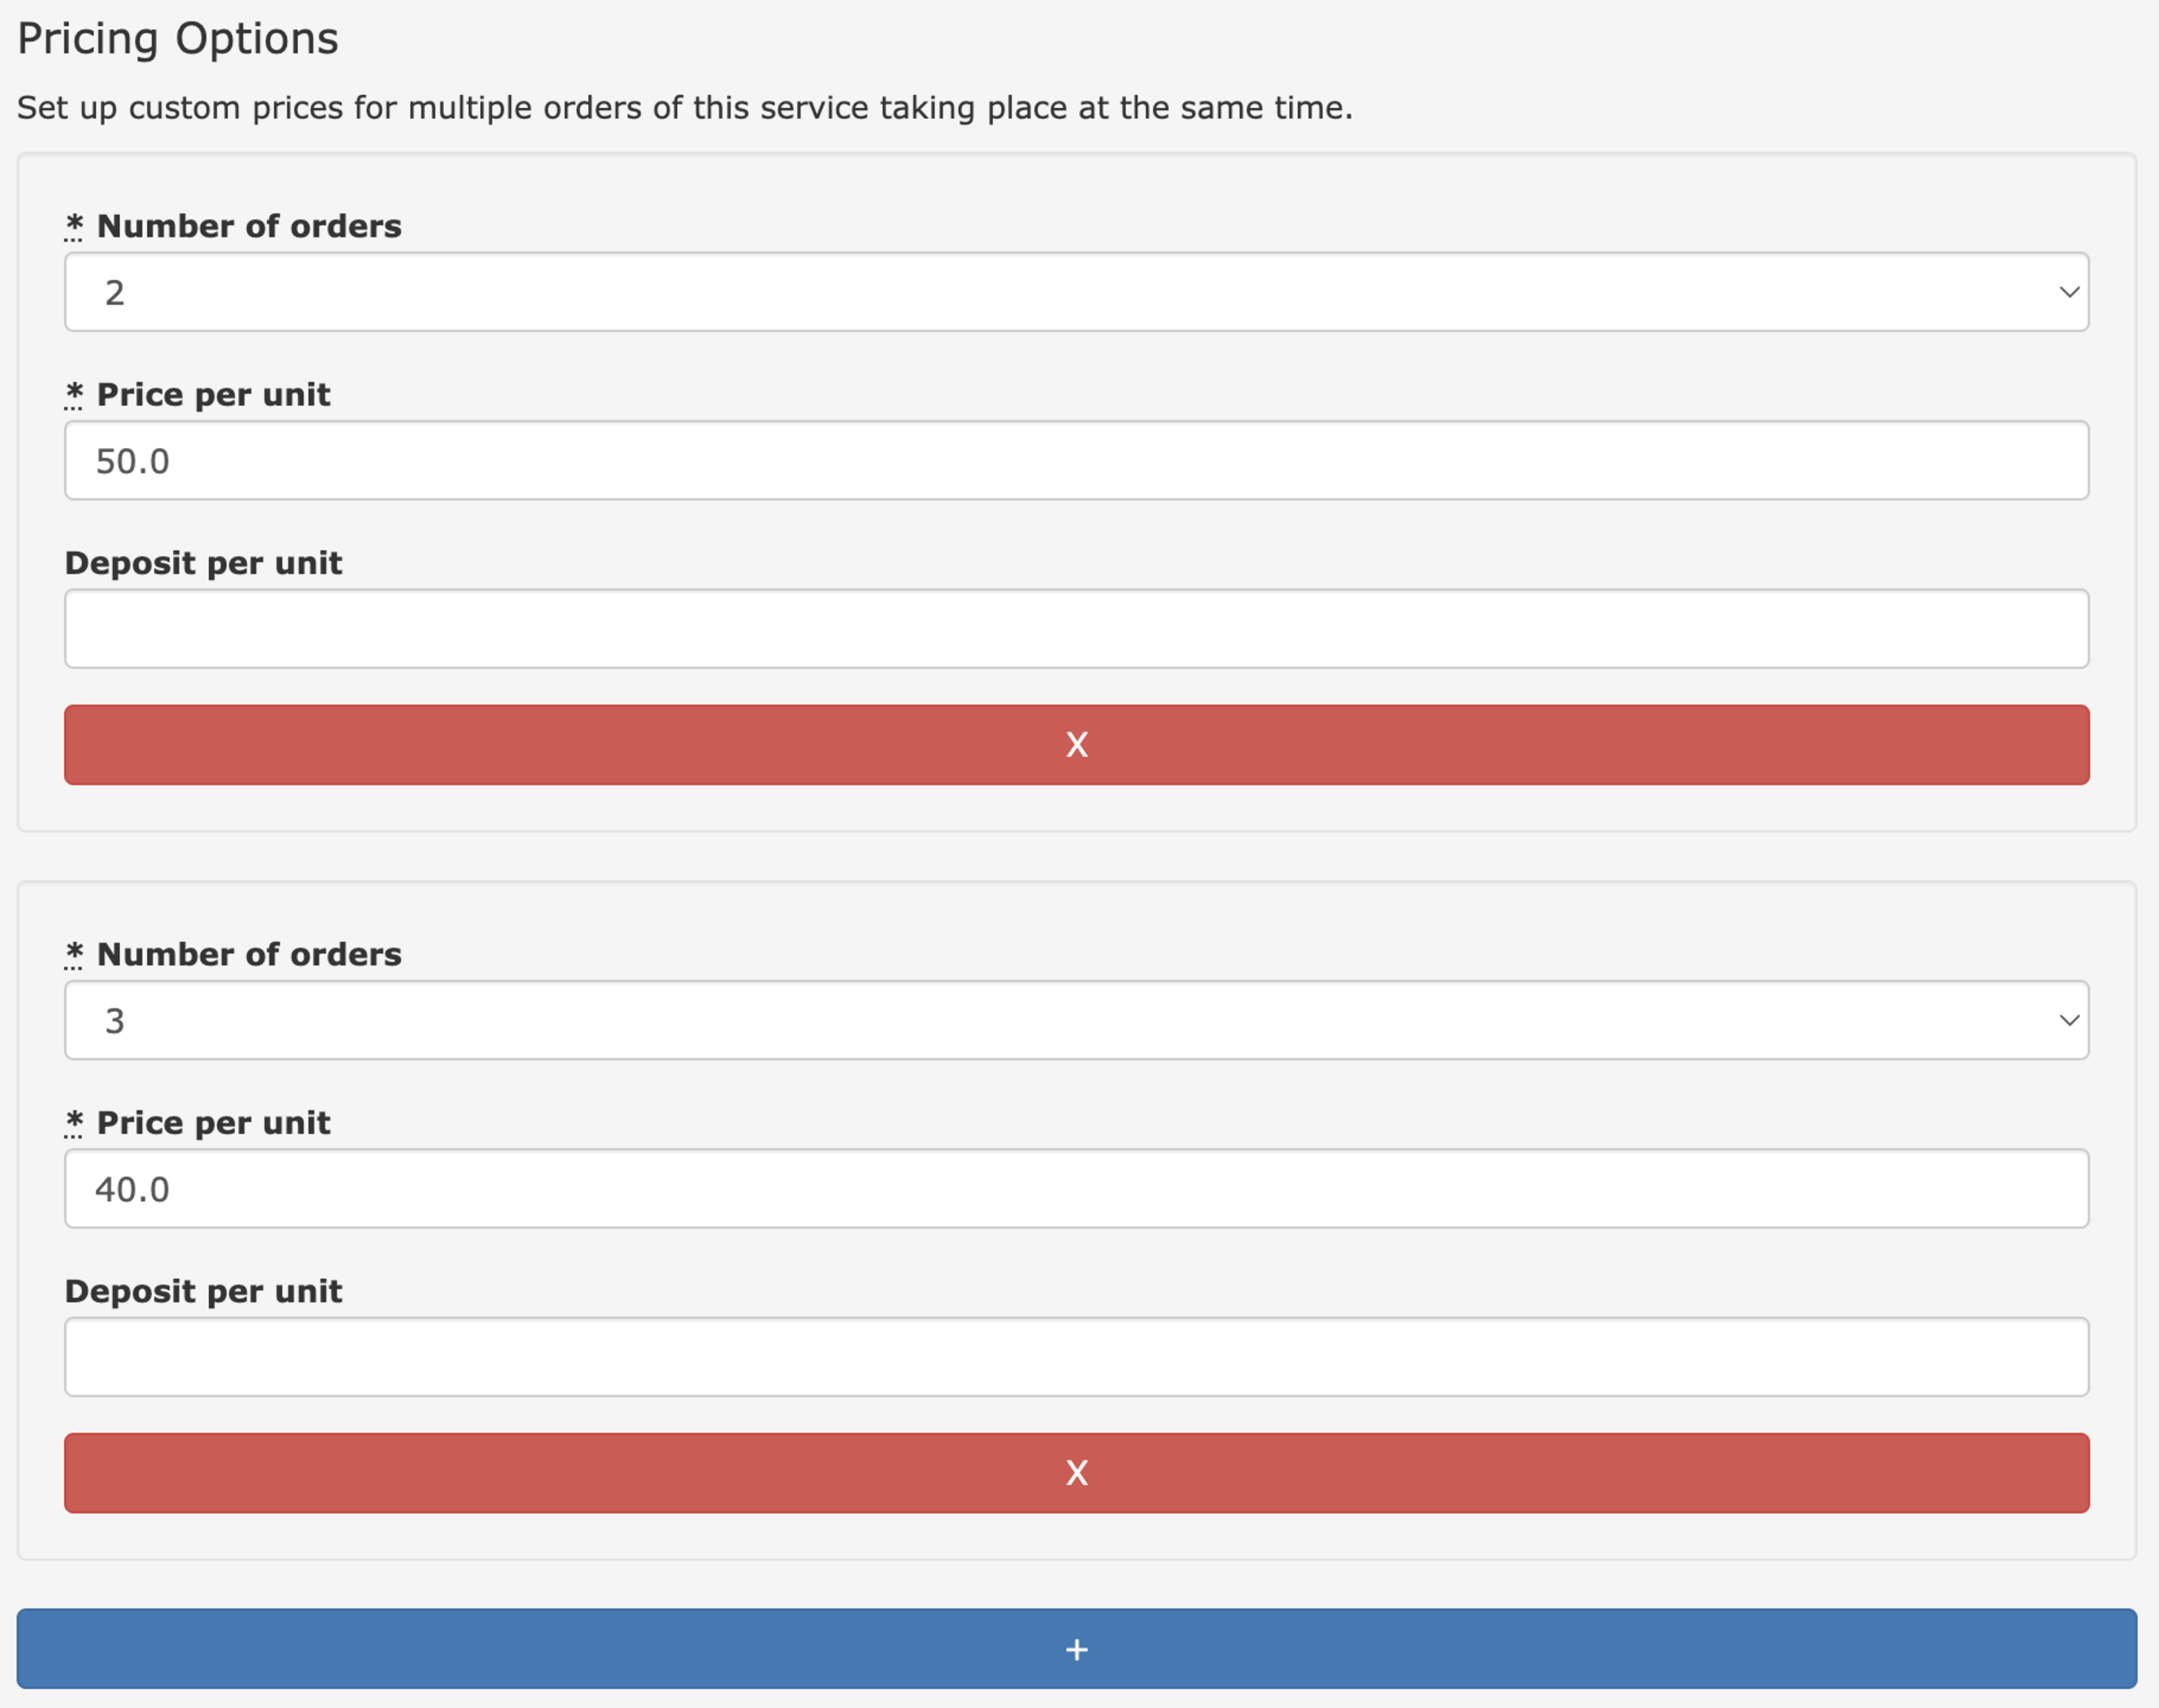
Pricing Options give you more flexibility in pricing your services for customers, allowing you to set a different price dependant on the number of orders they make.
Please Note: It is important that you create a pricing option for every different size of order you want to support. If you, for example, create a pricing option for 2, 3 and 5 orders (4 has been skipped) then they're will be no option for a customer to order 4 of that service.
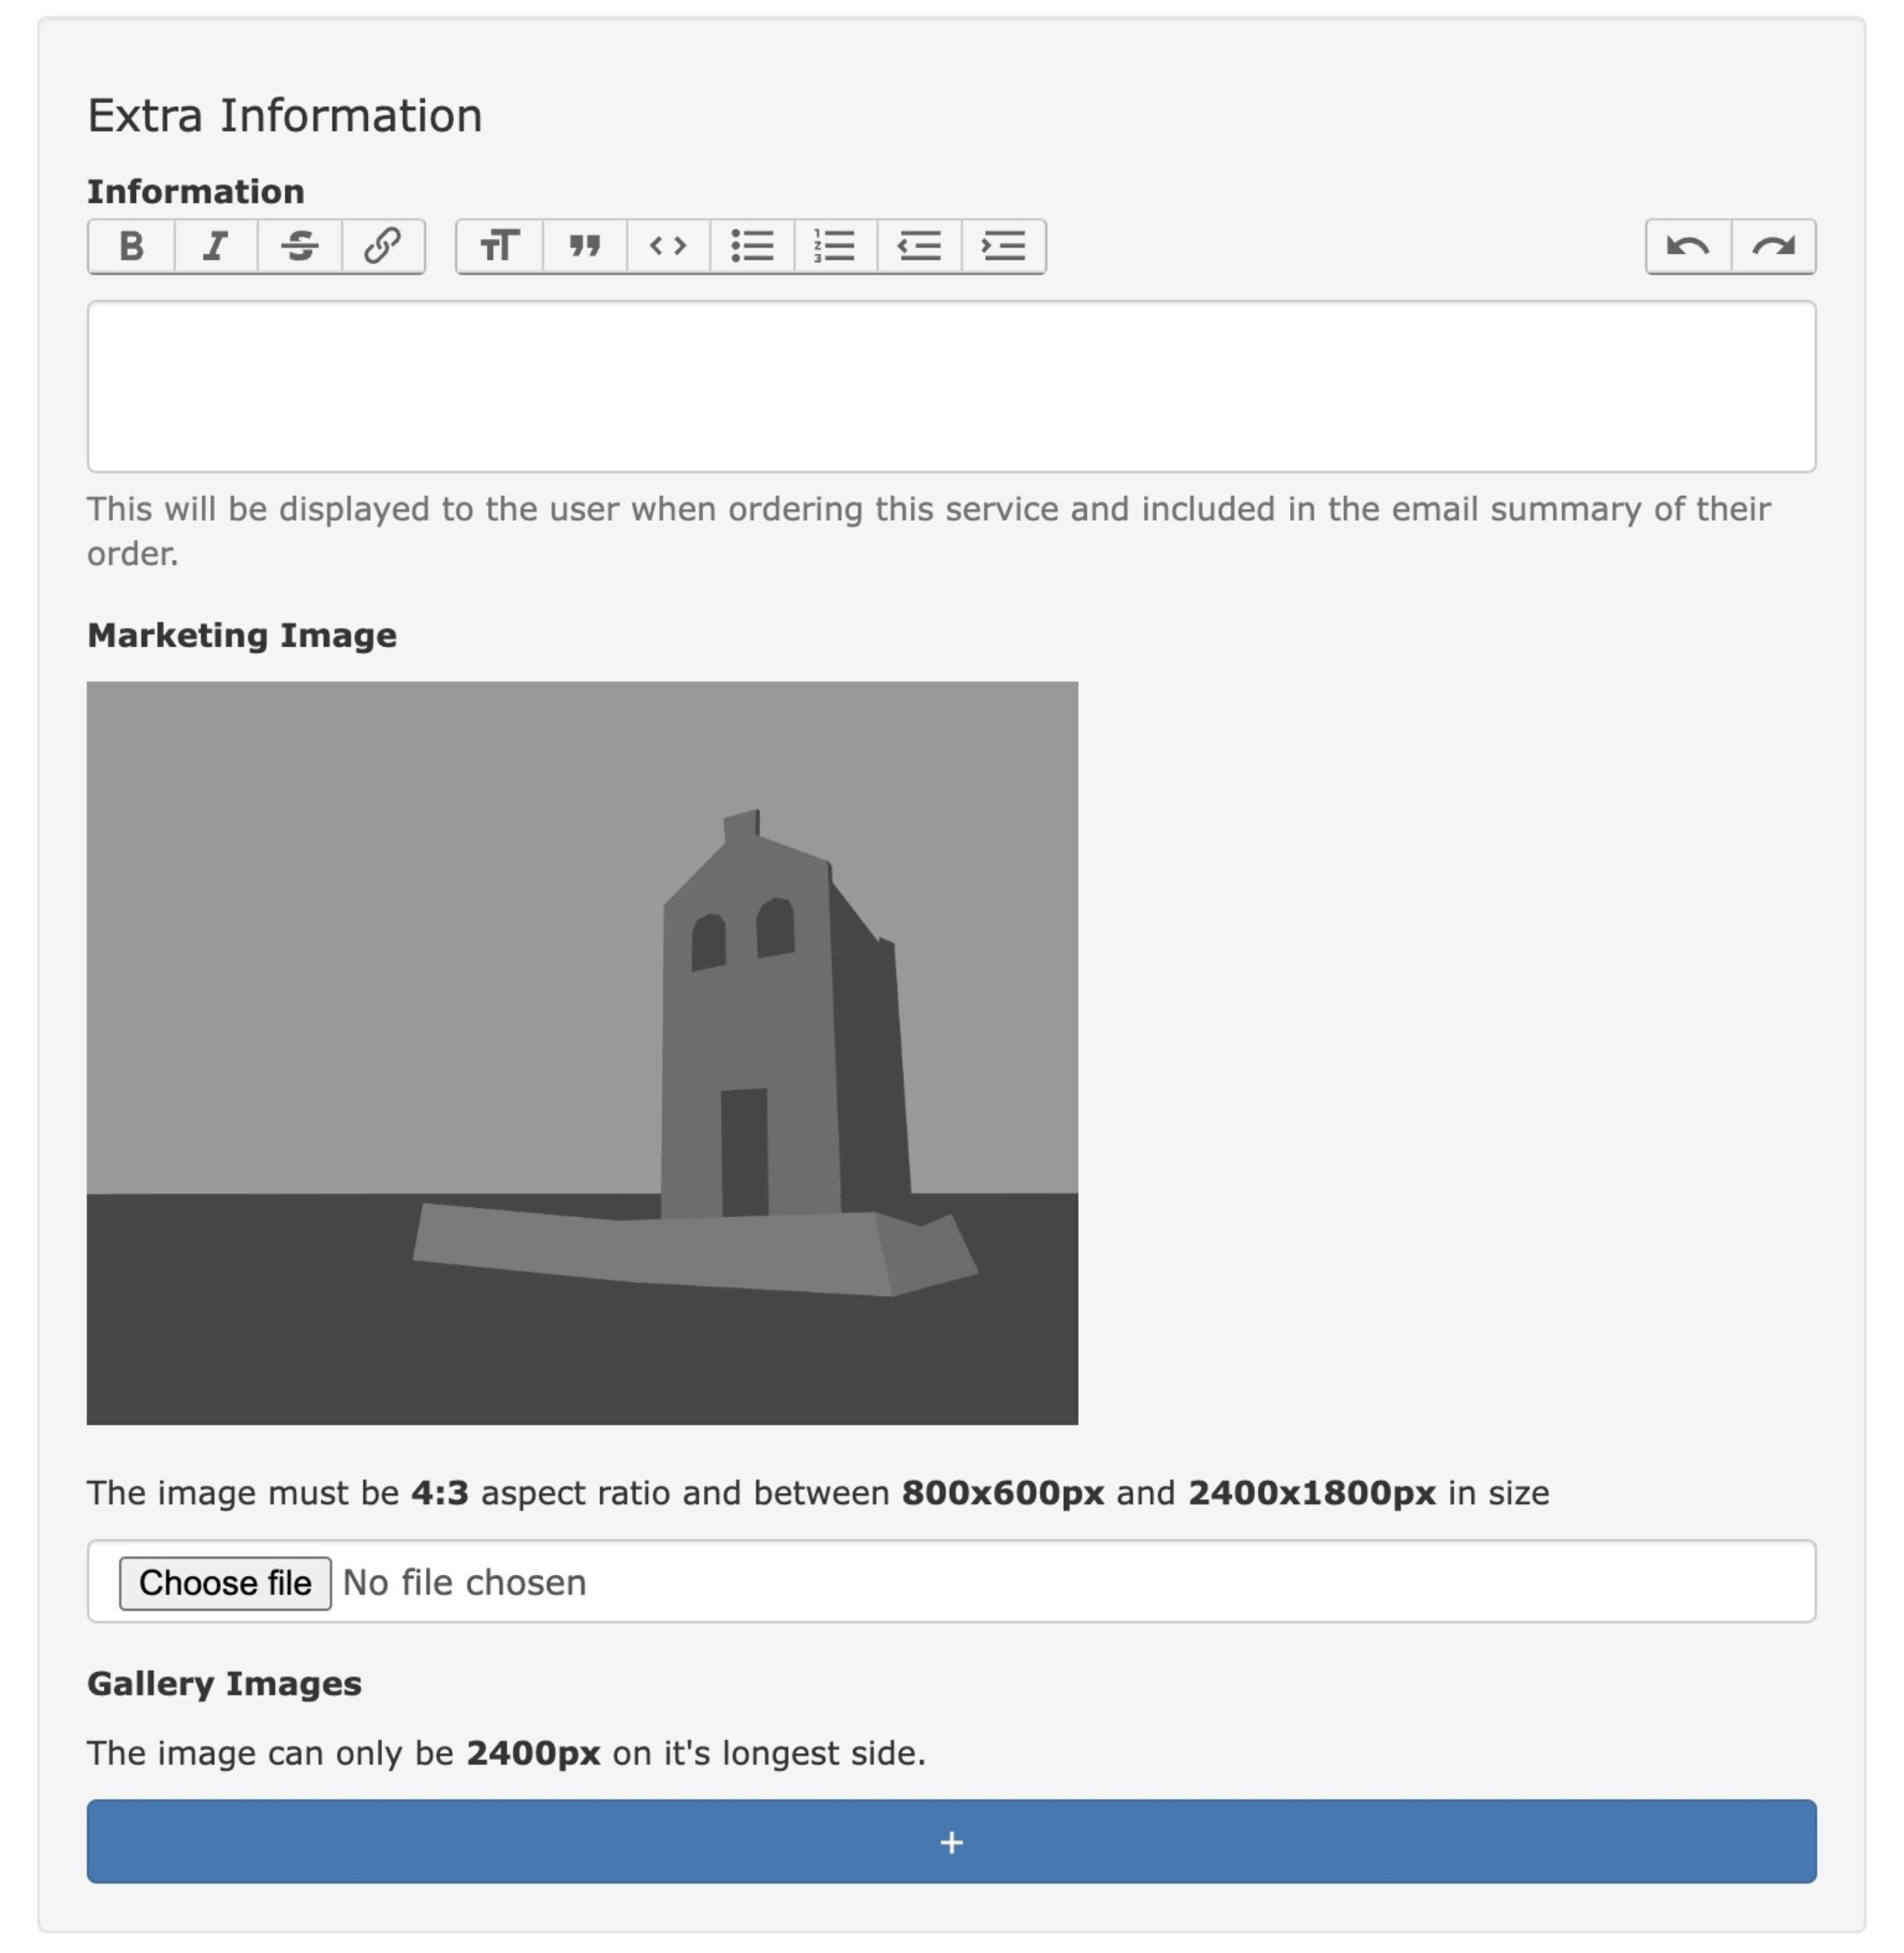
Information: Here you can provide all the additional information a customer might need to know when they're ordering a service.
Marketing Image: This is the image that will show on the front page of the shop.
Gallery Images: You can upload as many images as you want here to showcase this service/facility at it's best.
Once you've finished adding all of your services you're almost ready to go. Take a moment to take a look over the ordering of the services in your shop - you can make adjustments up and down by using the green and orange arrows.

Finally do one last review of everything. Proofread your descriptions, double-check your pricing and once you're satisfied, hit the Enable Shop button on the shop management page and watch your shop go live with At The Yard!
The web address for the shop will be shown at the top or left of the shop configuration page (it'll end in /shop).
Now that your shop is up and running, it's time to spread the word. Leverage your existing networks, social media platforms, and equestrian communities to promote your new shop.
Setting up your shop with At The Yard is a straightforward process that can significantly expand your equestrian business horizons. By following these steps, you can create an enticing shop, showcase your services and facilities, automate payment processing, and tap into a broader community of riders and enthusiasts.
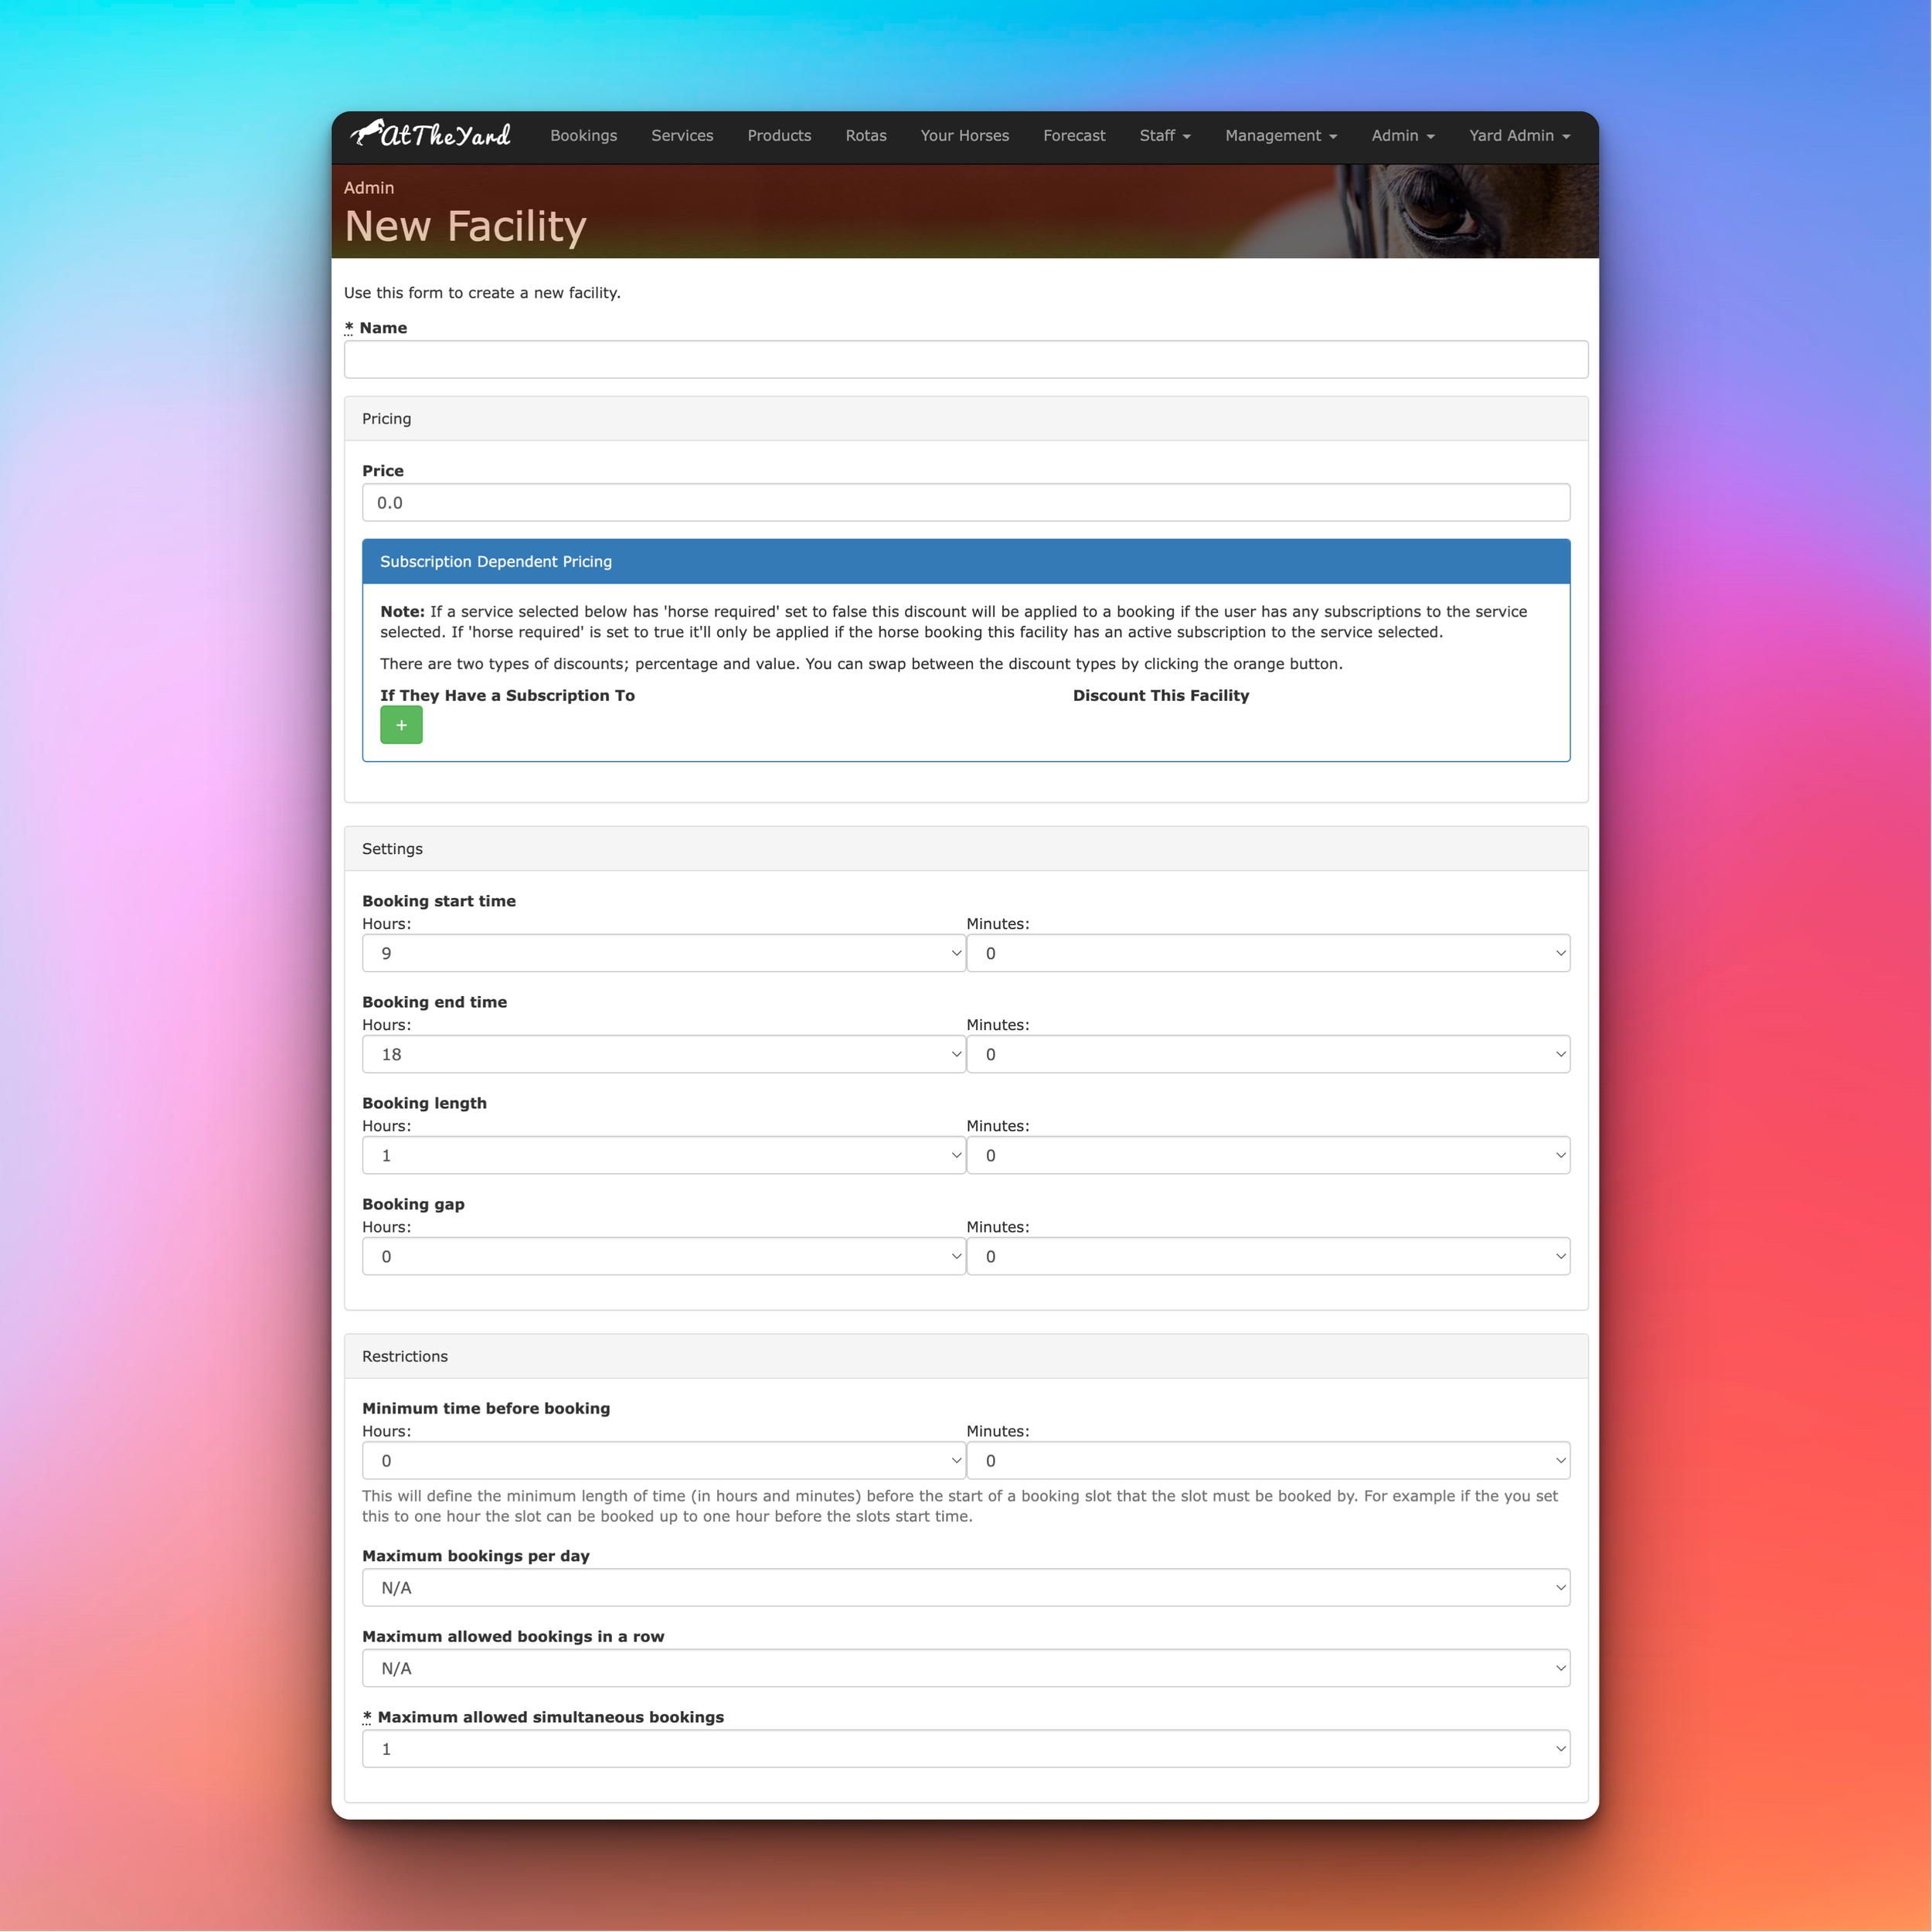
At The Yard has a broad range of options to allow you to setup bookings for your facilities to run just the way you like. In this blog post we’ll be taking a look at all of them and explaining why and how you can use them.
If you are looking to setup your facility to be available to the public you’ll need to look at our guides on setting up your shop. This guide is purely for setting up facilities for bookings within your yard.
For some yards/facilities this section can be completely ignored. If you don’t charge your customers a fee for using your facilities you can leave it as is. However if there is a charge this section will allow you to configure all the options available.
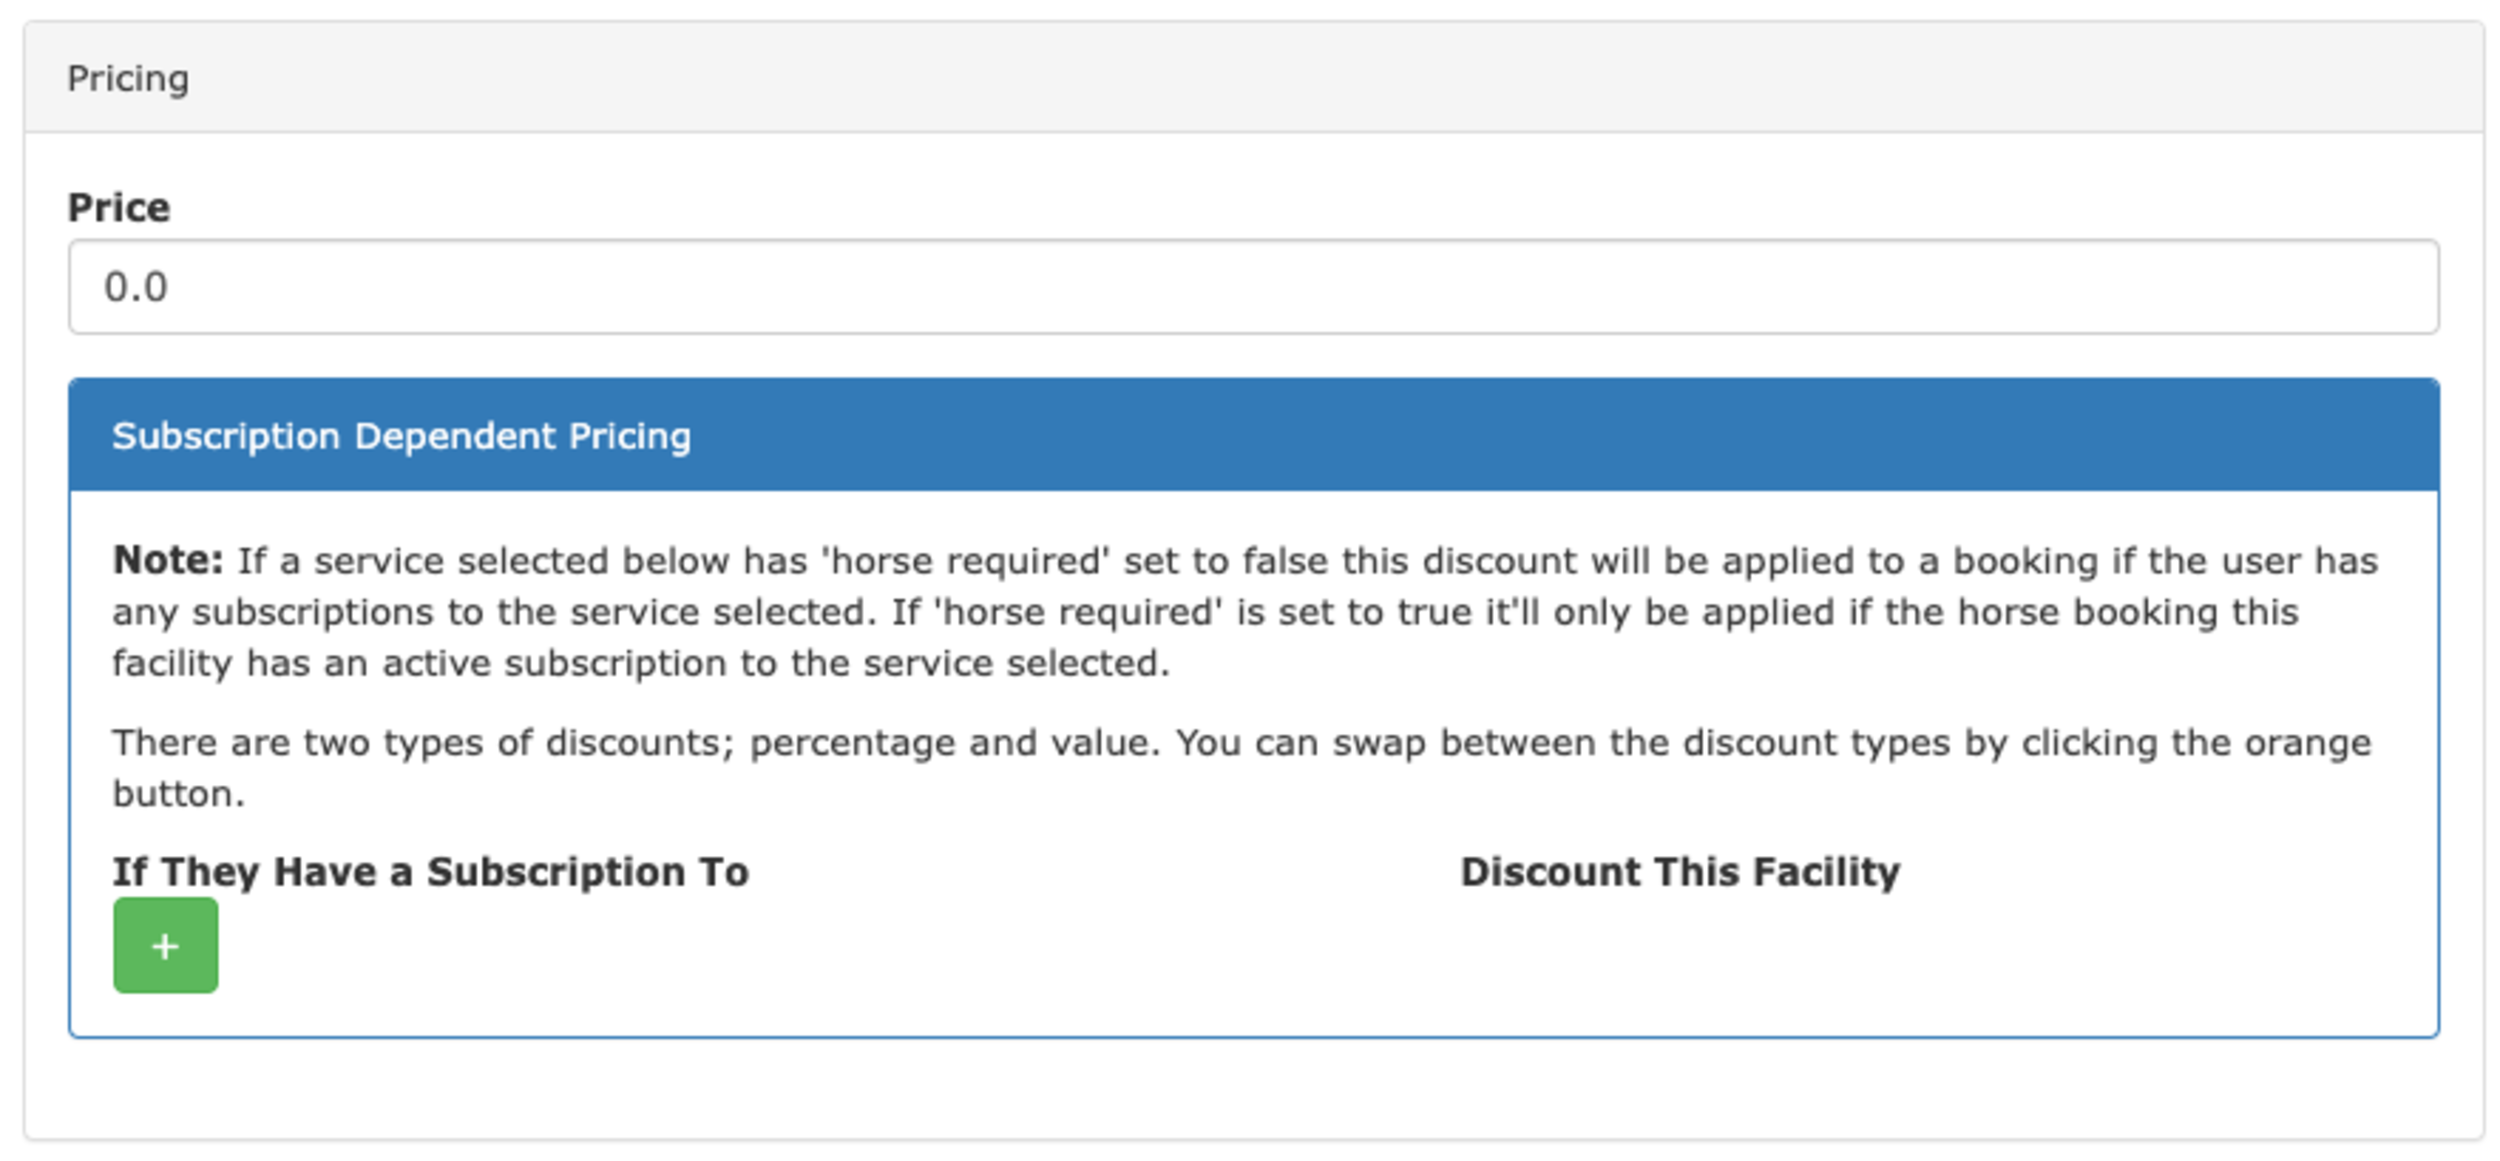
The initial option is the standard price for the service (if you’re VAT registered you’ll see the options here to set the VAT code as well).
The price you set here will be the amount charged to your customer when their booking takes place (e.g. if booked on the 01/04/23 at 10:00 the charge will be raised on 01/04/23 at 10:00).
The next section is Subscription Dependent Pricing. This allows you to vary the price a customer will pay based on the subscriptions they have (e.g. if they have a certain livery package or a membership package you can offer them a reduced rate or allow them to use it for free).
To set this up you click on the plus button, chose the service to which they must have a subscription and set the discount. You can do this for as many different services you have, allowing you to create multiple levels of benefits to your users to fit the needs of your business.
We also support including a number of visits to a facility as part of livery or membership package. This can be configured once you’ve created your facility and instructions on how to do this can be found here.
Settings allows you to configure the overall availability and slot lengths throughout the day.
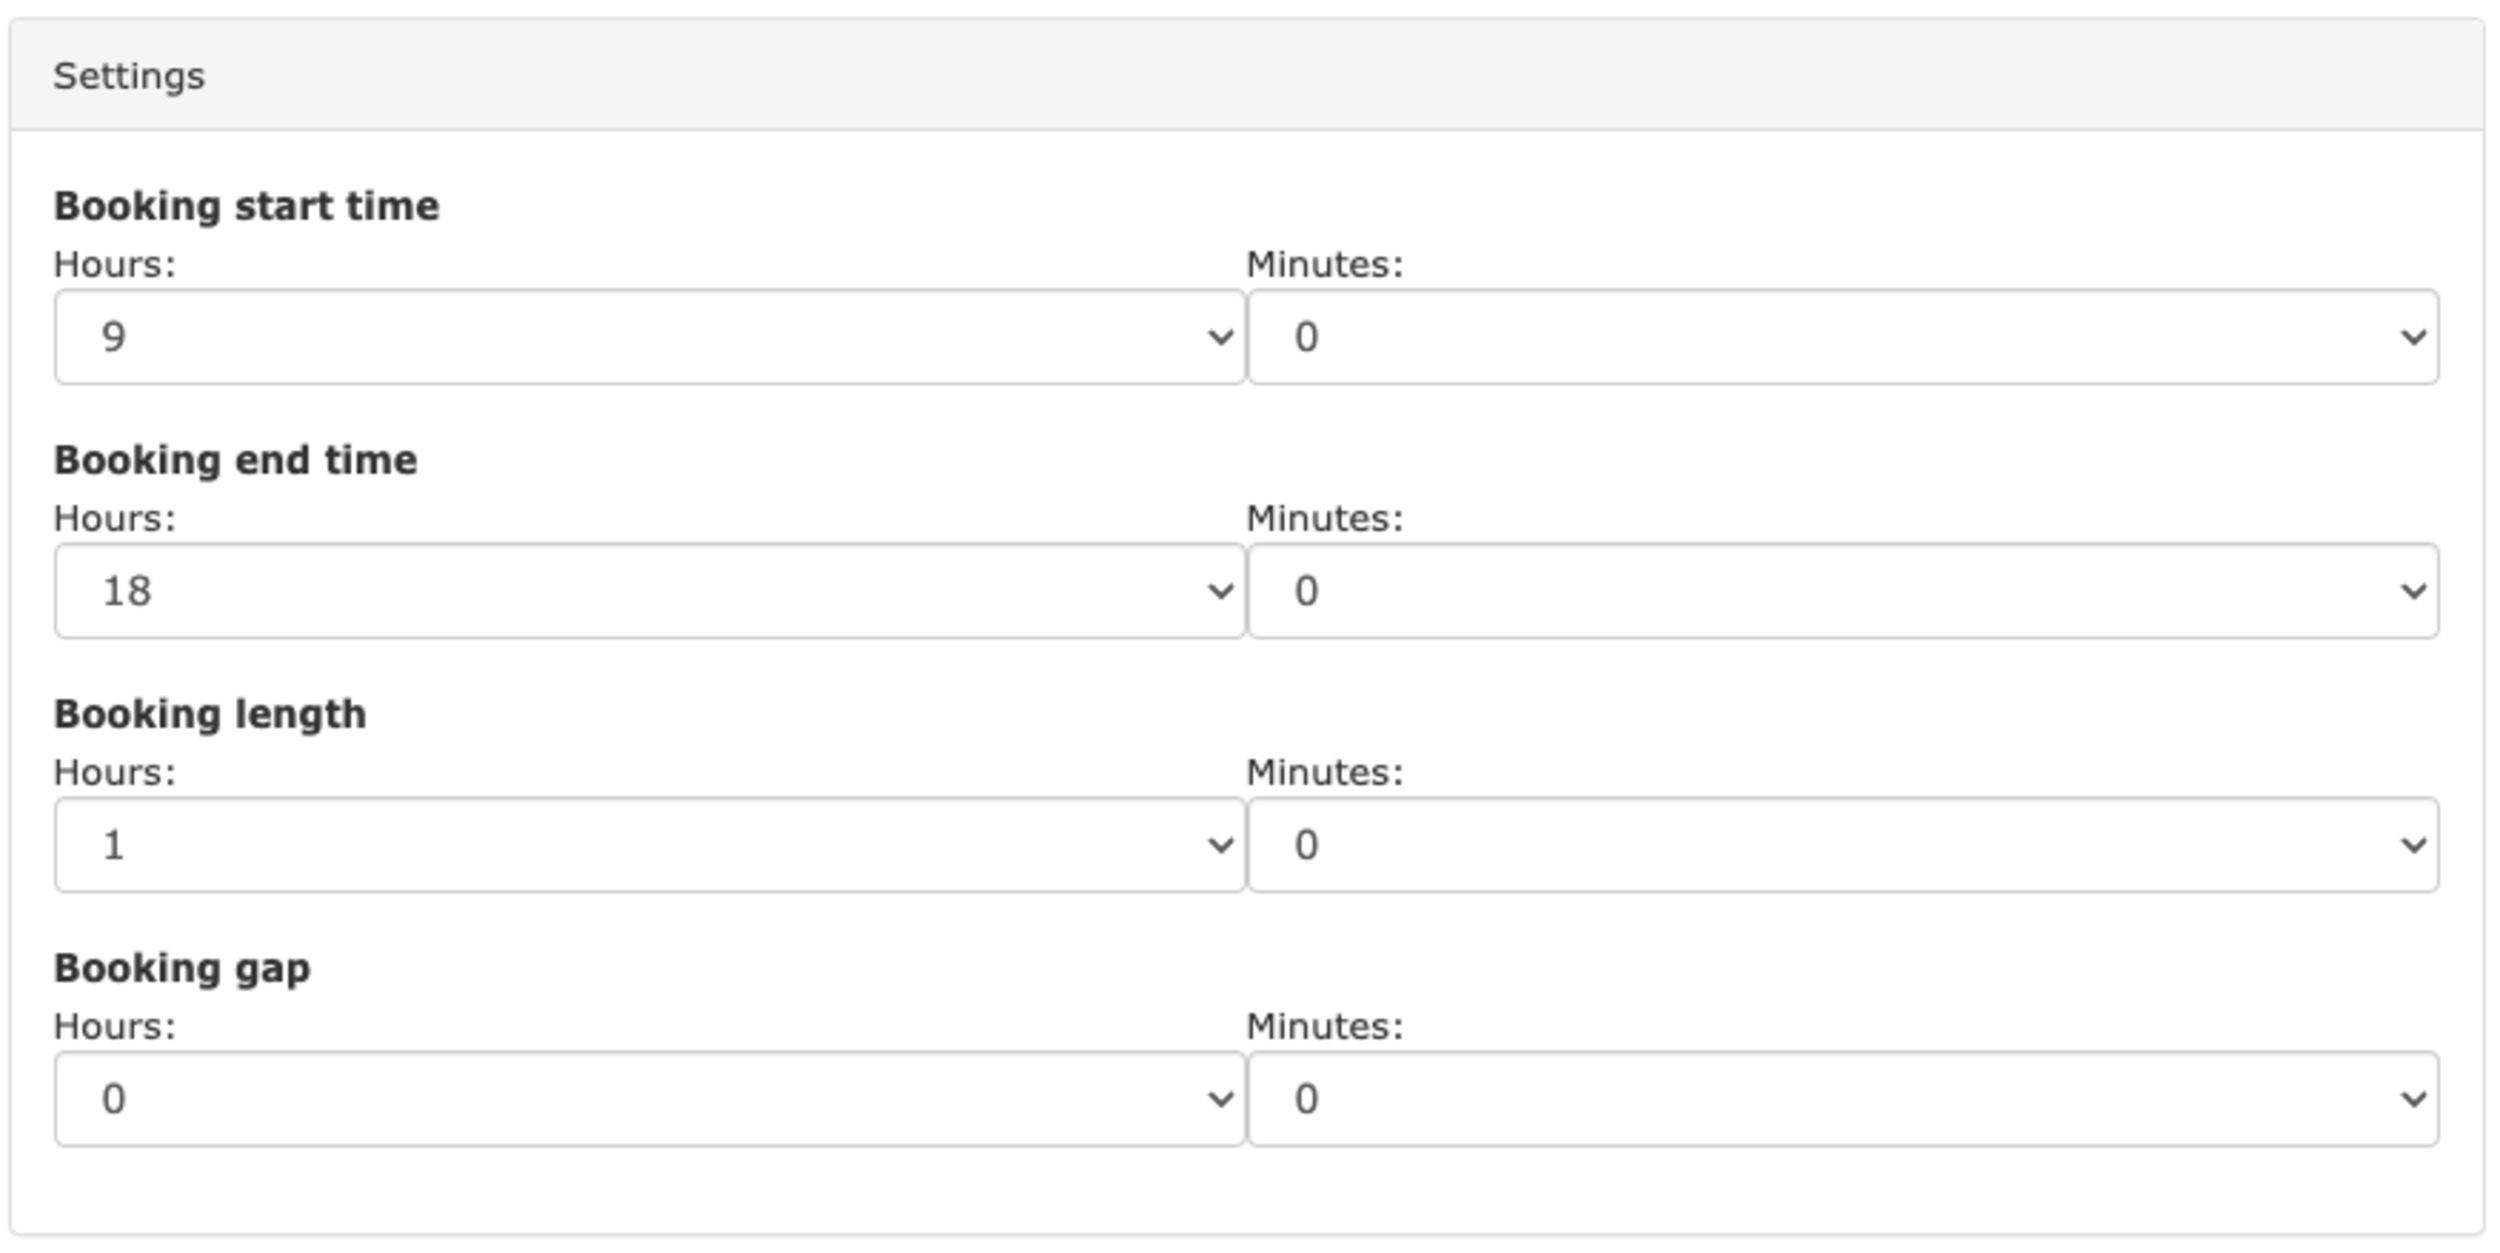
Start and end times dictate when the facility is open and closed. Booking length sets the length of the slots themselves and gap length sets an un-bookable gap between slots (great for giving time to tidy the school).
Handy Tip: With booking length it’s generally a good idea to keep this relatively small (15-30 minutes). Users are presented with a button when booking to extend their booking over multiple slots. Because of this keeping slot length small allows the most flexibility.
Restrictions are the opposite of settings. Where settings allow access, restrictions constrain users in certain ways to allow you to keep control over your facilities.
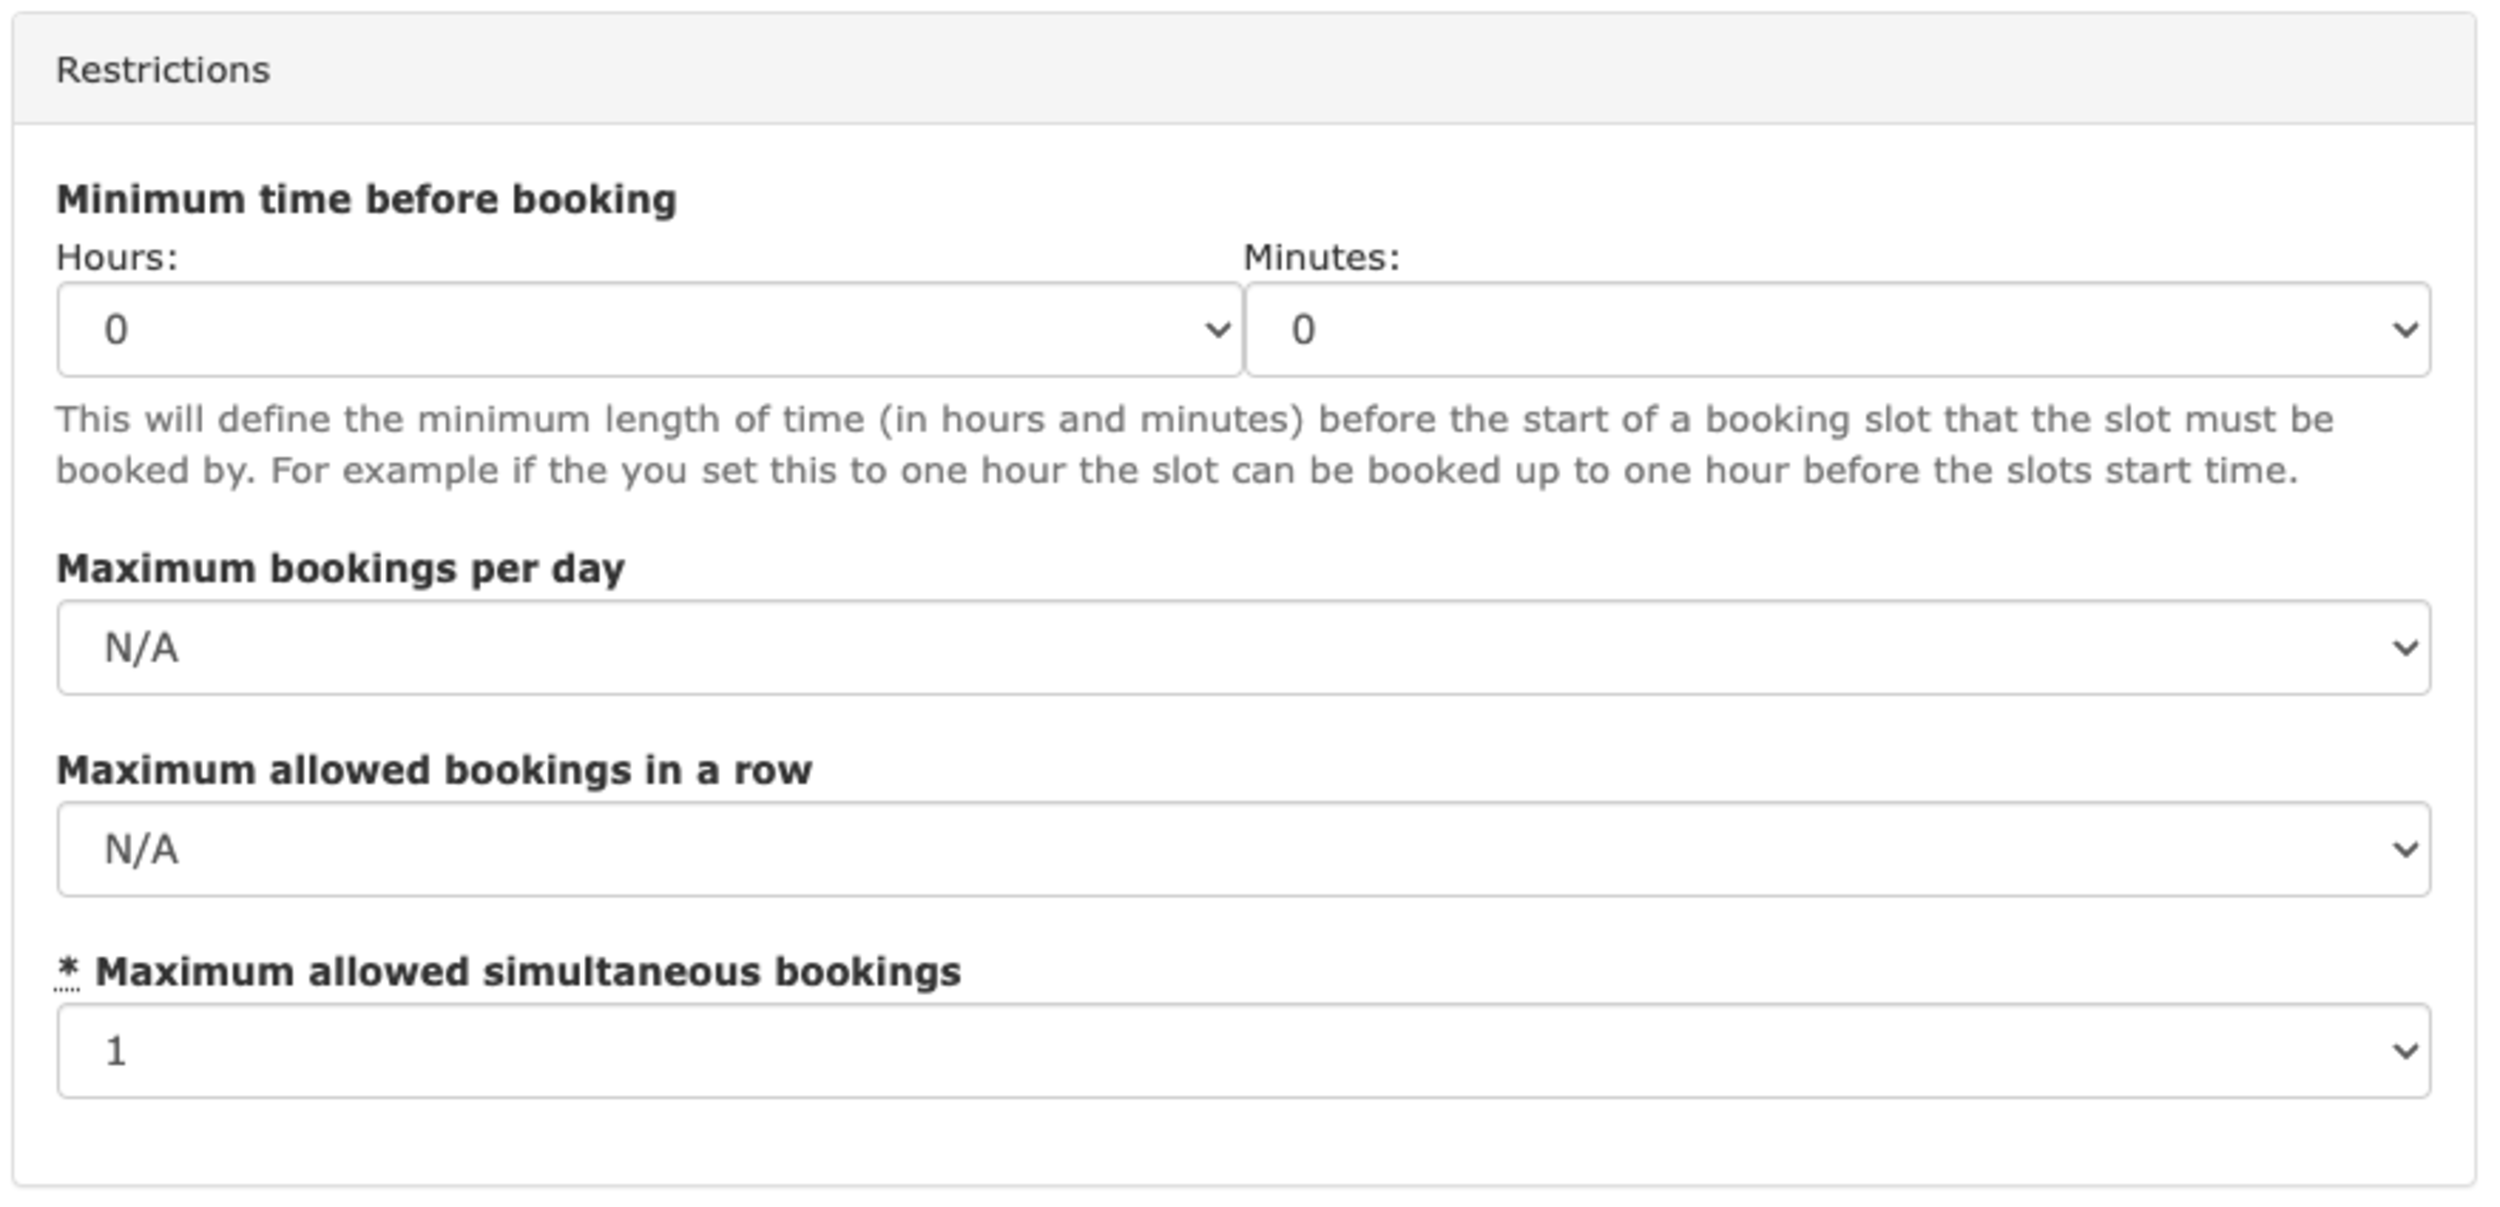
Minimum time before booking
Whatever time set here will stop users from booking (and cancelling) a slot in the facility in the defined period before a slot. By setting a sensible value here (e.g. 1 hour) it allows your customers to use an empty school without a booking (should you allow this) safe in the knowledge that no one can run in and book it when they’ve already started.
Maximum bookings per day
This is the maximum number of bookings per day across all your customers. For the majority of facilities this will be set to N/A.
Two examples as to when this can be used are:
1) To restrict uses of a certain facility to extend it’s serviceable life.
2) To only allow a certain number of bookings to be made a day whilst allowing the rest of the time to be left free for unbooked visits.
Maximum allowed bookings in a row
This sets how many slots an individual customer can book in a row. As above, if you combine this option with a short booking length you can allow customers to have flexibility to make longer booking whilst still stoping them from abusing it and booking a facility for the entire day.
Maximum allowed simultaneous bookings
This sets the maximum number of customers who can book a facility at the same time. (e.g. how many horses you’re allowed in a facility at once). This is great for increasing the utilisation of your facility and when combined with the social features (discussed next) can be an effective solution to allow multiple horses to use a facility at the same time.
This is a simple dropdown called ‘Enable Social Features?’. When enabled all login users (essentially everyone apart from guests booking via the shop feature) will be able to see who is in a particular slot and what they’re doing.
Defined uses allow you to predefine a set of uses for customers to choose from when making a booking. For example, you can predefine uses such as Schooling or Jumping. Then, when a booking is being made, people can choose from one of these predefined options to make it clear to others what they’re doing.
On top of this there are a few extra options for each defined use:
Exclusive Booking
If set, on selection of the defined use by a user an exclusive booking will be made for them (and will only be available to them if the slot is entirely free).
This can be useful, for example, when setting up a defined use for an external lesson where it would be necessary to have sole use of the facility.
Include Question This allows for a question to be added to a defined use. Following on with our example from above (an external lesson) we could ask at the time of booking for the name of the instructor they’re using.

This section allows you to define the facilities on which this facility depends. This allows for the creation of simple through to complex dependency structures - for more information on this read this article for more information on how to set it up.
The final section includes a number of additional options you can choose to check or not check depending on your needs.
As you can see facilities in At The Yard have a huge range of options to customise and tweak to allow you to match the way you work. With that said if you’re looking for a simple facility you can stick with the default options and get up and running straight away.
If you’re setting up a facility in your yard and want some help in getting it to work the way you want get in touch with our support who’ll be happy to help.
We’ve recently introduced two new features that work together to give you more flexibility in the running of your yard and more insight into where you spend money on your yard.
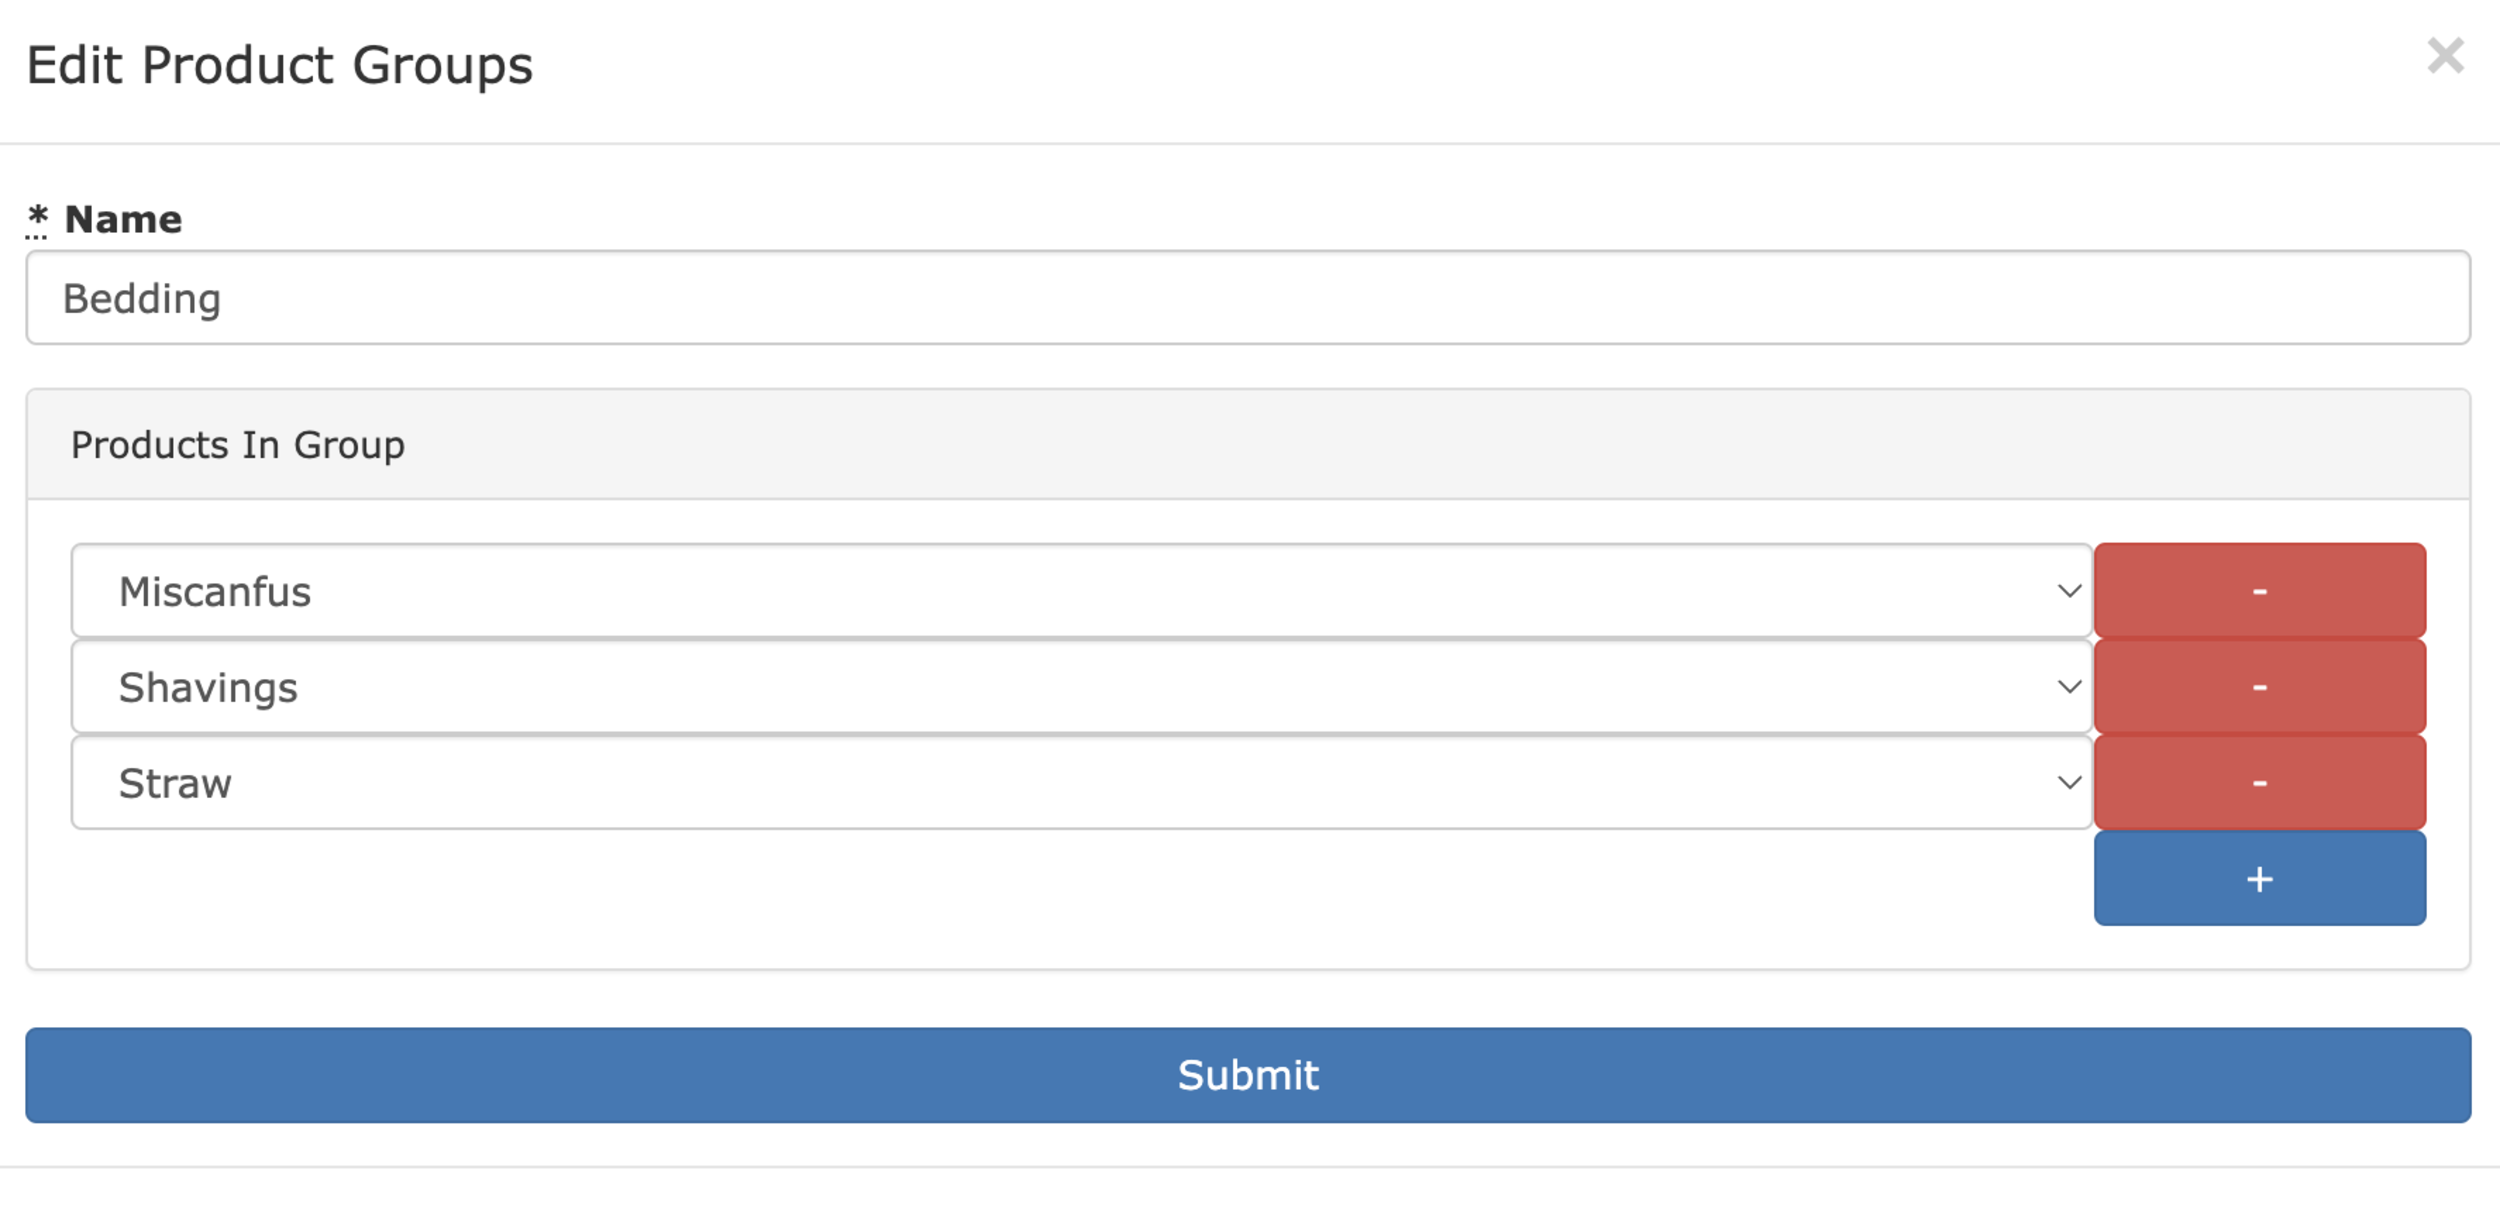
Product groups allow you to build collections to be used within the existing Included Products System. Previously you could set an allowance for a single product to be included with a livery or membership package. With this update you can now set a number of items to be included from a group of products.
For example, you can now offer 7 bales of bedding per month, chosen from a selection of available bedding (such as shavings, straw or Miscanfus). Your customers can then pick a combination of 7 of these included within their product allowance. Any extra they use beyond this will automatically be charged to them.
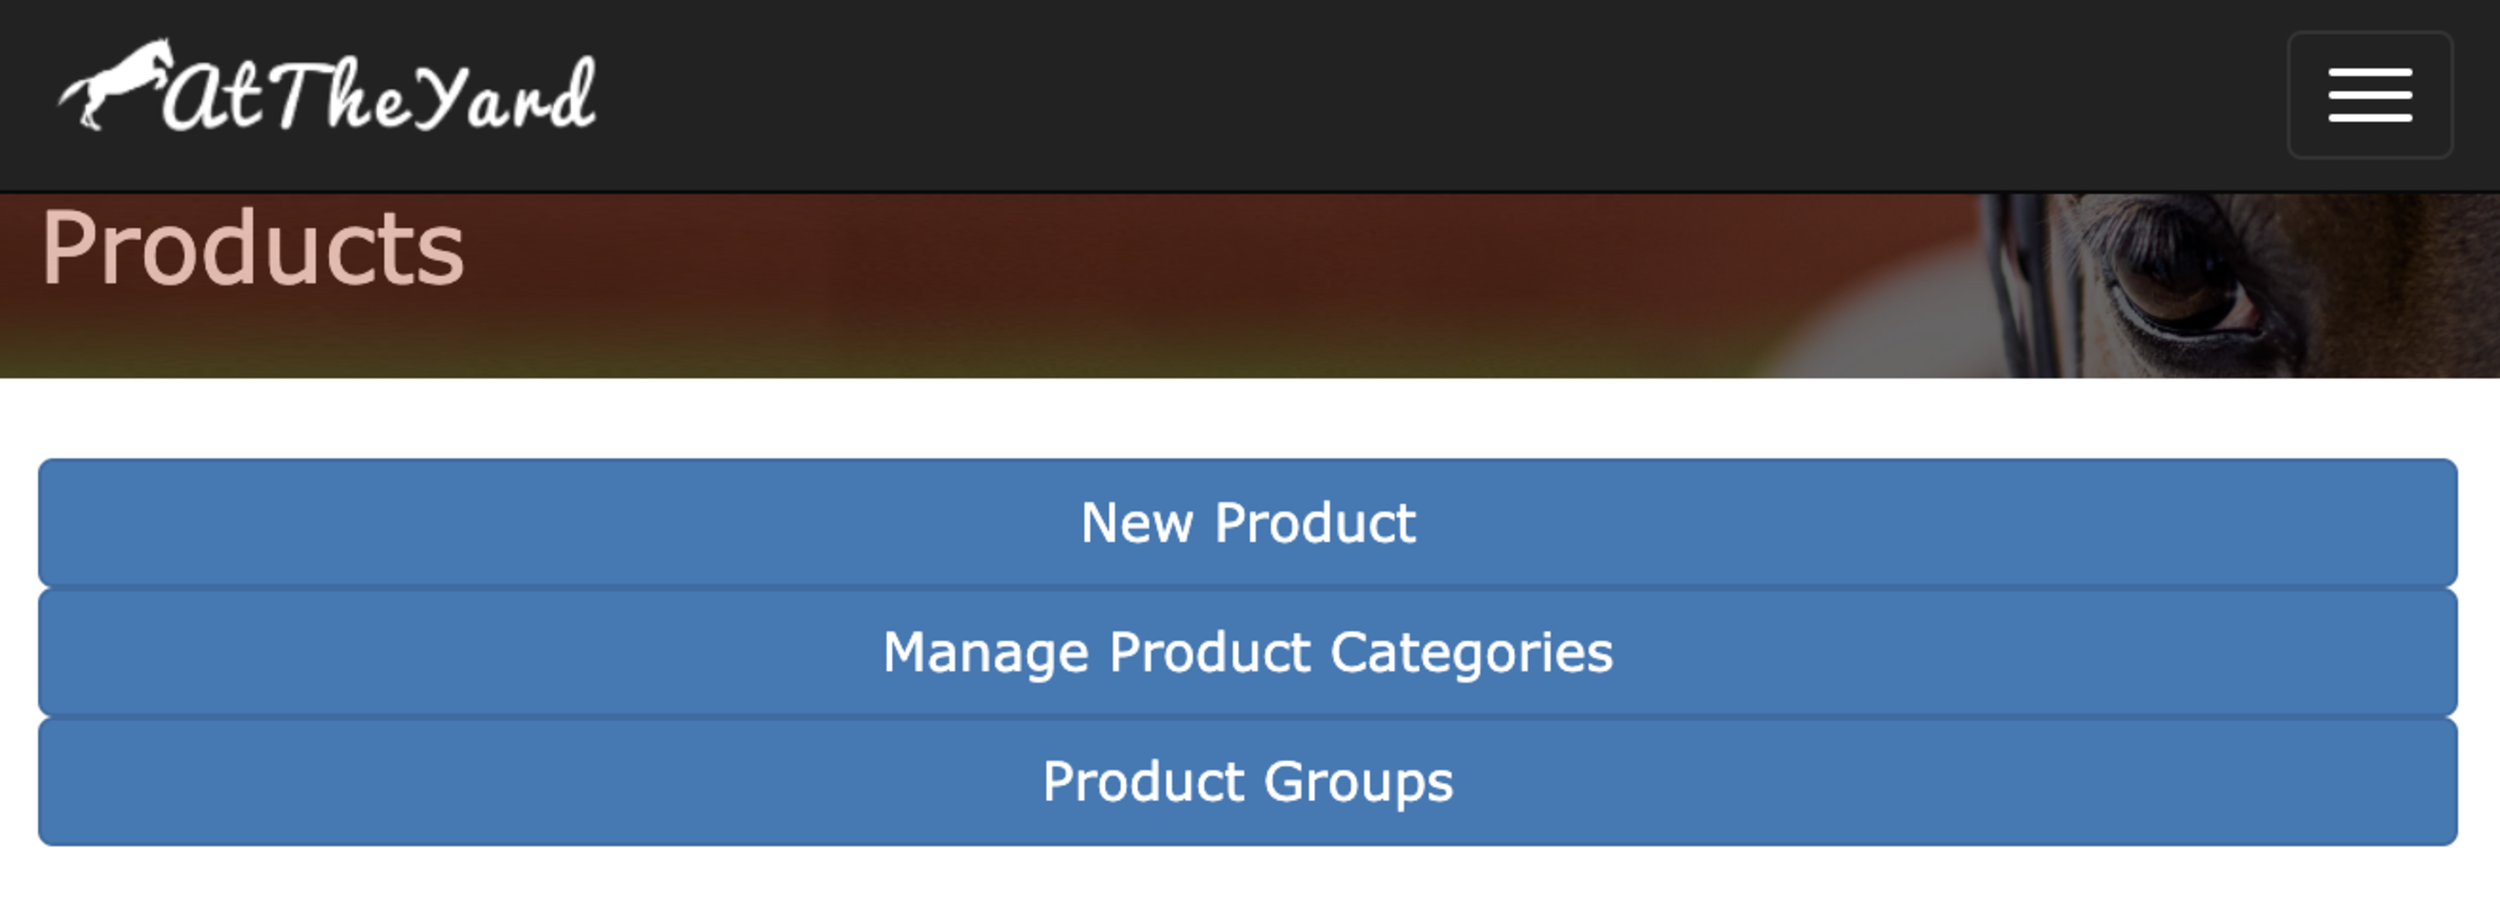
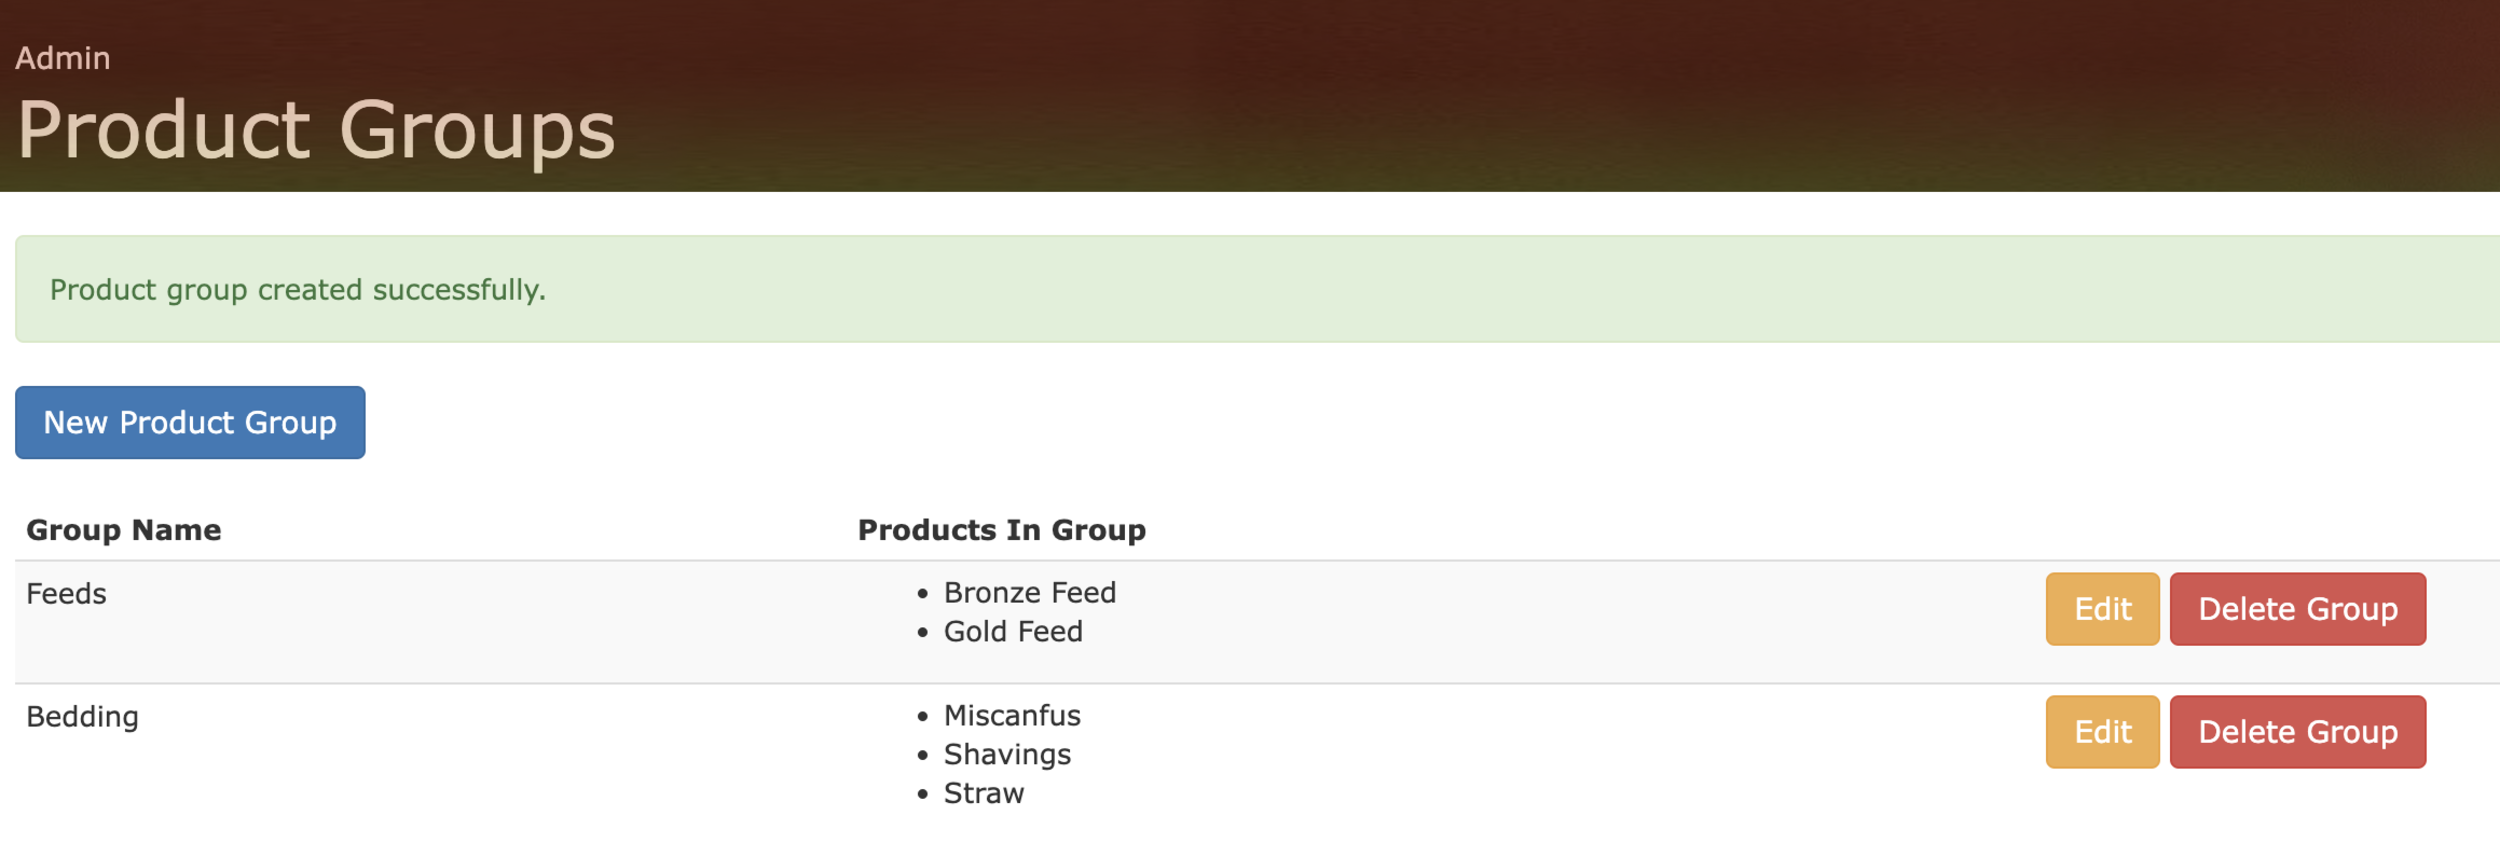
Setting up product groups is easy. To get started go to the Admin menu and click on Products. From this page click on the Product Groups button at the top of the page (shown).
You can create as many product groups as you need and products can be included in as many different groups as needed.
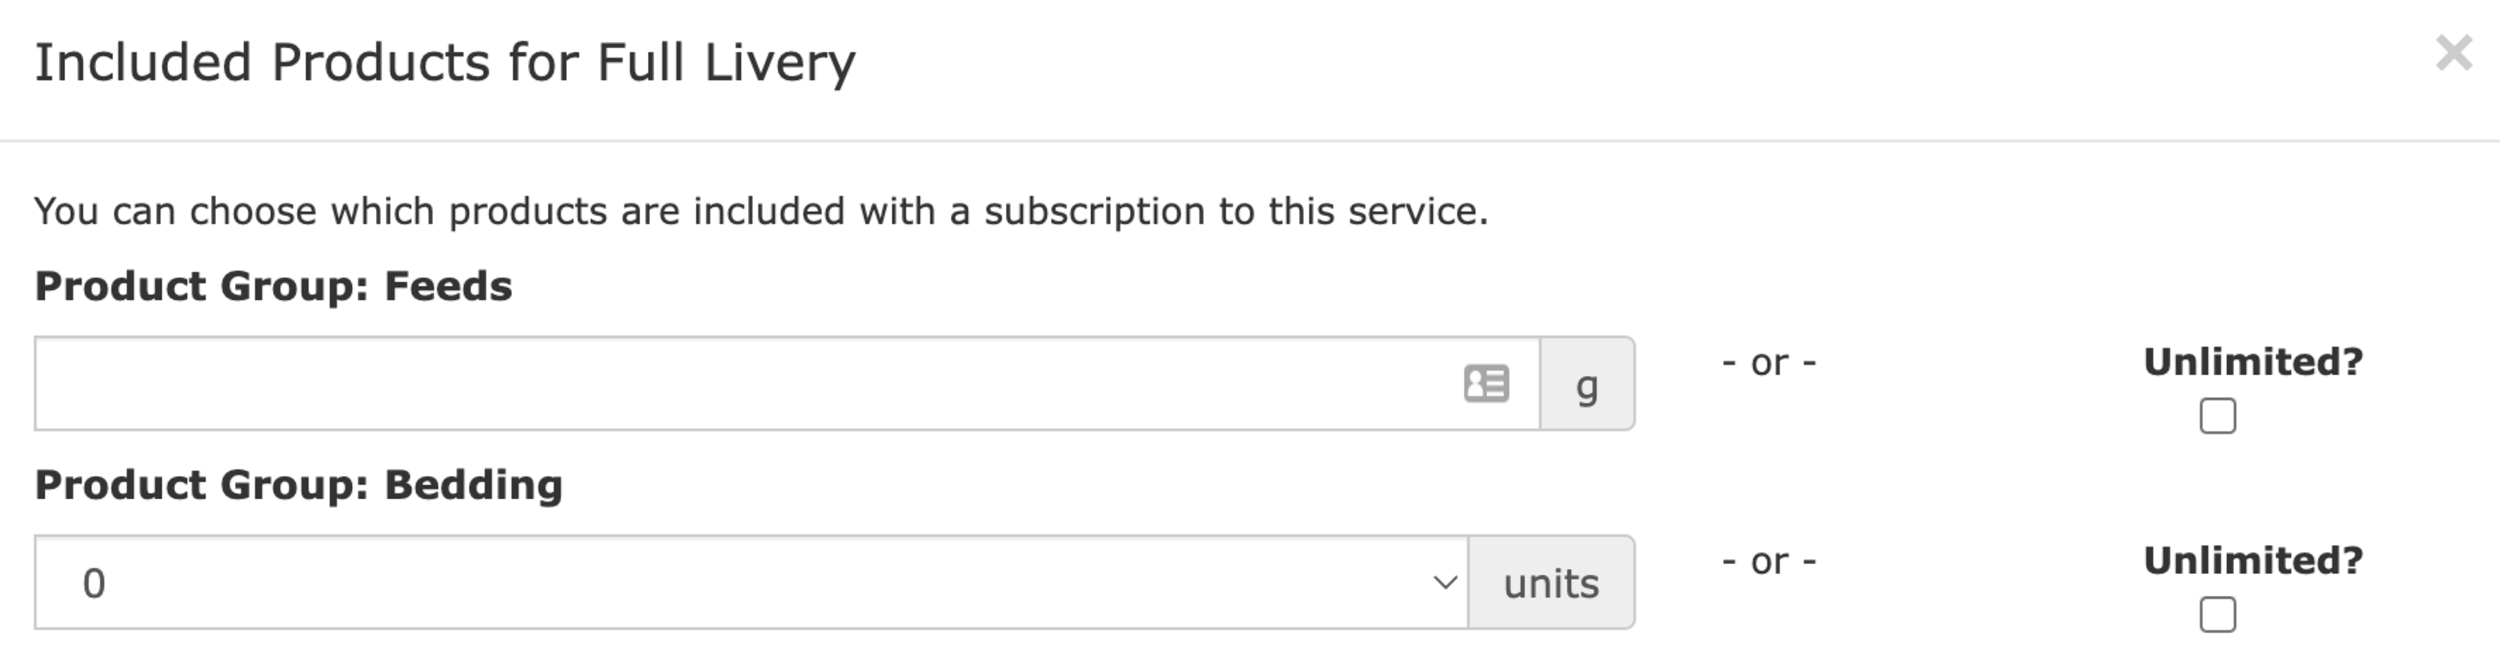
As with the existing Included Product System you can now use the new product groups to make a certain quantity of products available as part of a subscription. They’re available in the same included products screen (accessed by going to the Admin menu and clicking on the Services button and then on the Edit button on the applicable service and finally on the Edit Included Products button). The product groups will always show at the top of the list of available items (shown below).
At The Yard features reporting for both historic purchases and service fulfilments. We’ve long had the ability to filter by date, user and product/service but we wanted to make more information available to yards.
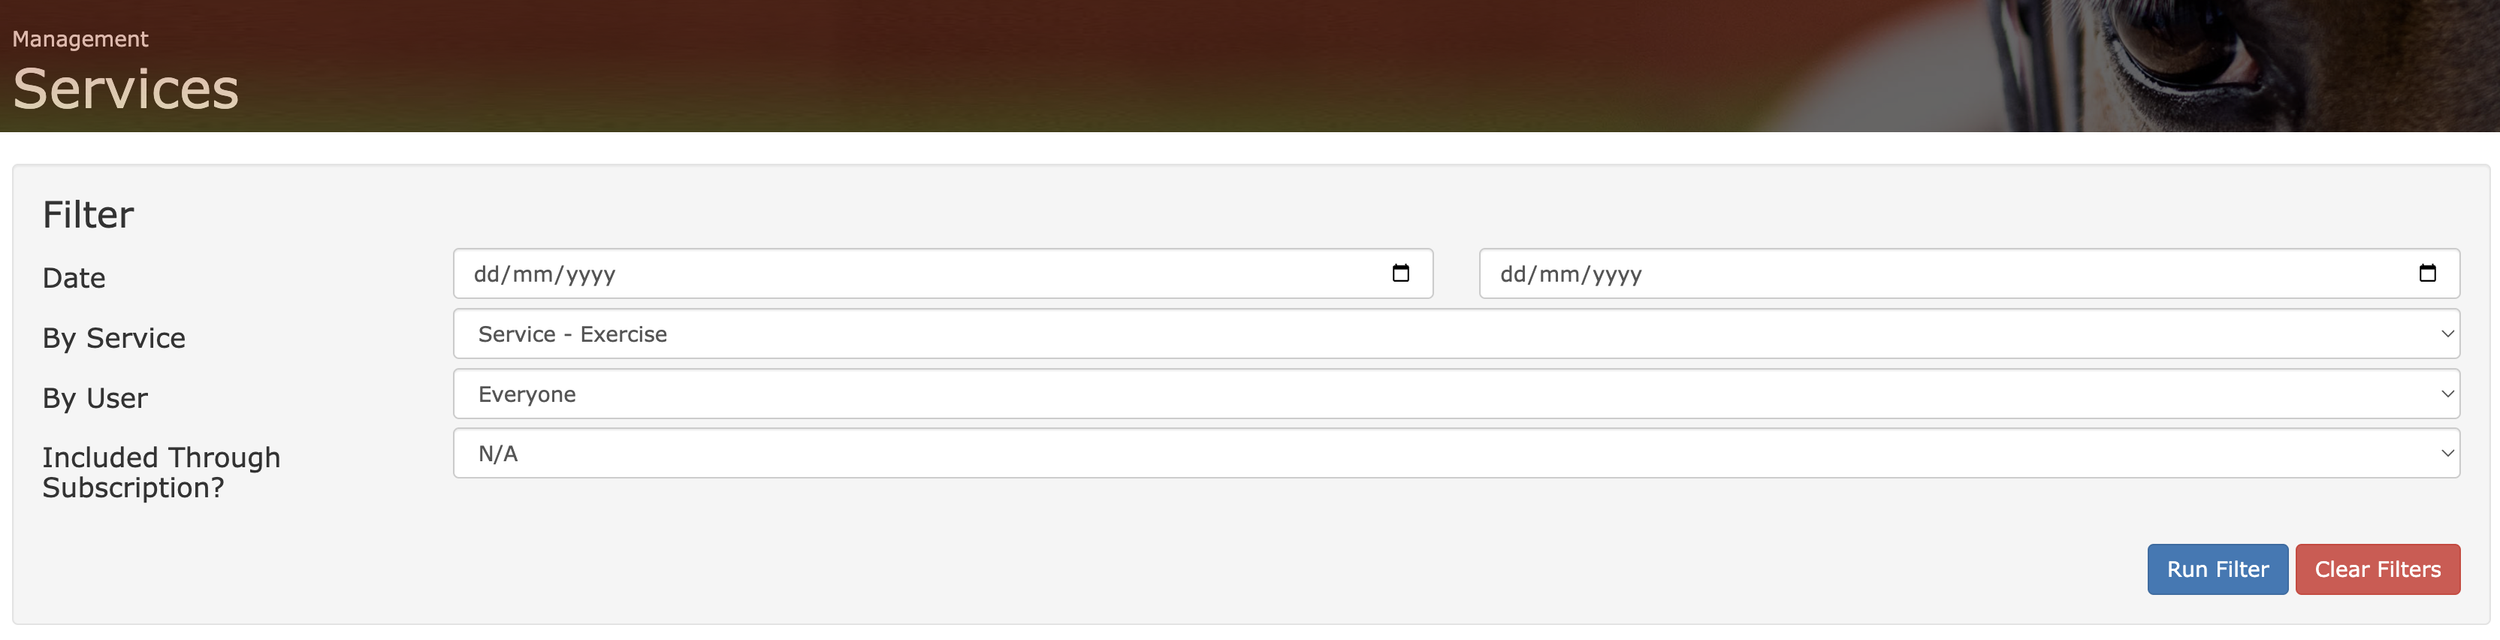
This update brings enhancements to give you more information about your historical data including totals and breakdowns within your chosen search. These data points, when combined with the existing filtering, can be a powerful tool in analysing expenditure in terms of both money and time.
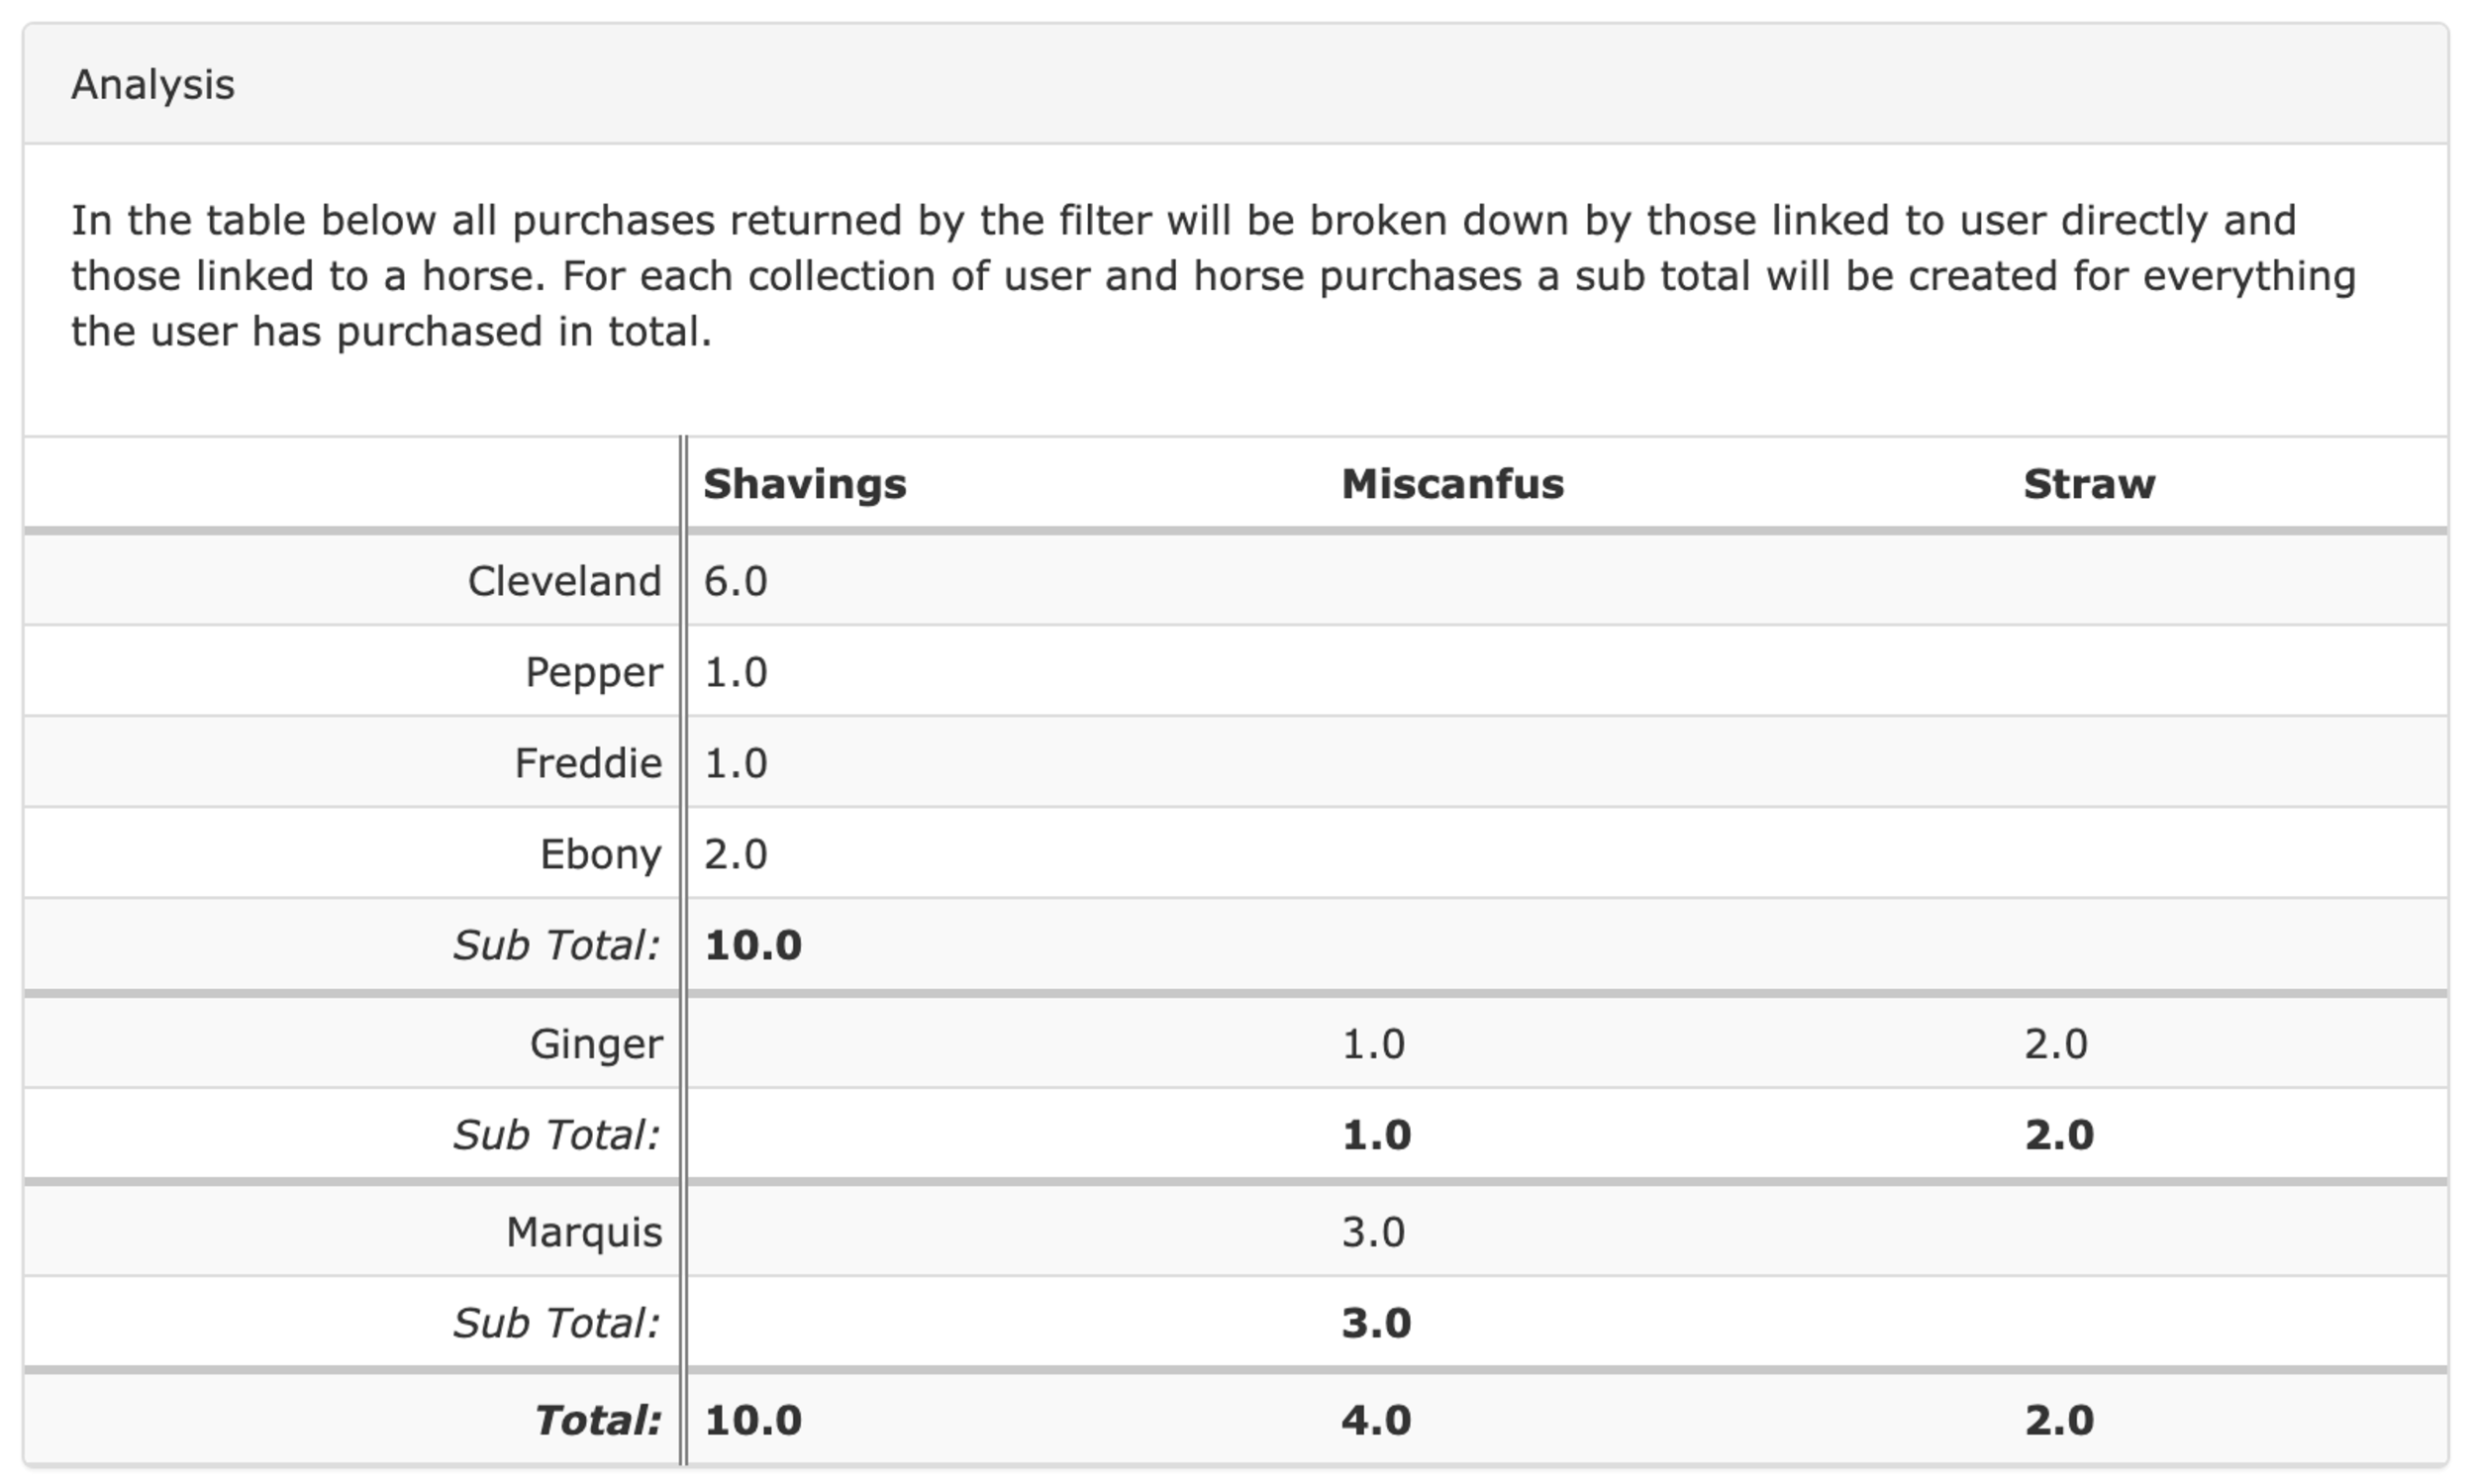
These reports are automatically shown to you at the bottom of Purchase History and Service History whenever you choose to filter by a service, product or group.
We’ve already seen yards use this data to support their business, but we’re always adding additional features to give you more insight into your yard. If you have an idea for a new report please get in touch.
A Required Service Option (previously known as a parent service) allows you to restrict a service you offer through the use of subscriptions.
Much like Subscription Dependant Pricing this can be used to tailor offerings to your different customers. Unlike Subscription Dependent Pricing this service allows you to completely hide non applicable services from customers rather than just changing their pricing.
This can be useful, for example, when you have different types of customers on your yard (e.g. DIY & Full Livery). For each type of customer you will have different services you want to offer to them and now with this feature you can reflect this in At The Yard.
This has been possible up to now with the existing parent service feature however it limited you to choosing one type of subscription to restrict your service to. Today we’re launching an expansion on this feature allowing multiple required service options to be added for each service making it overall more useful and more flexible.
For example previously you could have Exercise restricted to only those with a Full Livery subscription. This was fine until you want to make it available to other types of livery (e.g. part livery). With todays release you can now make exercise available to as many types of livery as you want while still restricting it to some.
Setup takes place in the Admin Services View. You can either create a new service or make changes to an existing one. Every service will have a new panel called ‘Required Service Options’, this replaces the existing drop down called ‘Parent Service’.
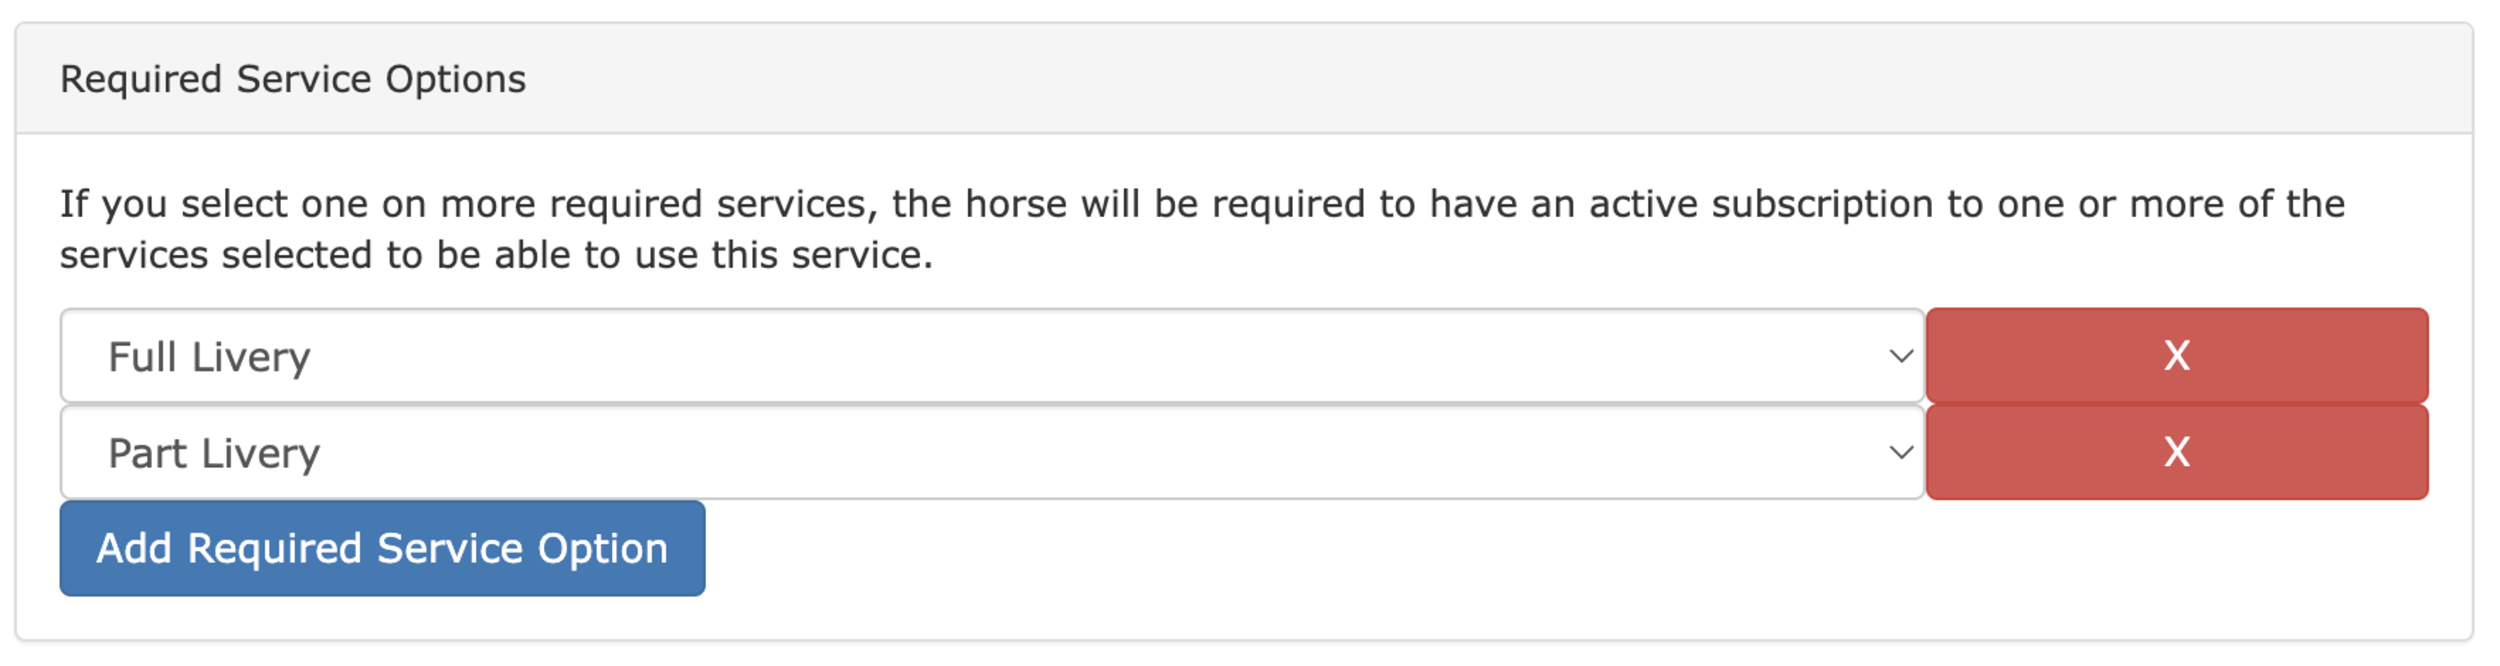
From here you can add as many option for required services as you wish. In this example we’re making the service available to those who have either Full Livery or DIY Livery.
Your customers will automatically see which services are available to their horse(s). This works even if their horses have different livery types or subscriptions.
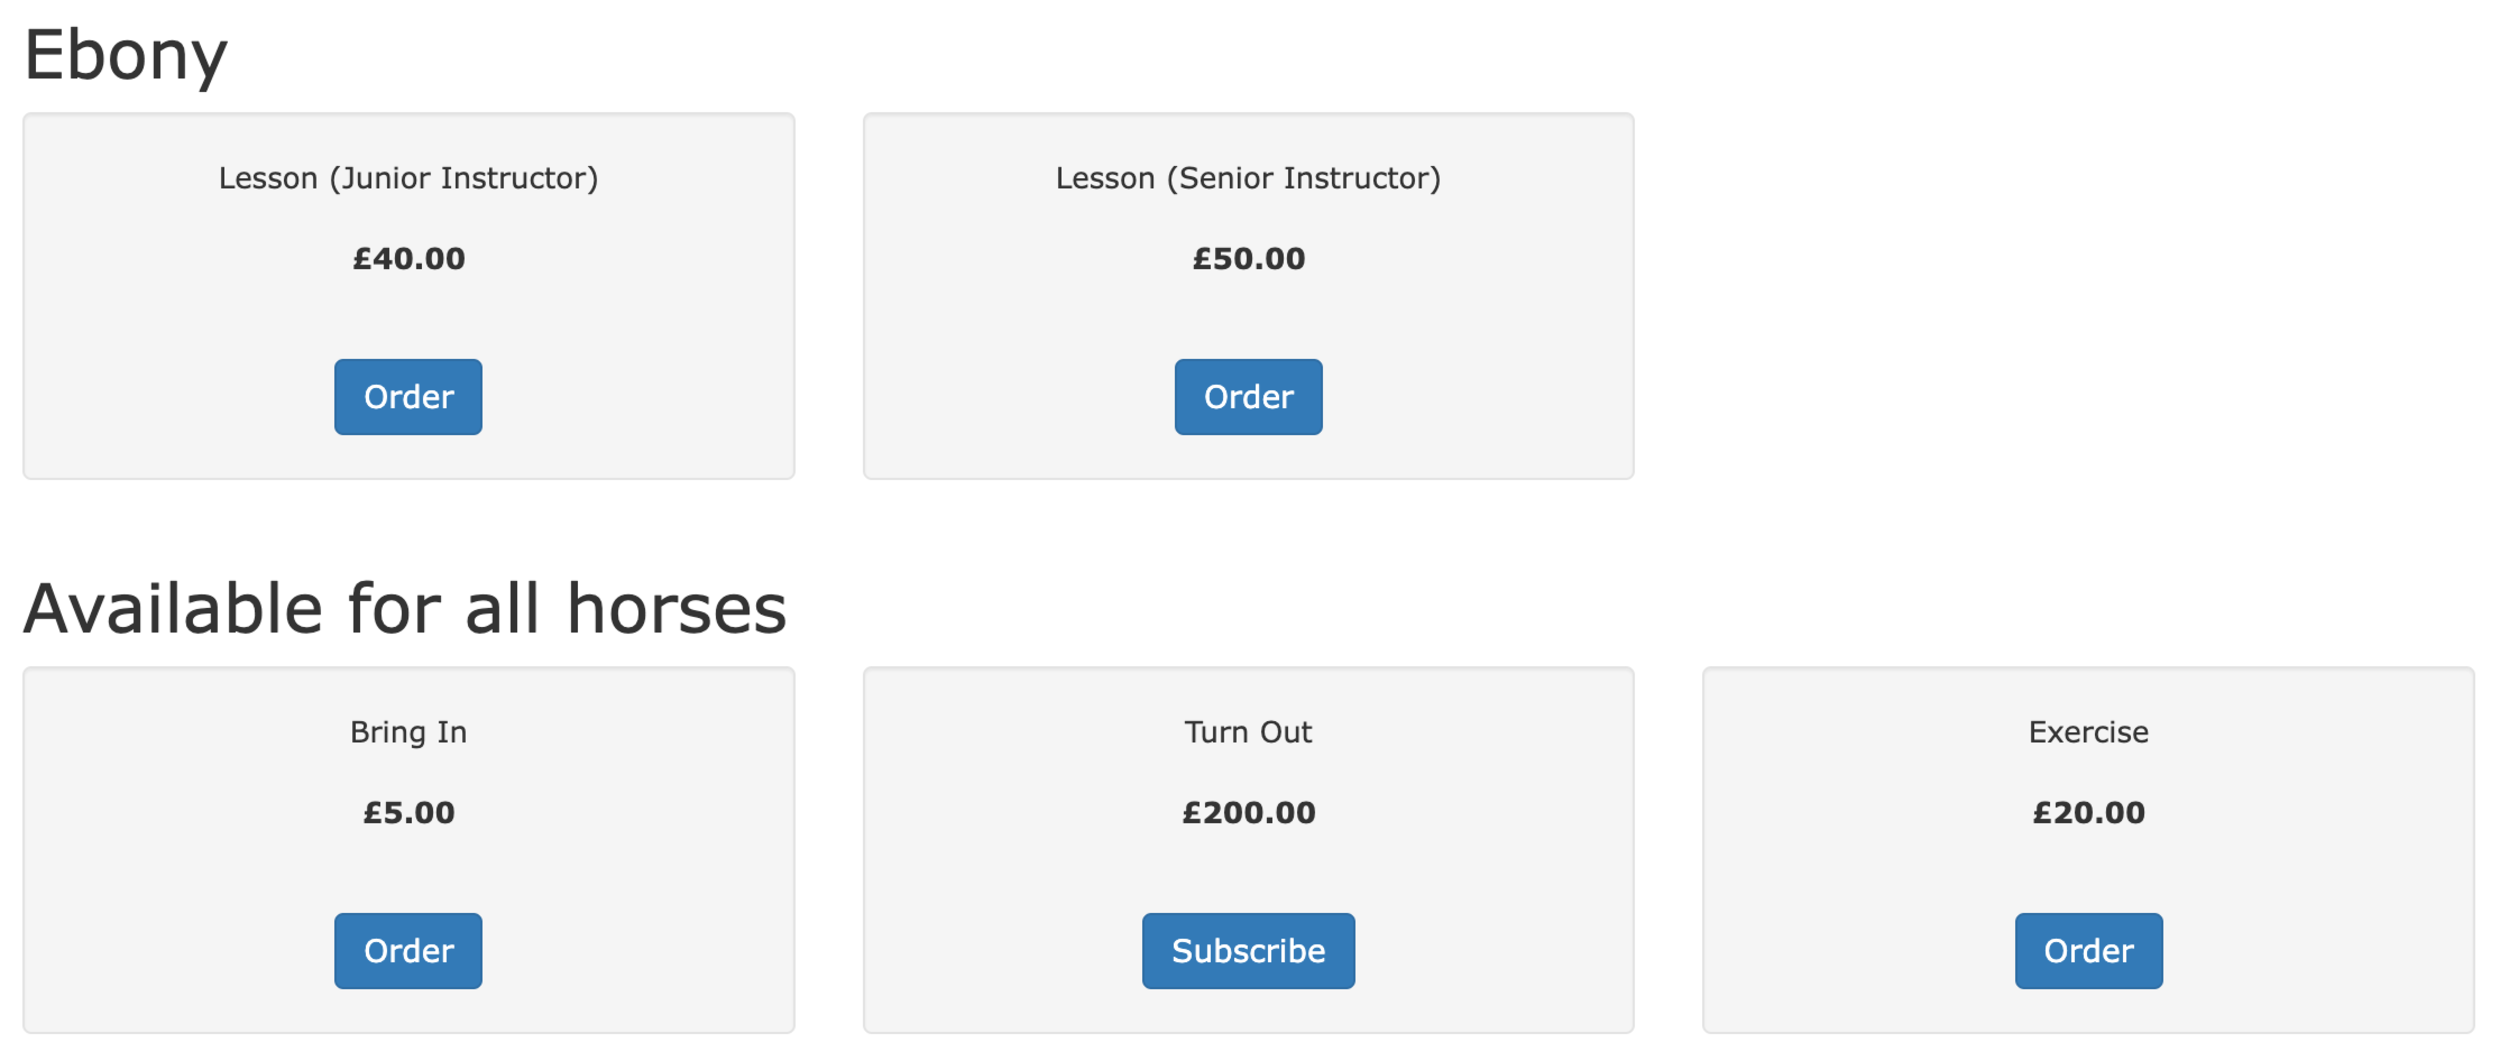
As you can see in the above example we have used this feature to make services available to some of the customers’ horses but not all of them.
Ebony (the horse) has a subscription to a Full Livery Package and so has access to book in lessons. Where as their others horses (shown under all horses) have access to all the other services your offer (along with Ebony).

We recently launched an update to the rota system in At The Yard that expanded functionality to let yards organise everything from staff rotas through to who’s turn it is to clear the paddock.
But what if you still need more?
Well that’s where integrations come in. Like At The Yard is with livery yards there are companies who’s focus is 100% on building the best software for creating and managing rotas.
Through integrations you can pick the best software available for rotas and bring that data into At The Yard where it can be easily displayed to your customers on the dashboard.
RotaCloud (https://rotacloud.com/) was the clear choice for us to support as the initial 3rd party rota System to integrate with At The Yard and we are excited to be announcing the launch today.
RotaCloud is based in the heart of Yorkshire, UK - and who better to tell you about themselves than themselves:
Having been on the receiving end of more than a few poorly managed work rotas themselves, RotaCloud’s co-founders David, Joel and James decided to come up with a solution. They pooled their skill-sets and got to work building an app that would let managers create and share rotas in minutes, regardless of their experience of rota management or technology. Cut to today, and RotaCloud is used by more than 3,000 businesses all over the world, saving managers time, helping businesses grow, and making life easier for their staff.
- RotaCloud - https://rotacloud.com/about/
Before you get started you’ll need to make sure you have:
To start the setup you need to go to the Integration Configuration page by clicking the button on the Admin ➔ Yard Config page. On this page you’ll see a section called RotaCloud Integration and a button you can press to enable the integration. Once you’ve clicked it you’ll see the following screen:
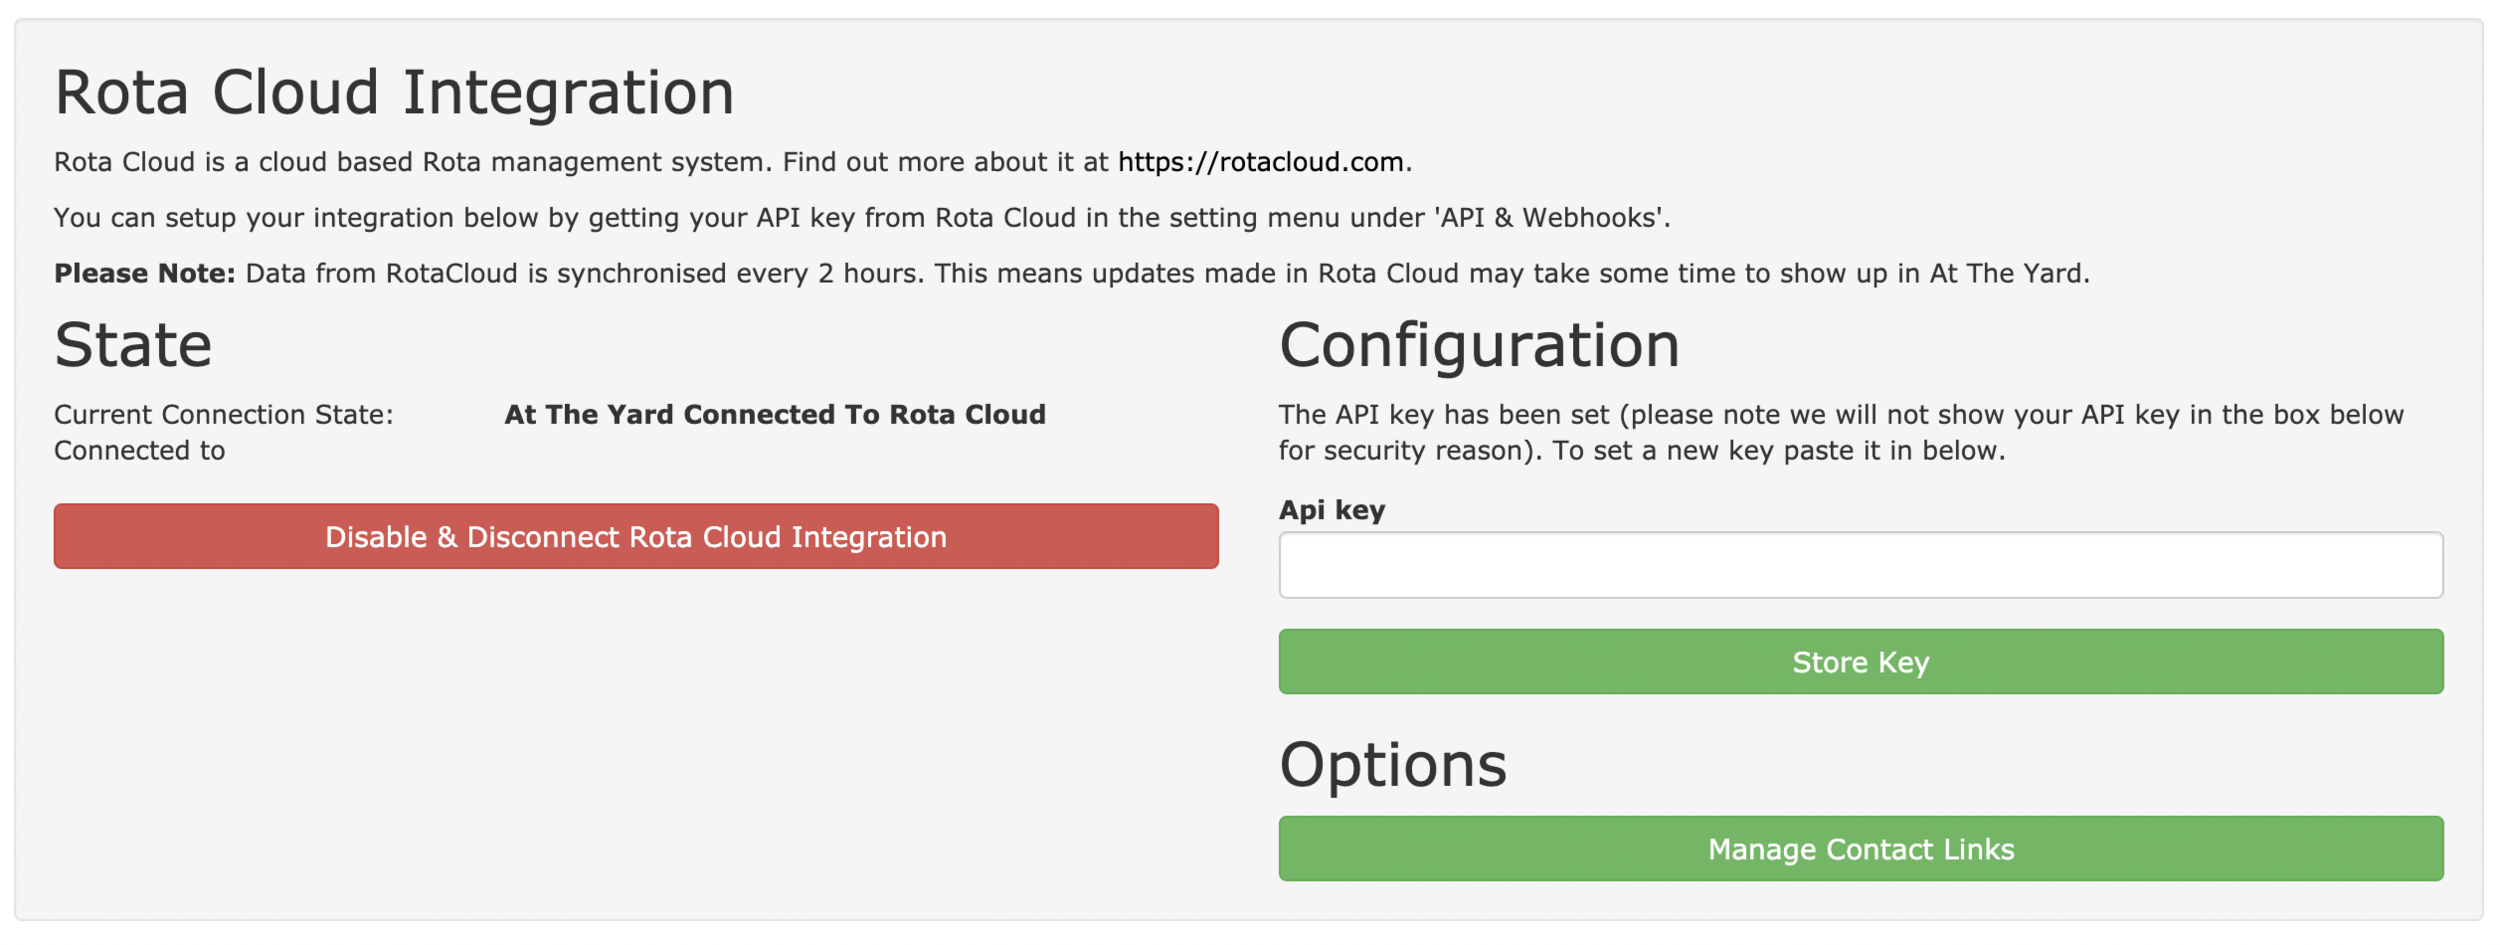
Next you’ll need to create an API key over in RotaCloud. You can do this by going into RotaCloud, go to the settings menu and go to the 'API & Webhooks' section. Create a new API key called At The Yard and copy and paste the API key into the box in At The Yard and click Store Key.
At The Yard and RotaCloud are now connected.
The next thing to do is link your staff users in At The Yard to your Employees in RotaCloud. To do this click on the Manage Contact Links button.
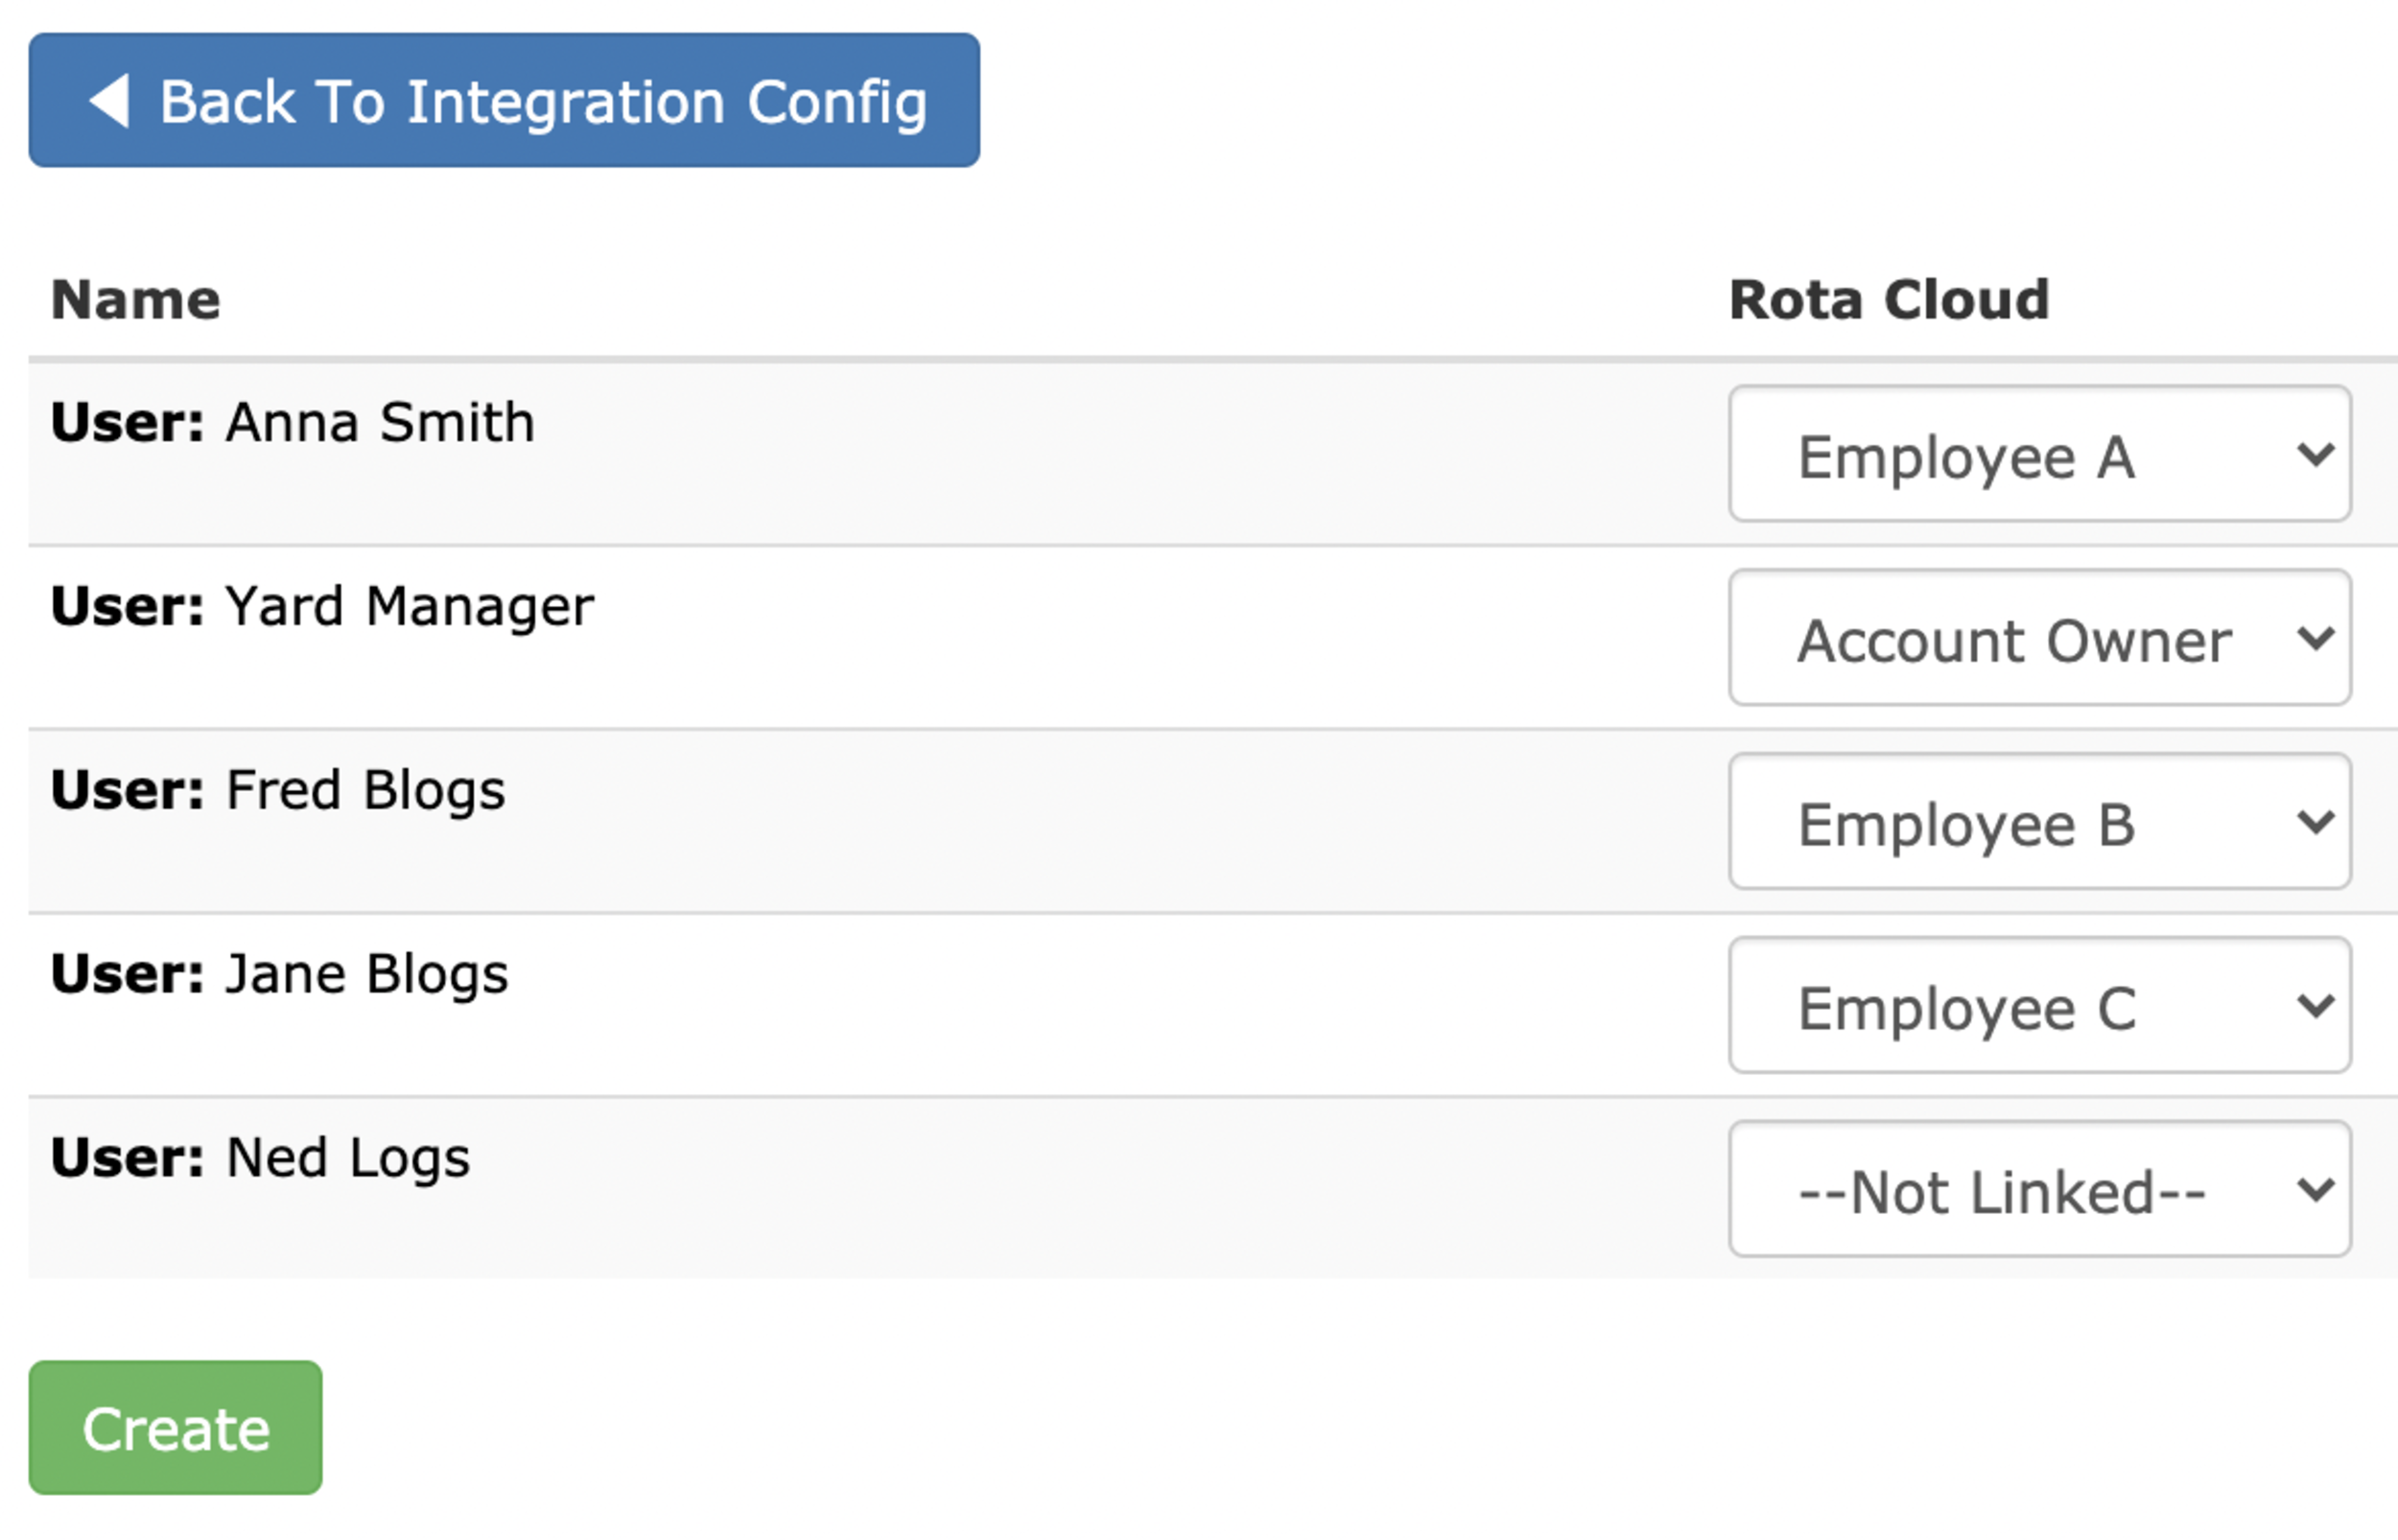
You’ll need to go to each staff member’s row and select the corresponding employee name from RotaCloud in the dropdown box. When you’re ready click on Create and it’ll setup all the links between the users and the employees in the two systems.
Your rotas will now be set to synchronise - this updates every 2 to 3 hours so you may have to wait a little while for the first synchronisation to take place. Once the first synchronisation takes place your rotas will show up under the Management ➔ Rota page. To let users see them you’ll need to go into the manage section for the rota and check the Publish checkbox (you may also want to check the Show in Forecast checkbox depending on your needs).
Congratulations! RotaCloud is now setup and syncing data with At The Yard and you can start benefiting from both systems working as one.