

Blog
Taking on a new livery client should be one of the nicest parts of running a yard – not a fiddly form-filling exercise. We've improved how you add a new user at every stage, so you can get your new livery set up in record time.
We've combined what used to be several separate stages into two simple screens.
Say a new livery arrives with three horses. Before this update, getting them set up meant:
Four stops, with the last one repeated for every horse the client brings to your yard. Now it's two screens.
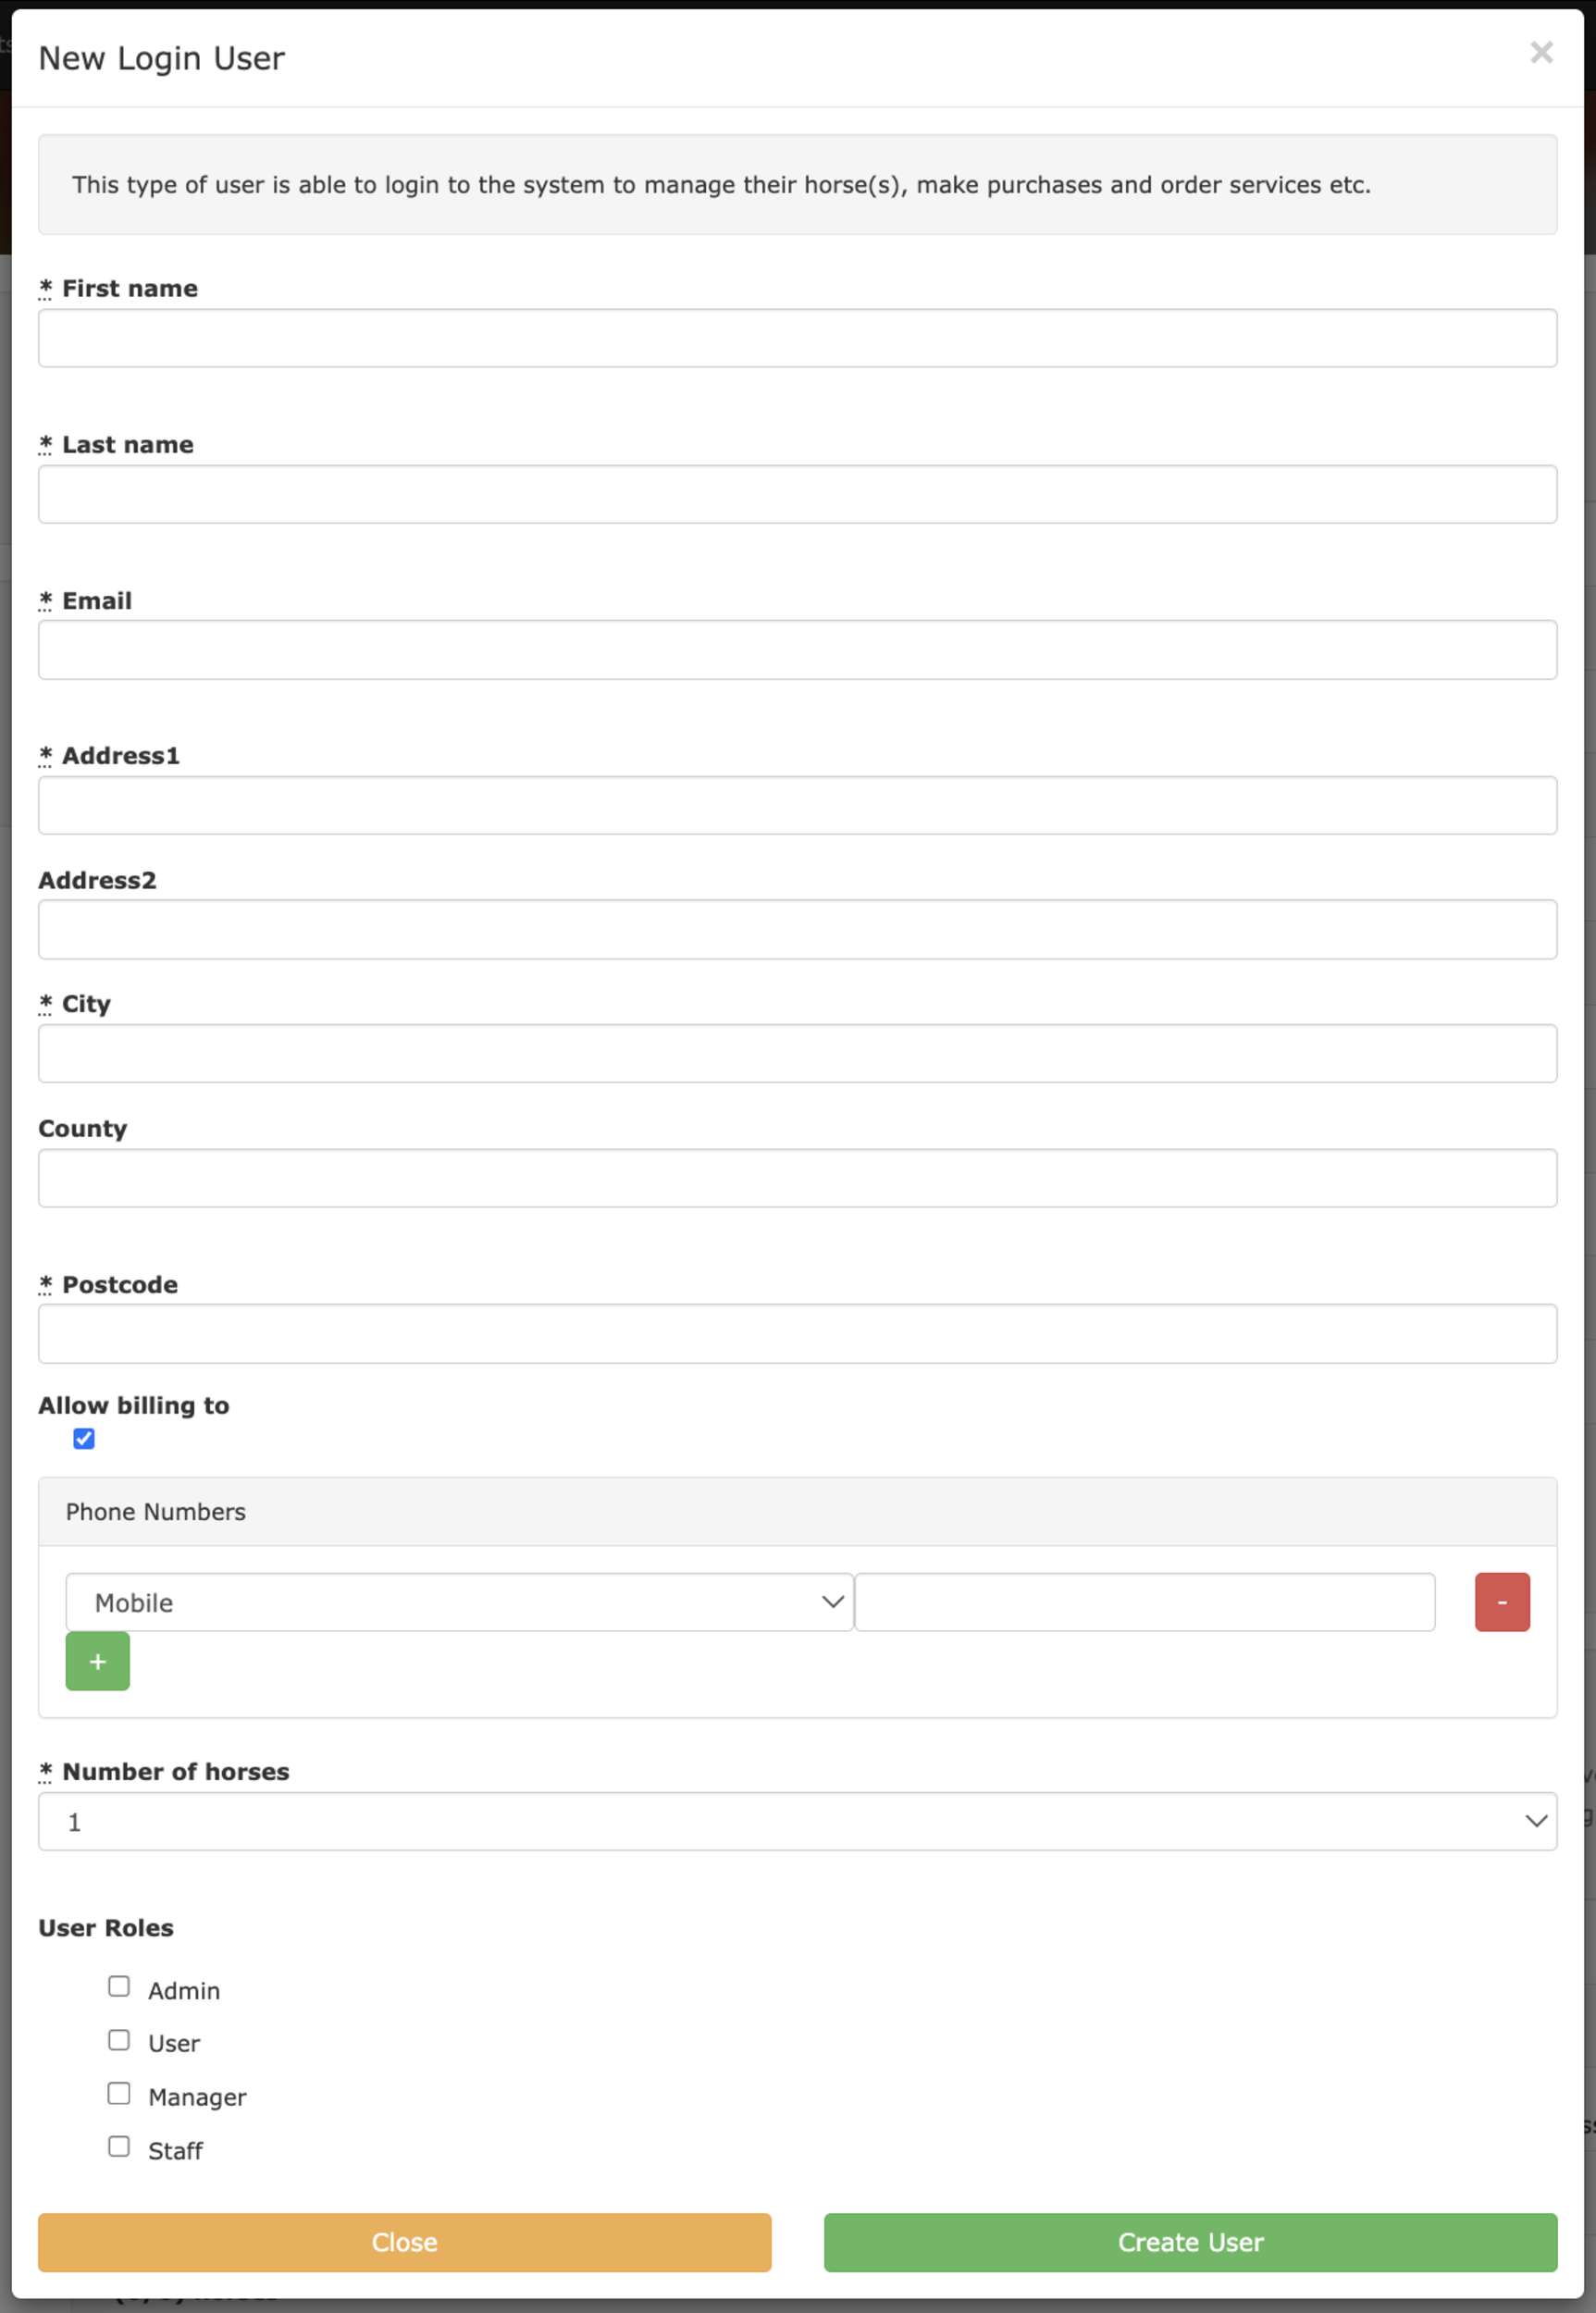
Once you're up and running with At The Yard, your most common type of user will be a standard 'Logon User'. These users can make the most of the system, logging in and managing their account directly.
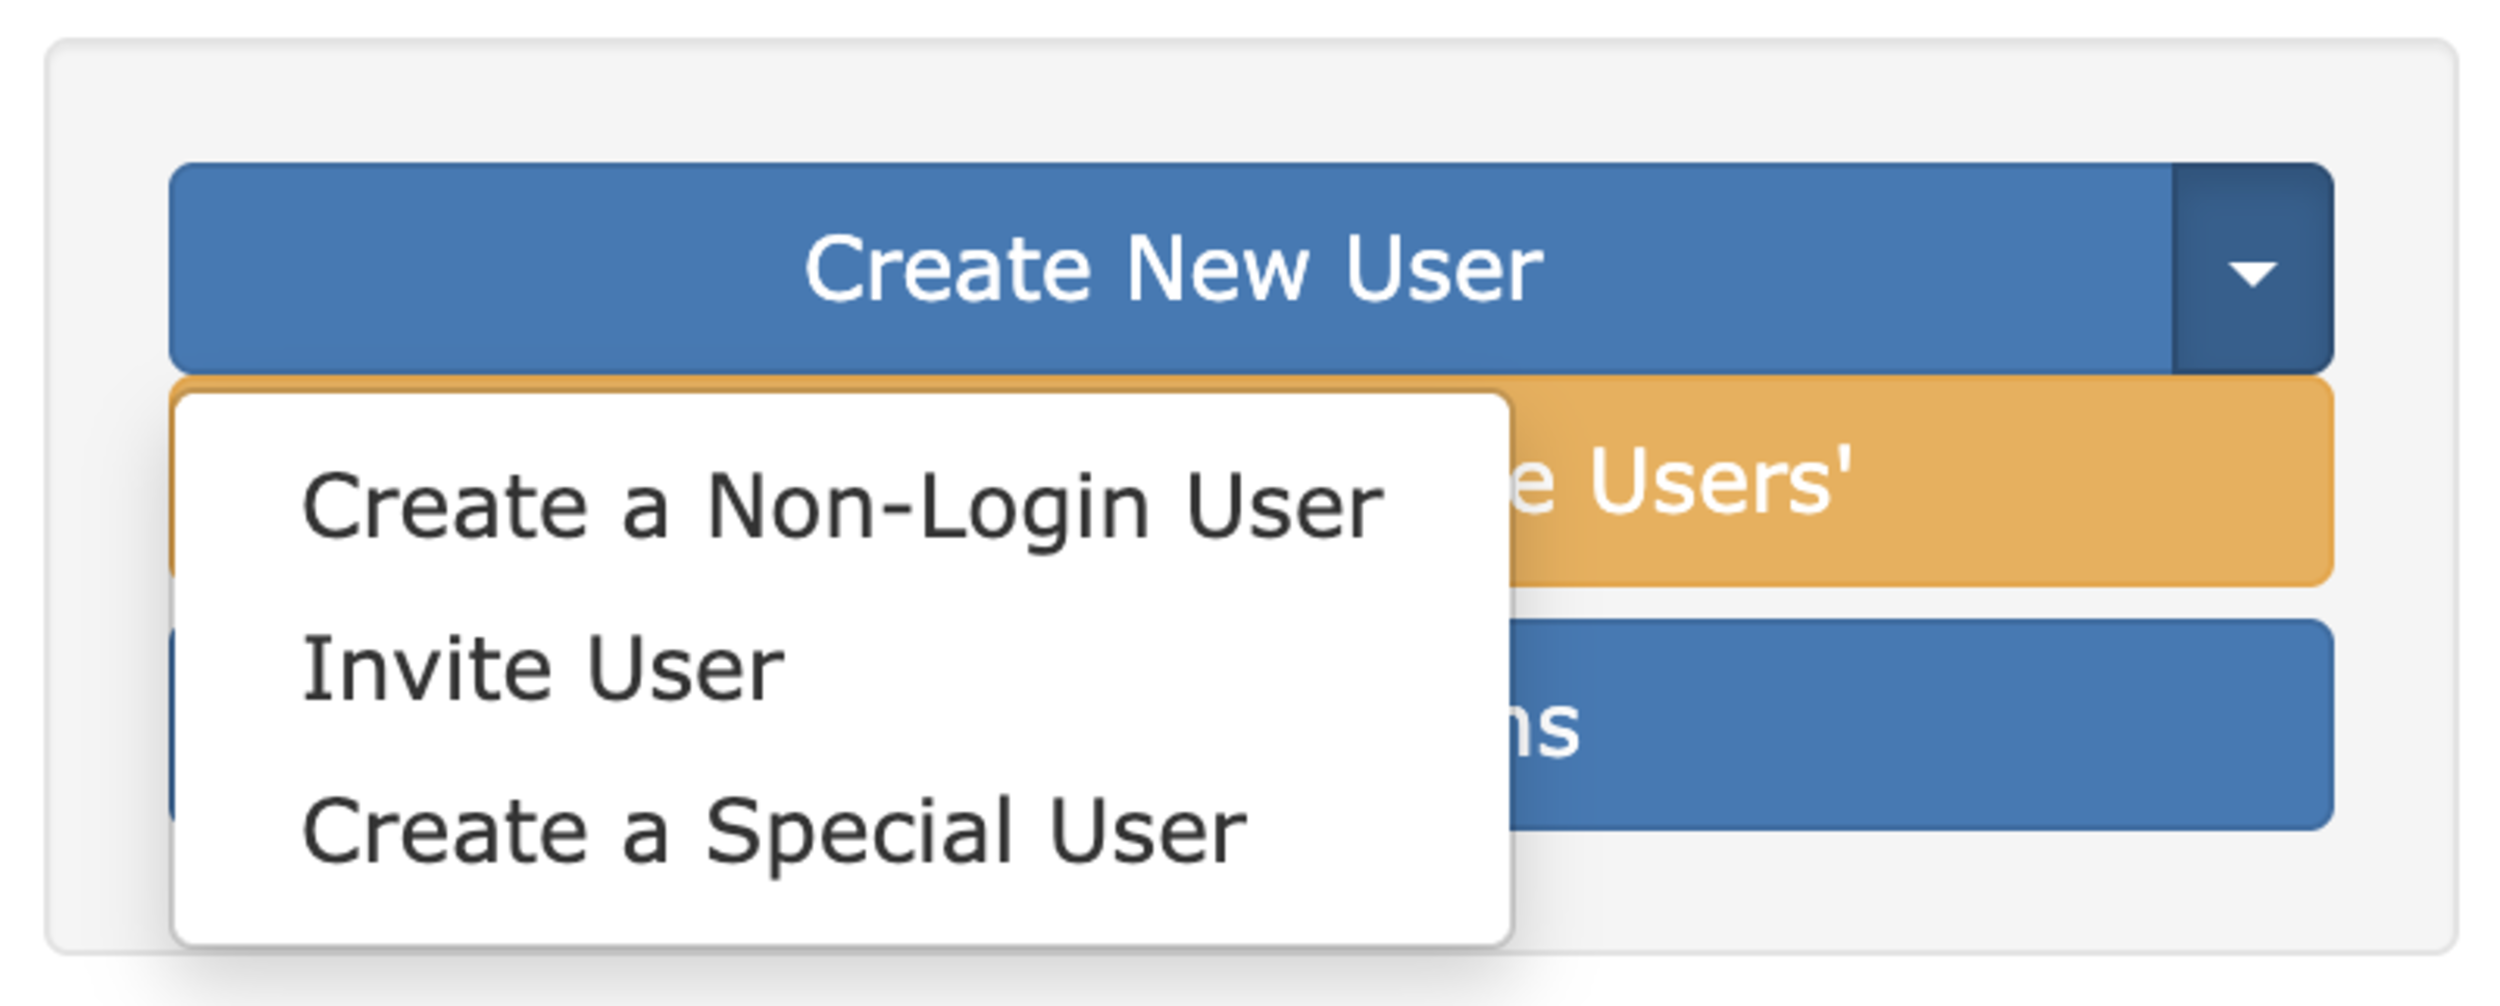
So we've made it the default. Click the 'Create New User' button and there's no user type selection screen to work through – you land on the form itself.
Nothing has been taken away, though. The less common options are tucked neatly into a drop-down right next to the default button.
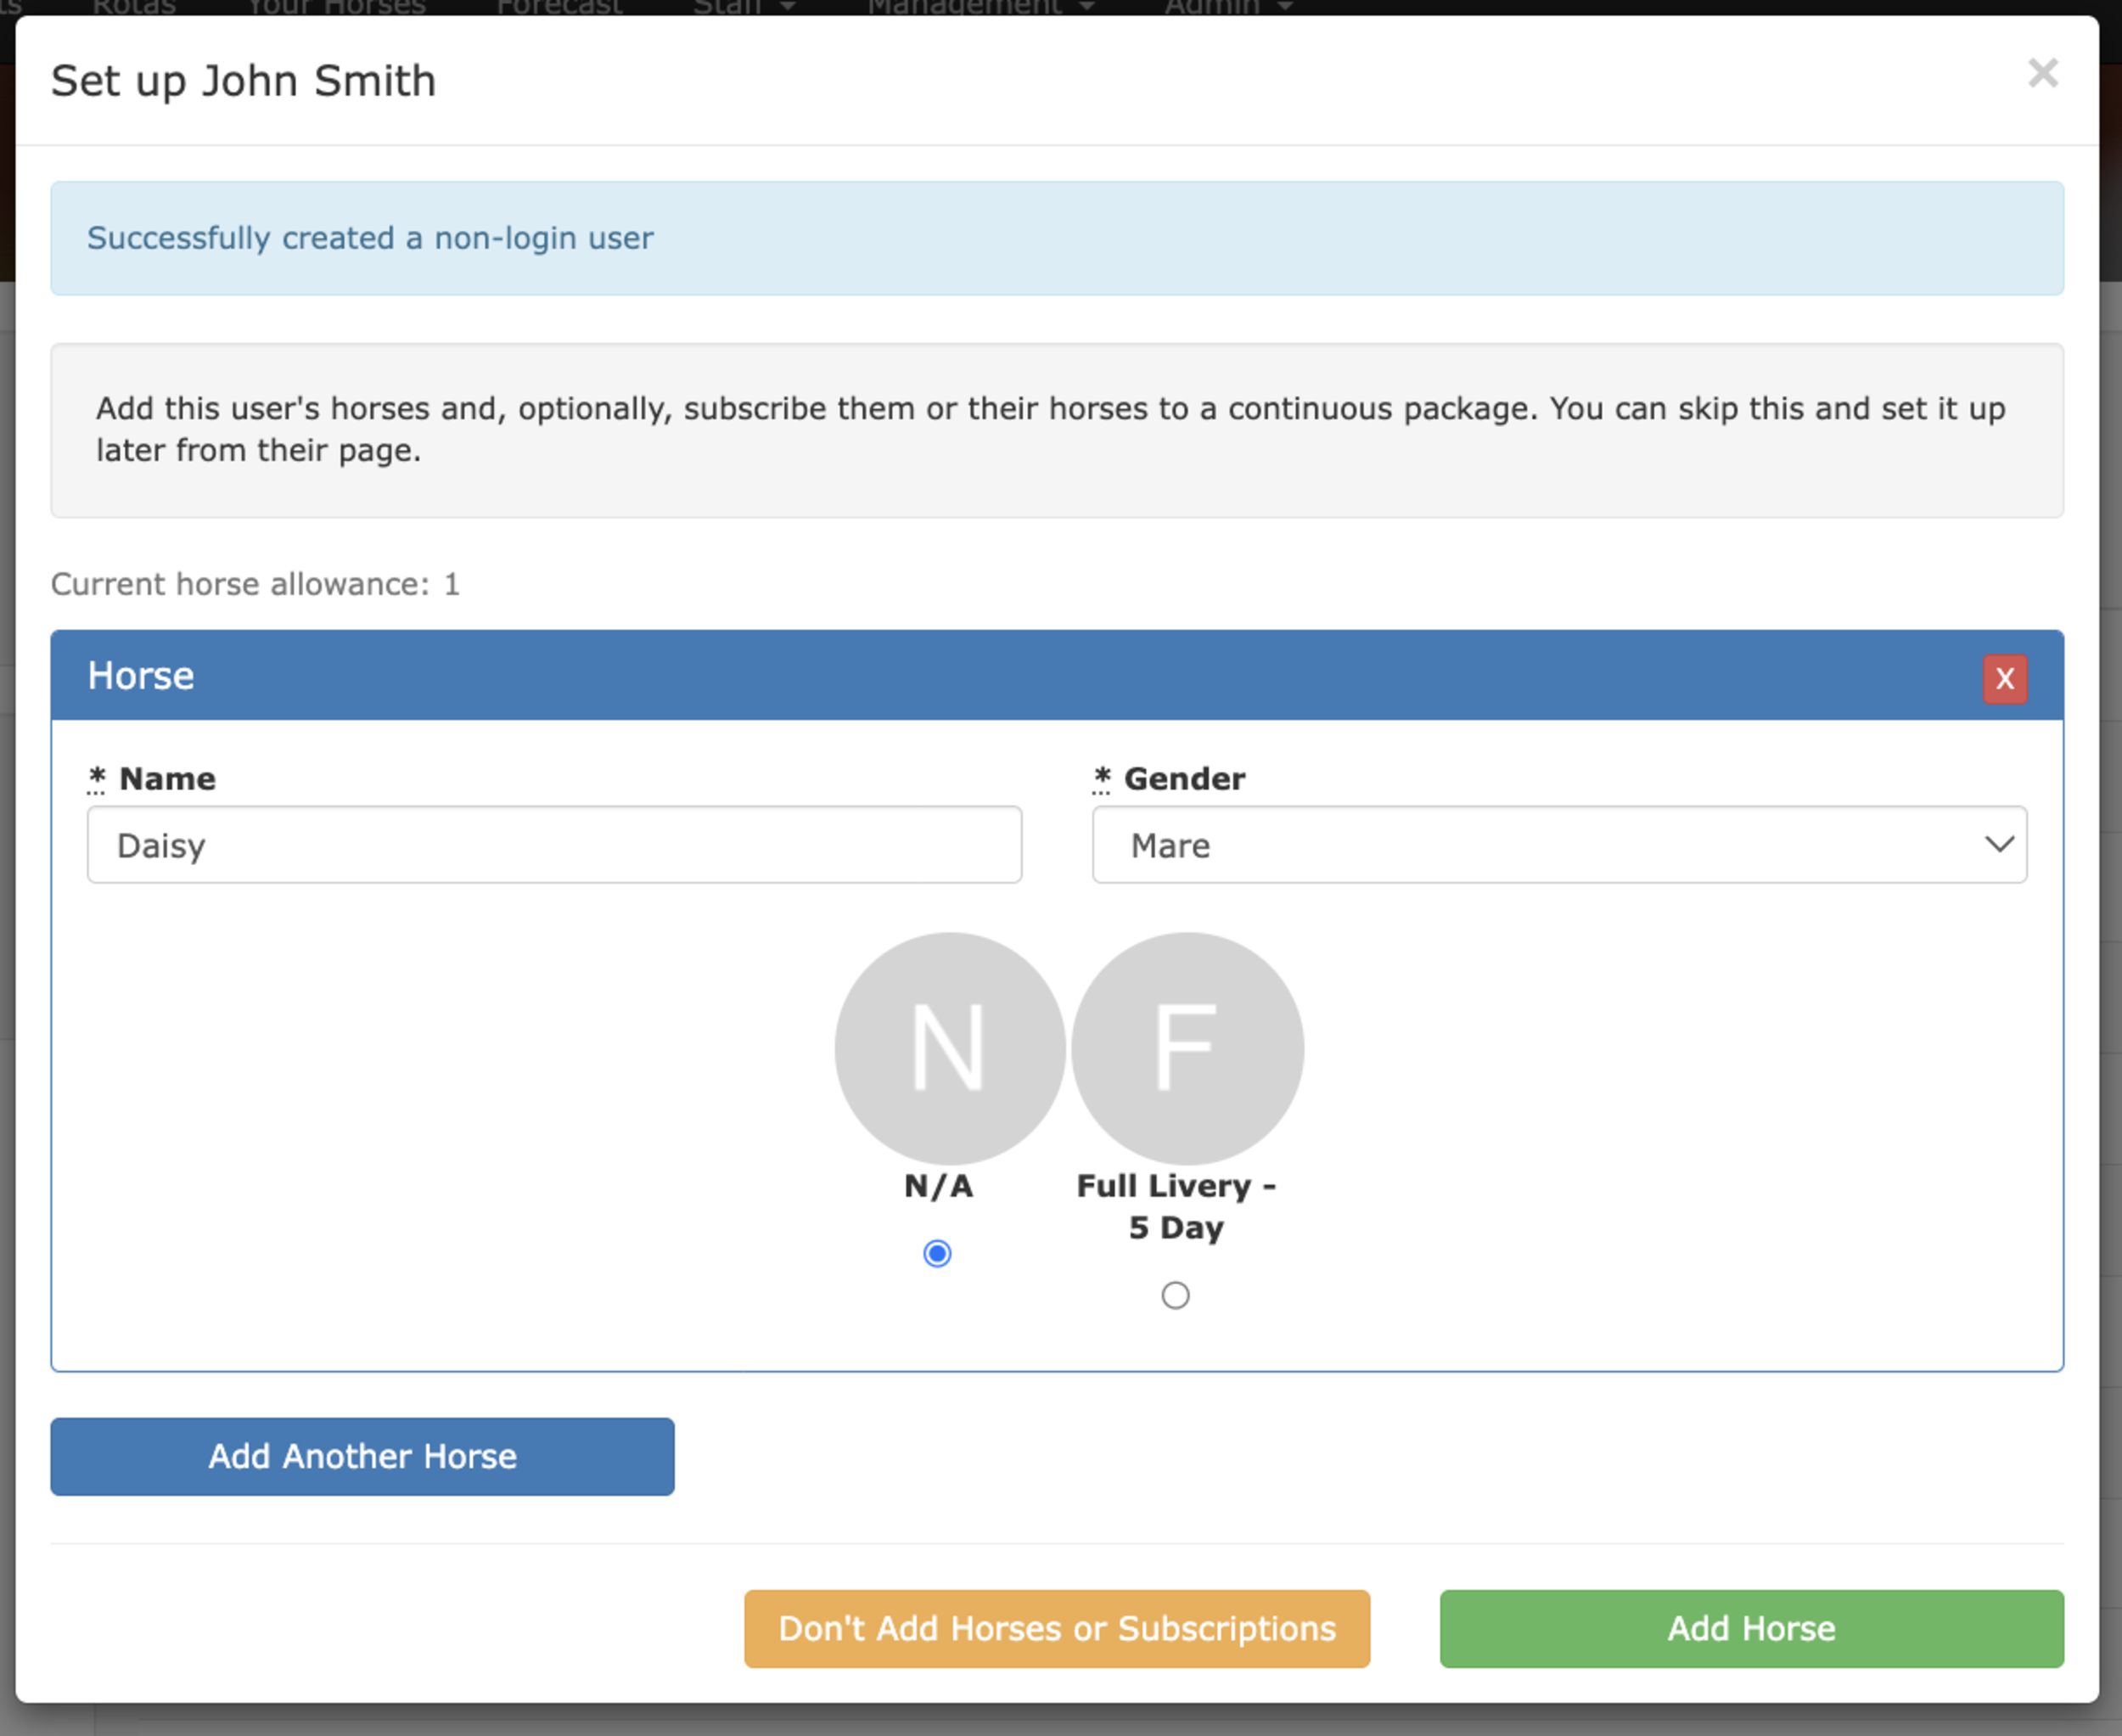
As soon as you've created your new user, you're taken into the next step, where both jobs happen on the same screen: - Add their horses – as many as you need, with a name and gender for each. - Subscribe them to their livery packages – choose the package right there alongside the horses you're adding.
That's the trip to Subscriptions – and the repeat visit for every single horse – gone entirely.
Prefer to sort packages out later? Skip the step and add them from the Subscriptions page exactly as you always have.
Taking on a client used to mean bouncing between several screens and repeating yourself for every horse. Now it's a single, guided path. Less clicking, fewer mistakes and a smoother welcome for every new face at the yard.
It's live now – you'll see it the next time you add a user. As always, if you have questions or feedback, we'd love to hear from you.
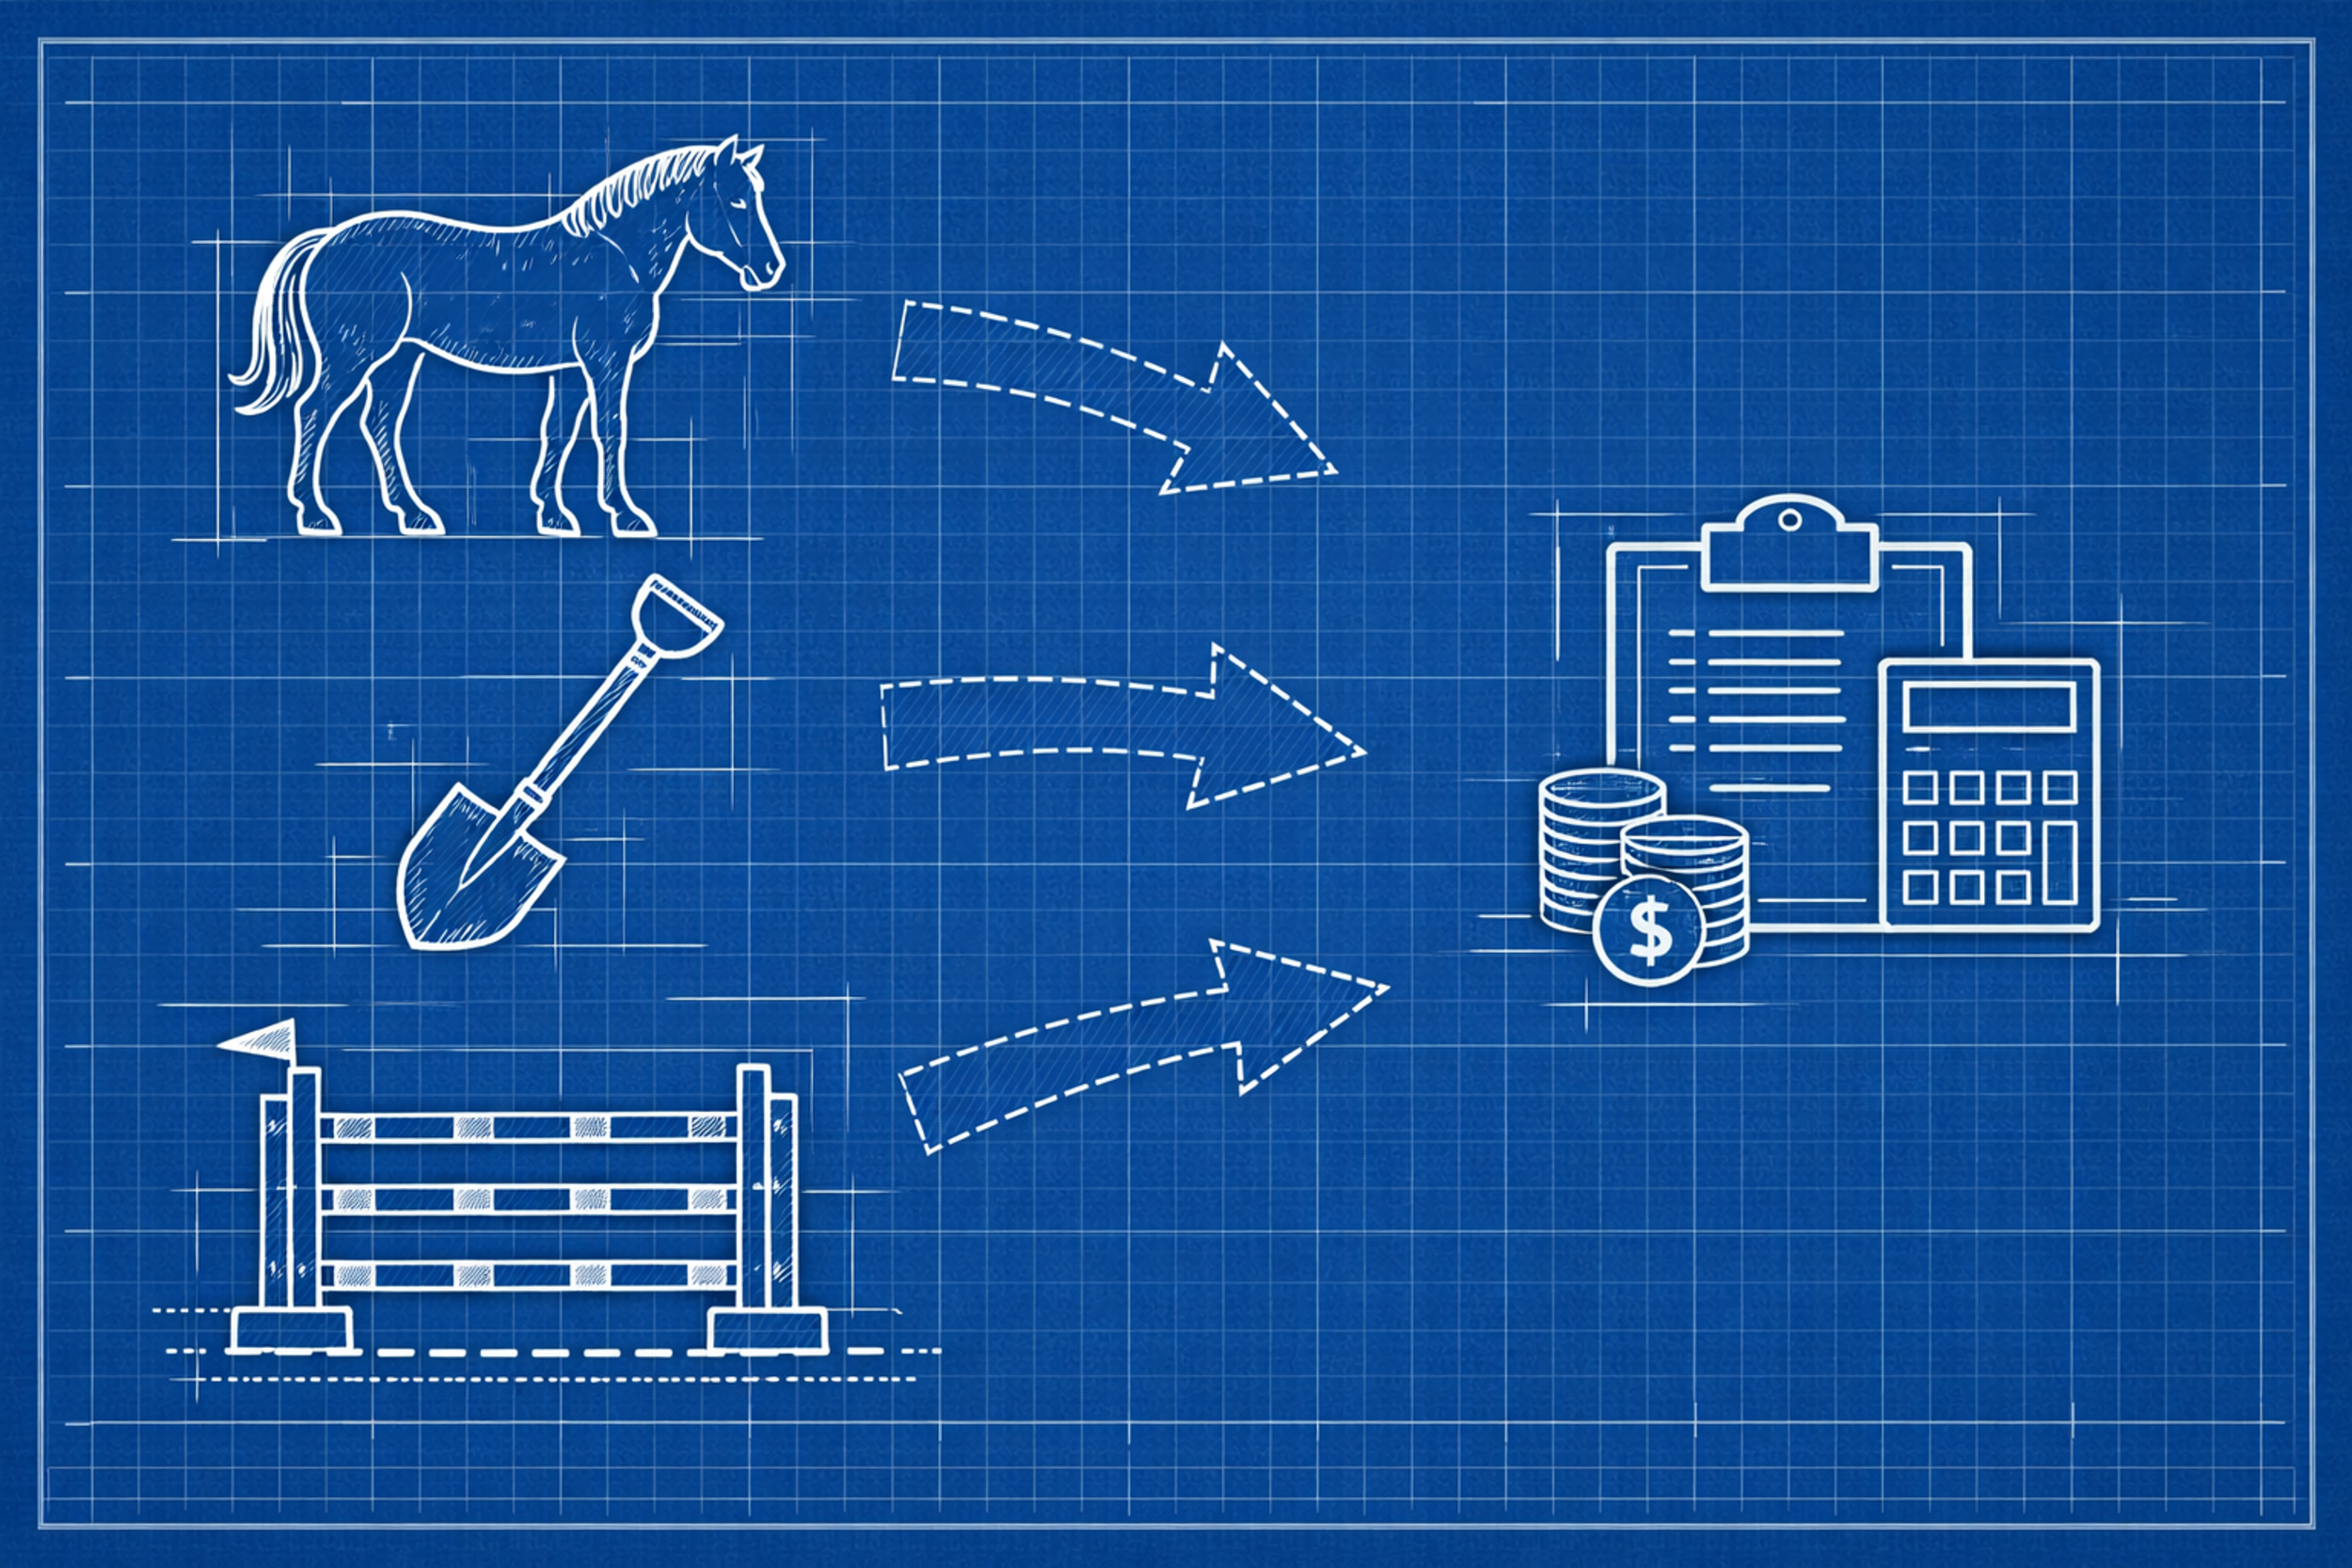
We're excited to announce a powerful new addition to our Xero integration: Tracking Categories Synchronisation. This feature bridges the gap between how you organise your business in At The Yard and how you report on it in Xero, giving you more granular financial insights without any additional manual work.
For those unfamiliar, Xero Tracking Categories are a powerful reporting tool that allows you to categorise transactions by dimensions such as department, location, cost centre, or project. Unlike account codes which determine what a transaction is, tracking categories help you understand where or why revenue was generated. You can read more over at Xero.
For example, a livery yard might want to track income by:
Previously, this level of reporting required manual data entry in Xero after invoices were synced to add the tracking category. No longer.
Many businesses using At The Yard already organise their products, services, and facilities into categories for internal management purposes. Perhaps you categorise your services by discipline (dressage, jumping, hacking) or your products by type (feed, bedding, equipment).
The challenge was that this organisational structure didn't carry through to your accounting. When invoices synced to Xero, all that context was lost. To get meaningful reports, you'd need to manually tag each invoice line item once it's in Xero - tedious work that often didn't get done.
Our new Tracking Categories feature allows you to map your At The Yard categories to Xero tracking options, ensuring every invoice line item arrives in Xero with the correct tracking information attached.
First, you'll need to set up categories in At The Yard to group your products, services, or facilities:
Click "New Category" and give it a meaningful name. We recommend using the helpful naming convention as follows:
Tracking Category: TRACKING CATEGORY NAME : TRACKING OPTION NAME
So for example you might have the following:
Add your Product, Service or Facility to the category you want to receive the Tracking Category Option when they're synced to Xero. (You have to create a category for each item type).
Save your category
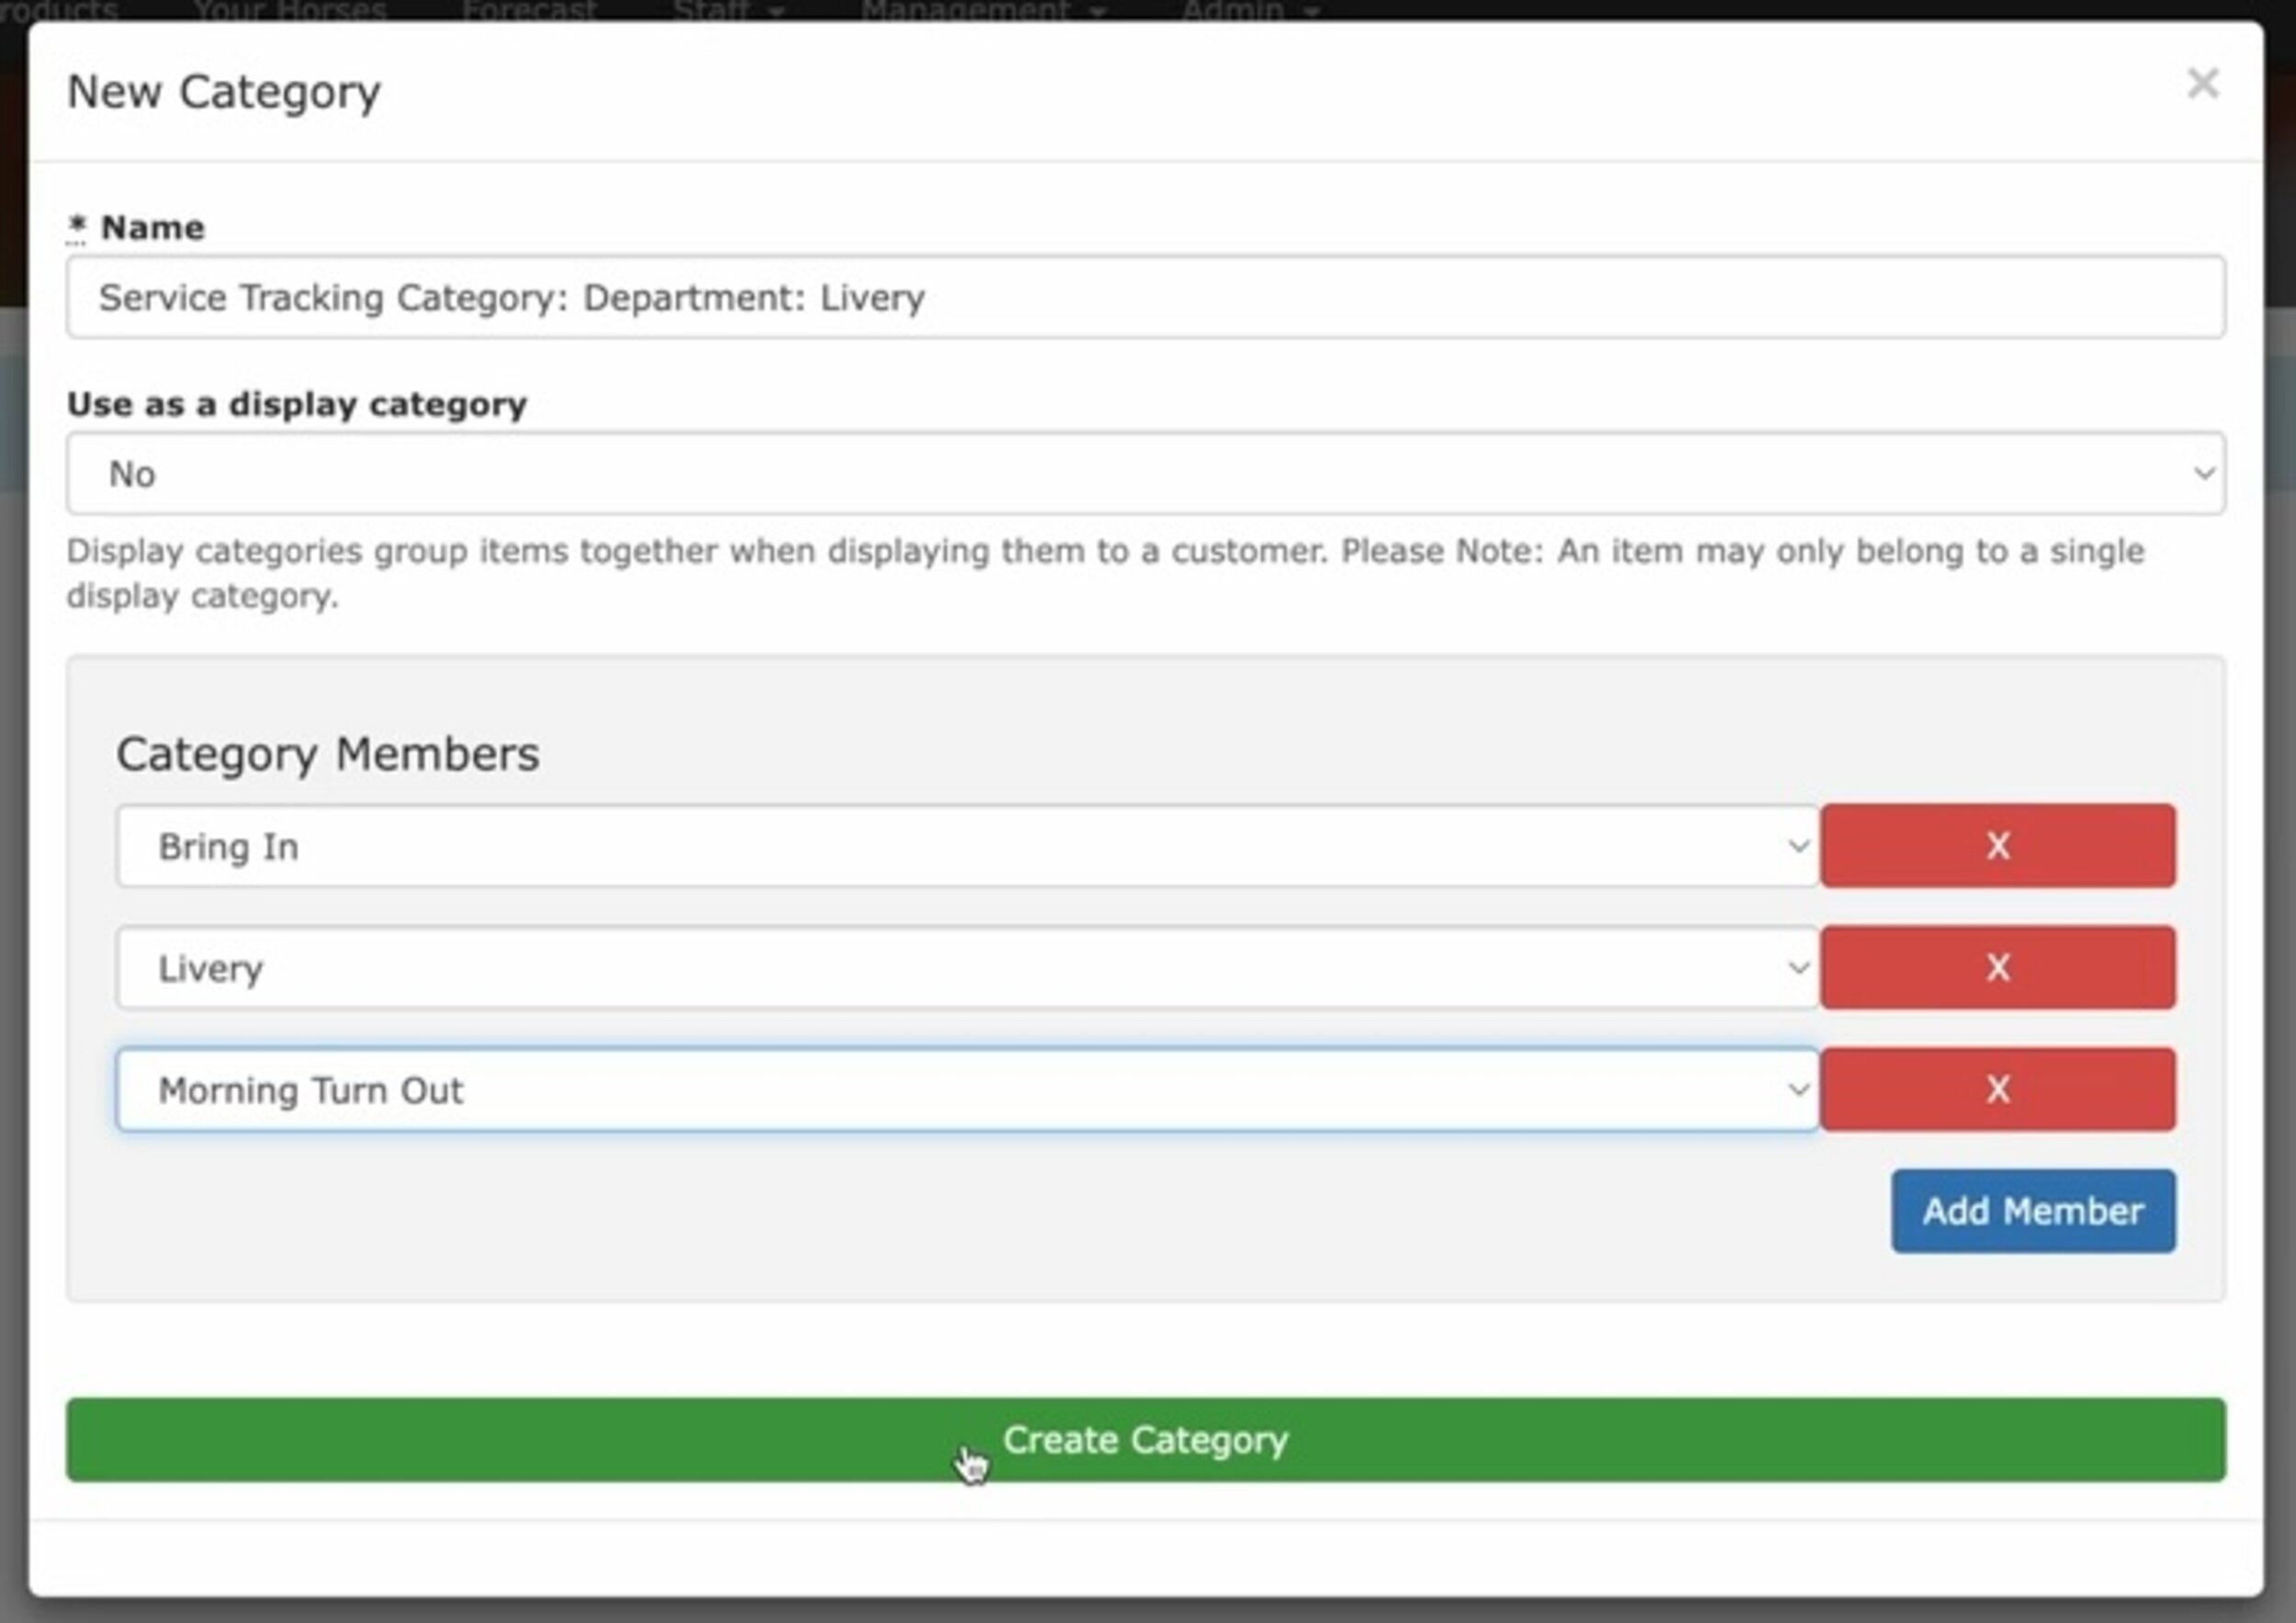
You can create as many categories as you need to reflect how you want to analyse your revenue in Xero.

If you haven't already, set up your tracking categories in Xero. This is done within Xero itself under Settings > Tracking Categories.
Once your categories exist in both systems: 1. Navigate to your Xero integration settings in At The Yard 2. Click on "Tracking Categories" 3. For each At The Yard category, select the corresponding Xero tracking category and option
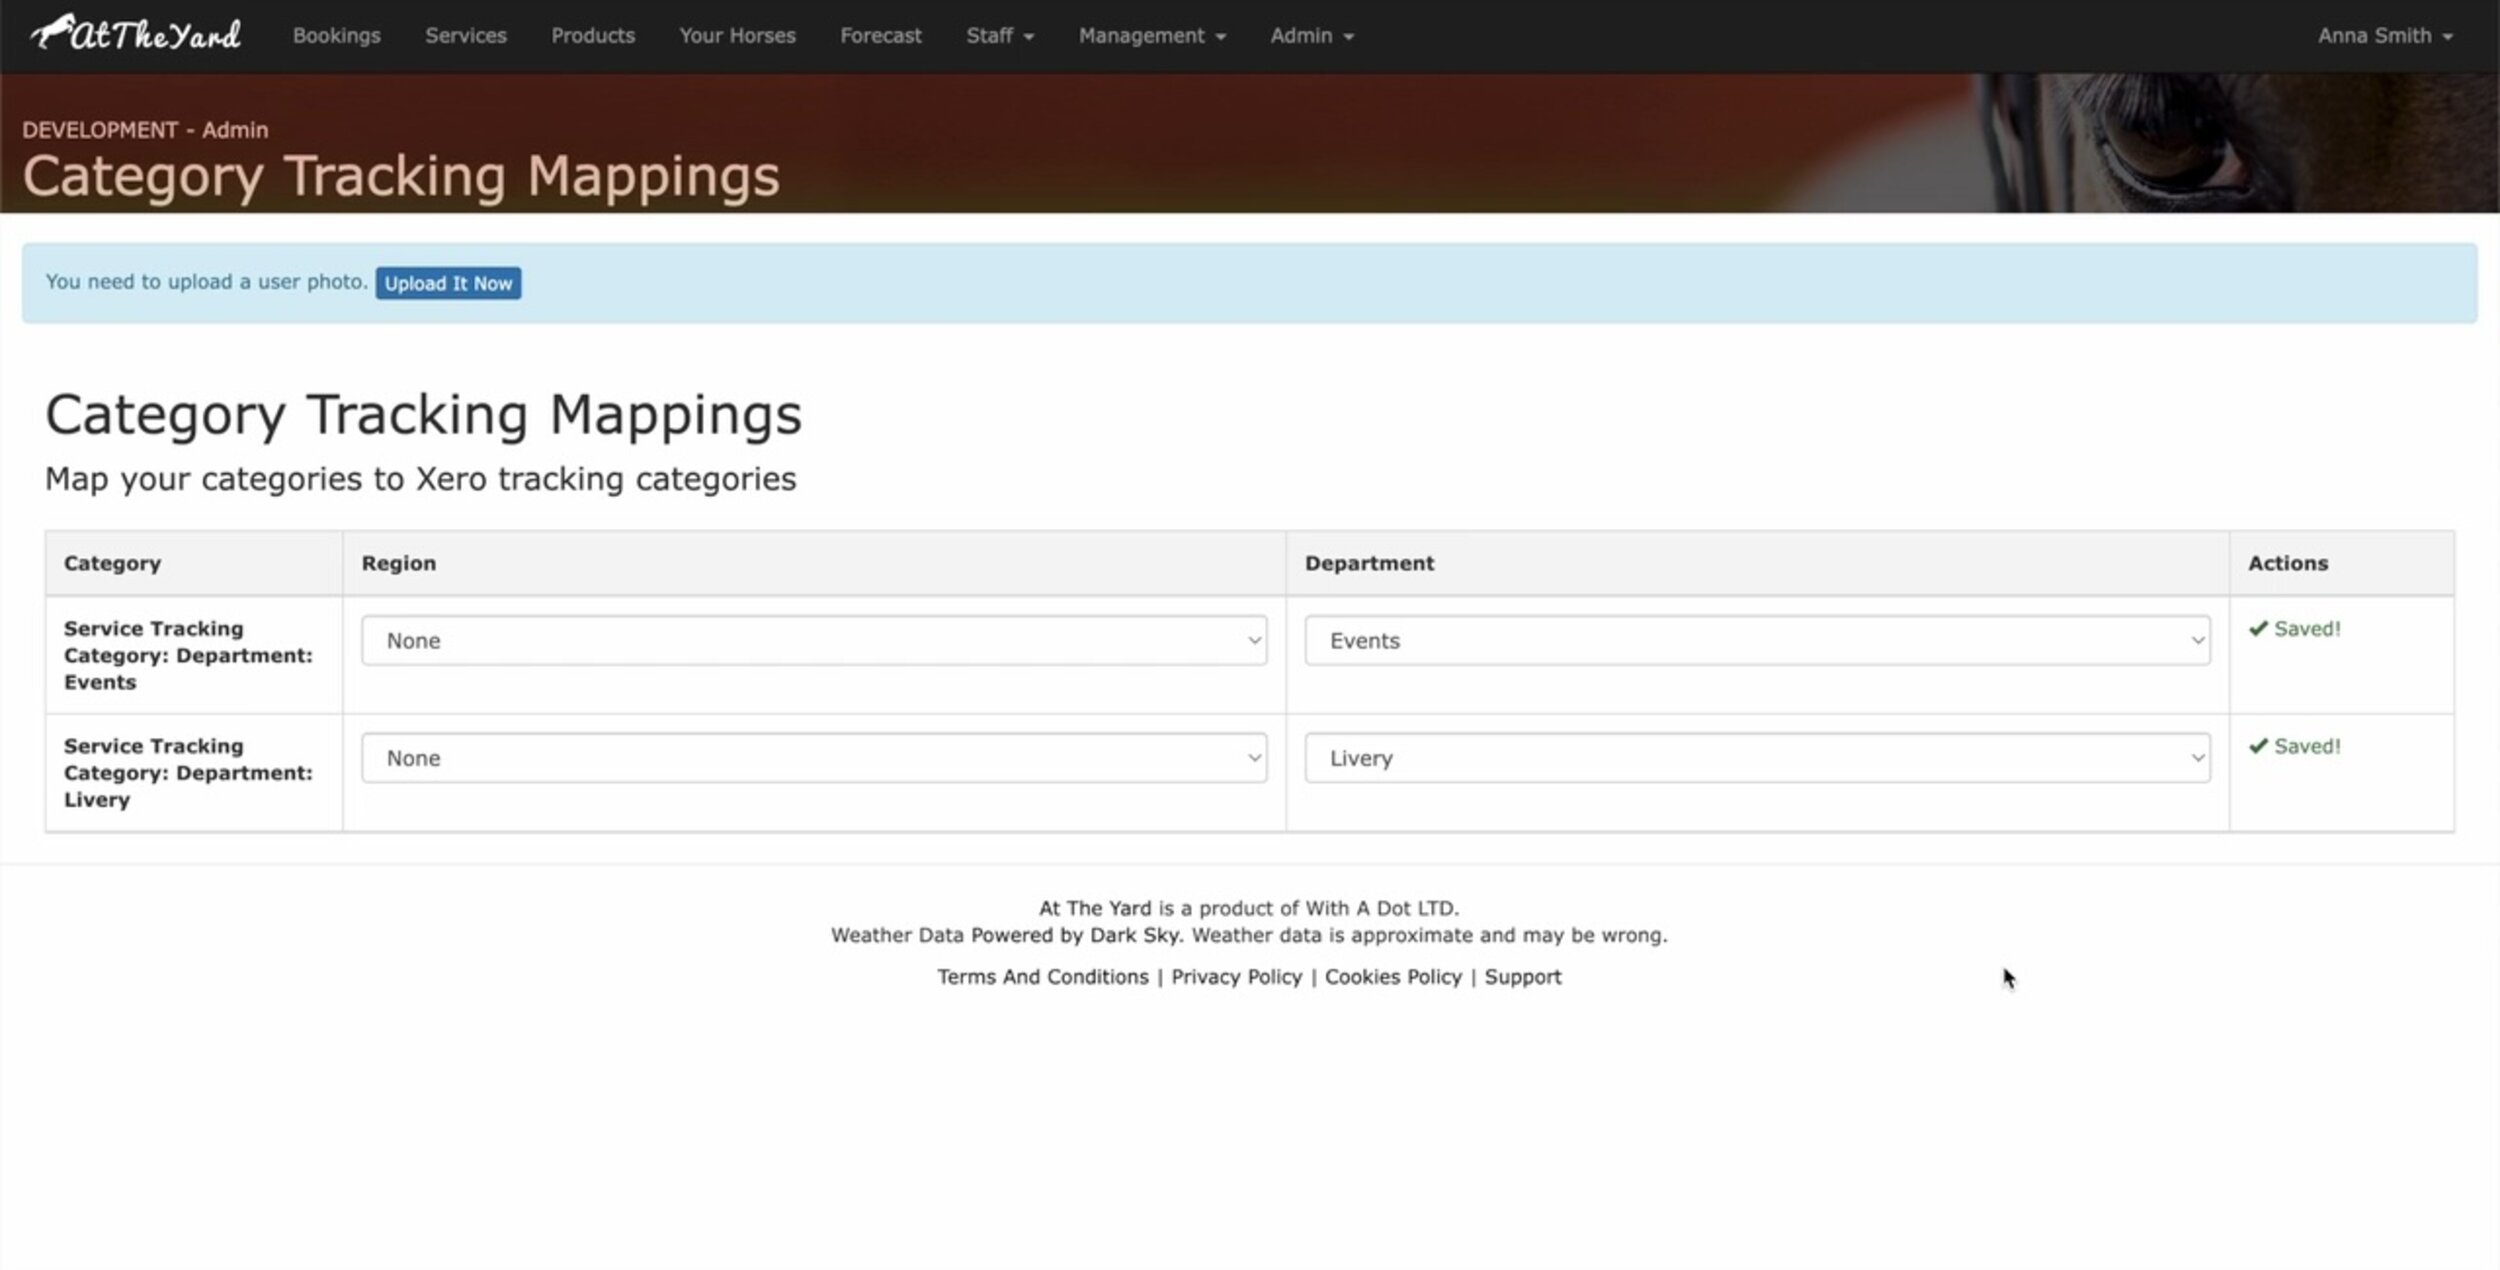
Once configured, the system handles everything automatically. When an invoice containing a categorised product, service, or facility syncs to Xero, the appropriate tracking data is attached to each line item.
There is a requirement to ensure each item only appears in a single tracking option for each tracking category.
To understand this lets look at an example with two Tracking Categories each with multiple Tracking options.
┌─────────────────────────────────────────────────────────────────────┐
│                     XERO TRACKING CATEGORIES                        │
├─────────────────────────────────┬───────────────────────────────────┤
│      Tracking Category:         │      Tracking Category:           │
│          LOCATION               │        BUSINESS AREA              │
├─────────────────────────────────┼───────────────────────────────────┤
│   ┌─────────────────────┐       │   ┌─────────────────────┐         │
│   │     Main Yard       │       │   │       Livery        │         │
│   └─────────────────────┘       │   └─────────────────────┘         │
│   ┌─────────────────────┐       │   ┌─────────────────────┐         │
│   │      DIY Yard       │       │   │      Lessons        │         │
│   └─────────────────────┘       │   └─────────────────────┘         │
│                                 │   ┌─────────────────────┐         │
│                                 │   │       Events        │         │
│                                 │   └─────────────────────┘         │
└─────────────────────────────────┴───────────────────────────────────┘

✓ VALID: "Dressage Lesson" assigned to ONE option per category

     ┌───────────────────┐
     │  Dressage Lesson  │
     └─────────┬─────────┘
               │
     ┌─────────┴─────────┐
     ▼                   ▼
┌─────────┐        ┌──────────┐
│Main Yard│        │ Lessons  │
└─────────┘        └──────────┘
(Location)        (Business Area)


✗ INVALID: Item in multiple options of the SAME tracking category

     ┌───────────────────┐
     │  Dressage Lesson  │
     └─────────┬─────────┘
               │
     ┌─────────┴─────────┐
     ▼                   ▼
┌─────────┐        ┌──────────┐
│Main Yard│        │ DIY Yard │   ← Both are "Location" options!
└─────────┘        └──────────┘
(Location)          (Location)
When multiple At The Yard categories are mapped to the same Xero tracking category, each item (product, service, or facility) can only belong to one of those categories. For example, if you have categories for "Dressage" and "Showjumping" both mapped to a "Discipline" tracking category in Xero, a lesson service cannot be in both—it must belong to one or the other. This ensures each invoice line item receives a single, unambiguous tracking assignment. At The Yard will alert you should this happen in error.
Automated accuracy – Eliminate manual tagging errors and ensure consistent tracking across all your invoices.
Time savings – What previously required manual work after an invoice synced to Xero now happens automatically along with other data.
Better reporting – Unlock the full potential of Xero's reporting capabilities with properly tracked transactions.
Flexibility – Map your existing category structure to Xero's tracking categories without changing how you organise your business.
Discipline-based tracking lets your yard see exactly how much revenue comes from dressage versus showjumping versus cross-country. Understand which disciplines are driving your business and where to focus your investment.
Mixed-use facilities can separate income streams—seeing at a glance how much revenue comes from livery versus lessons versus events versus retail.
Instructor performance tracking becomes straightforward for yards with multiple freelance or employed instructors, letting you see revenue generated by each without manual spreadsheet work.
Arena and facility income can be tracked separately, showing you which facilities generate the most bookings and whether that new all-weather arena is paying for itself.
If you're already using our Xero integration, the Tracking Categories feature is available now. Start by creating categories in At The Yard that reflect how you want to analyse your revenue, then head to your Xero integration settings to map them.
If you haven't yet connected At The Yard to Xero, there's never been a better time. Our integration handles invoices, payments, contacts, and now tracking categories—keeping your financial records accurate and up-to-date without the administrative burden.
This release represents our ongoing commitment to making financial management effortless for equestrian businesses. By connecting the operational tools you use every day with professional accounting software, we're helping you spend less time on admin and more time doing what you love.
Have questions about setting up Tracking Categories? Our support team is here to help. Get in touch and we'll guide you through the configuration process.
We've shipped several improvements that didn't warrant their own blog post. You may already be using them, but in case you missed anything, check them out below.
We've added new options to help you customise how you manage bookings and billing.
Minimum cancellation notice periods are now configurable. When set, the system automatically prevents customers from cancelling bookings too close to their scheduled time, eliminating the frustration of last-minute cancellations that leave unfilled slots.
Flexible billing dates give you more control over cash flow. For services that bill on completion, staff can now choose whether to bill on the scheduled date or the actual completion date when they mark work as complete.
User search functionality is now available in the admin users interface. No more paging through long lists—just search and find the user you need.
View past booking requests, not just active ones. This makes it easier to track patterns, follow up on previously declined requests, or reference historical inquiries.
File attachments for horse profiles let you upload documents, veterinary reports, or competition results directly to horse profiles where they're easily accessible when you need them.
Customisable price displays Choose how prices appear when listing products or services: - Smallest order unit price - Smallest order total price - Lowest possible unit price The default display remains unchanged, but you can now adjust this per item in the shop settings.
We've got more improvements on the way. In the meantime, if you have questions or feedback, we'd love to hear from you.

We're excited to announce a new feature for users of the At The Yard shop - customizable delivery options! This update allows you to set specific delivery patterns for each product in your shop, giving both you and your customers more flexibility and control over when items are delivered.
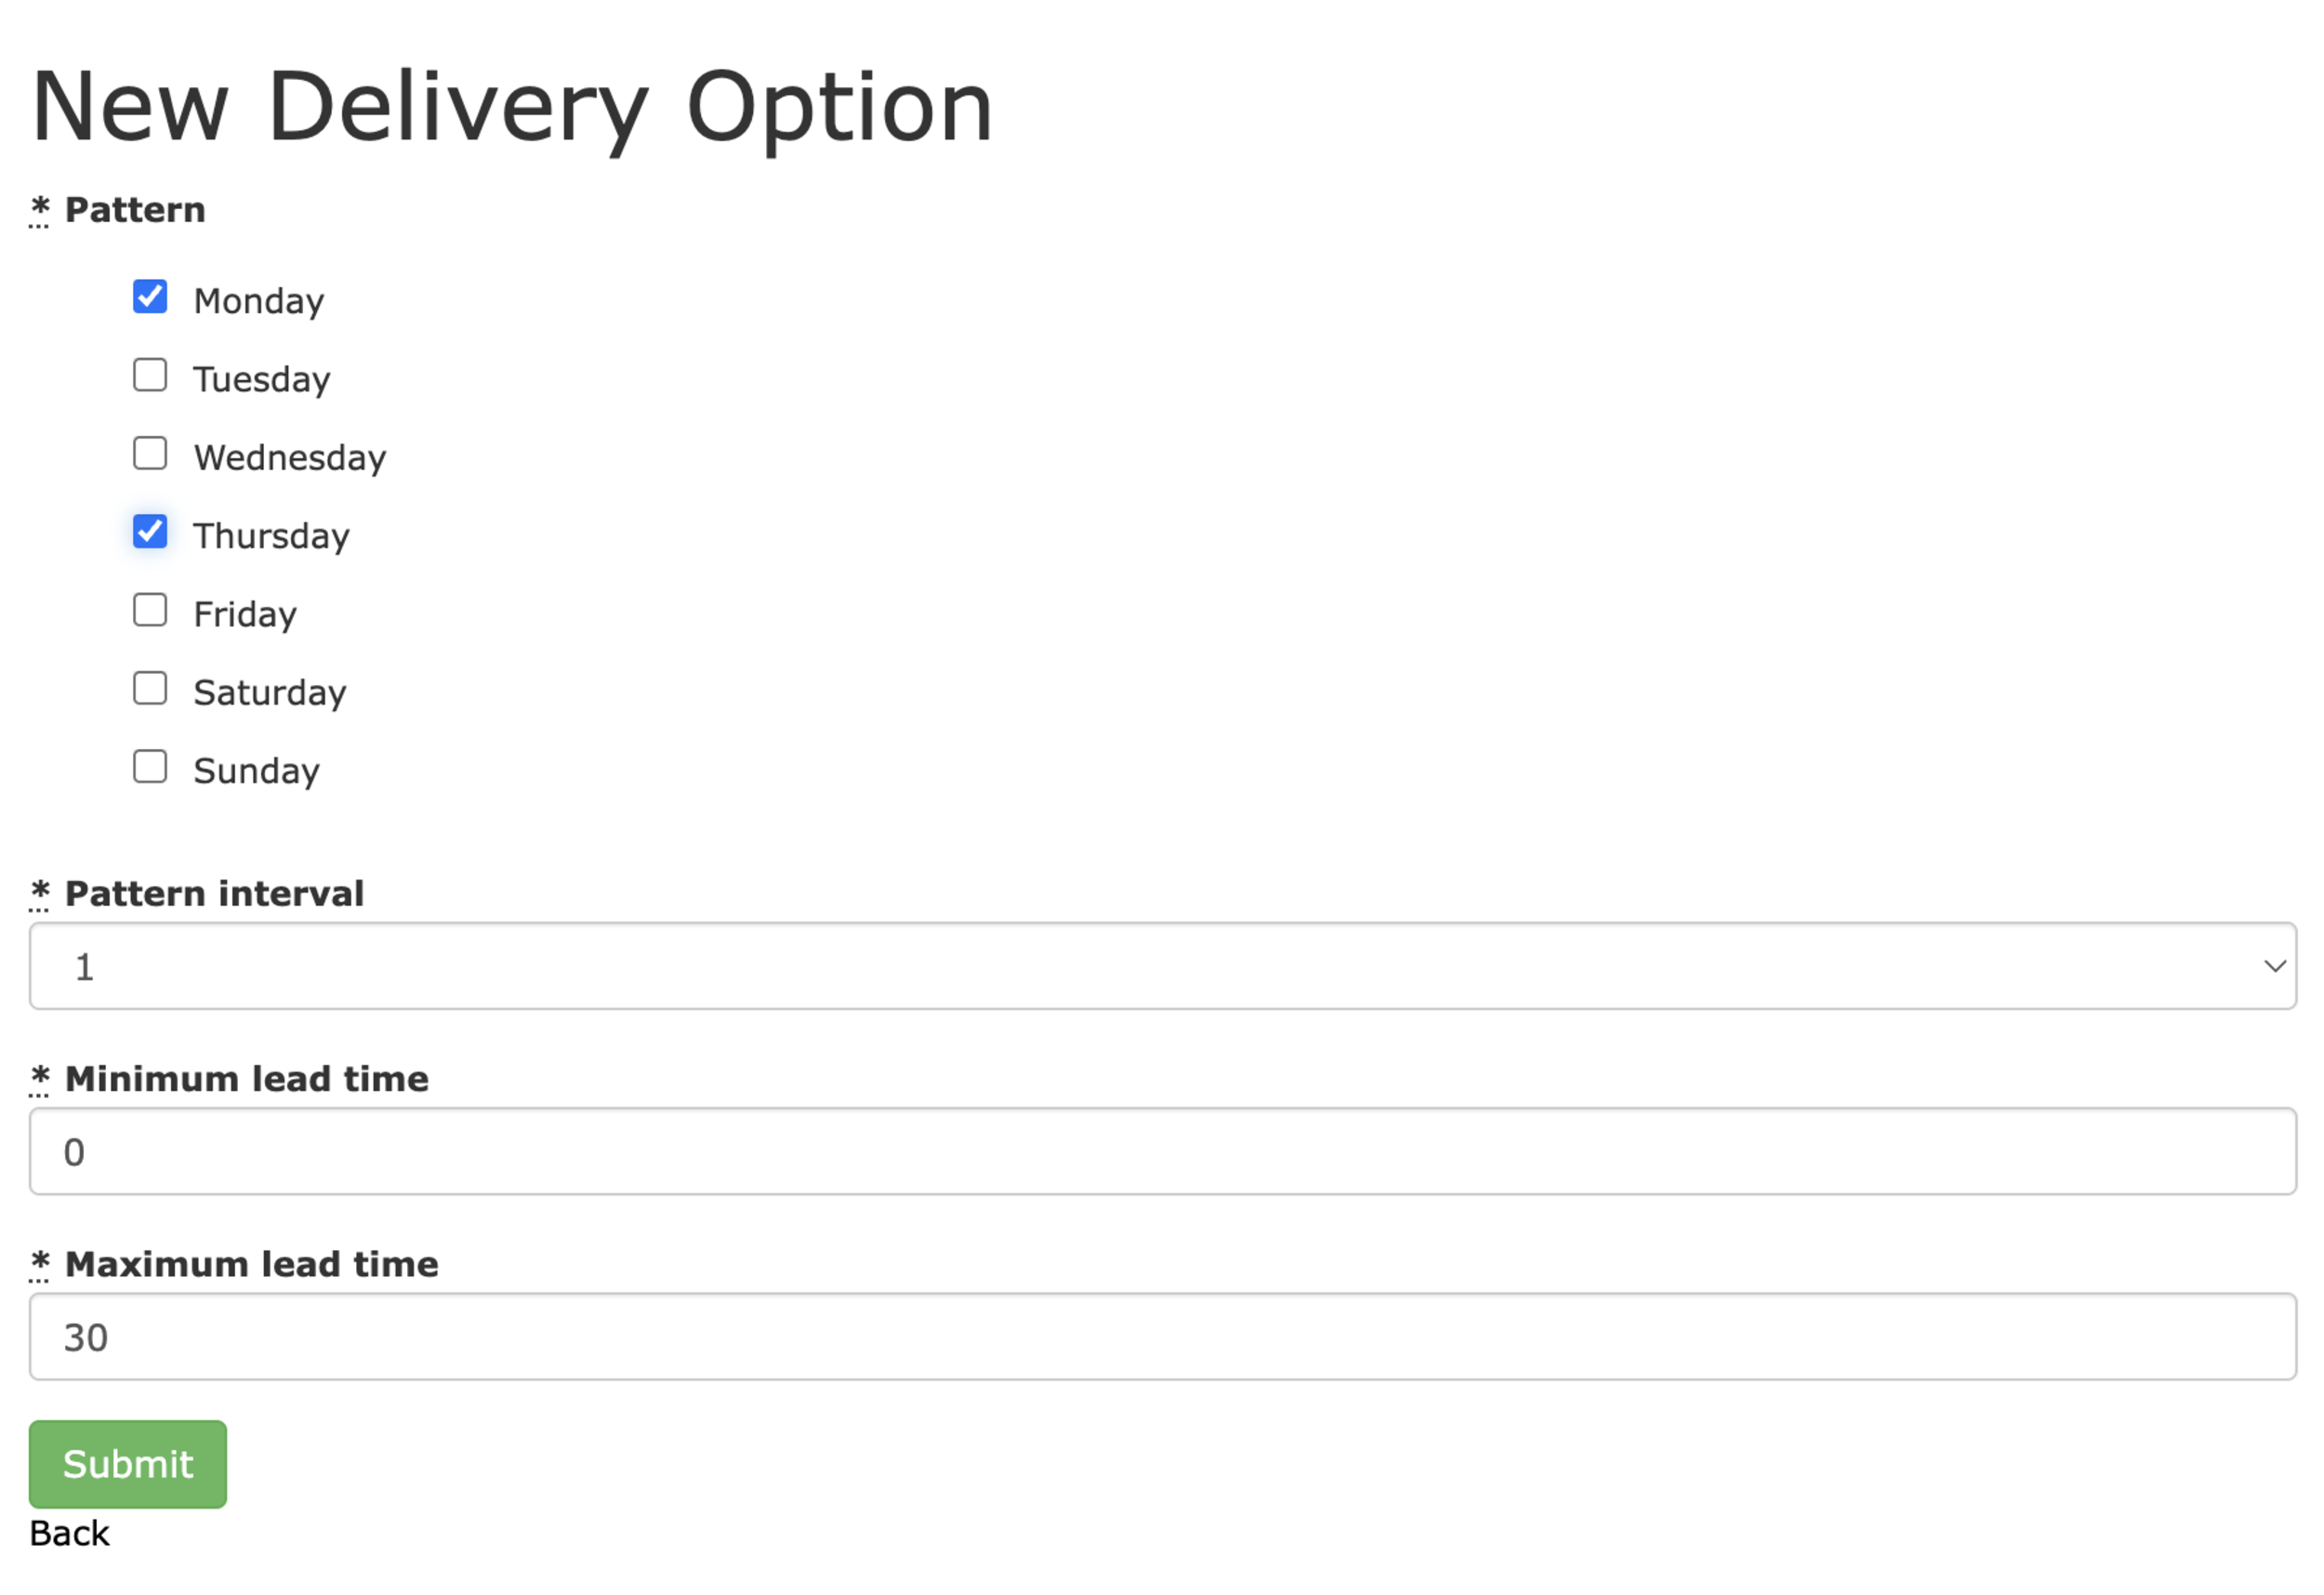
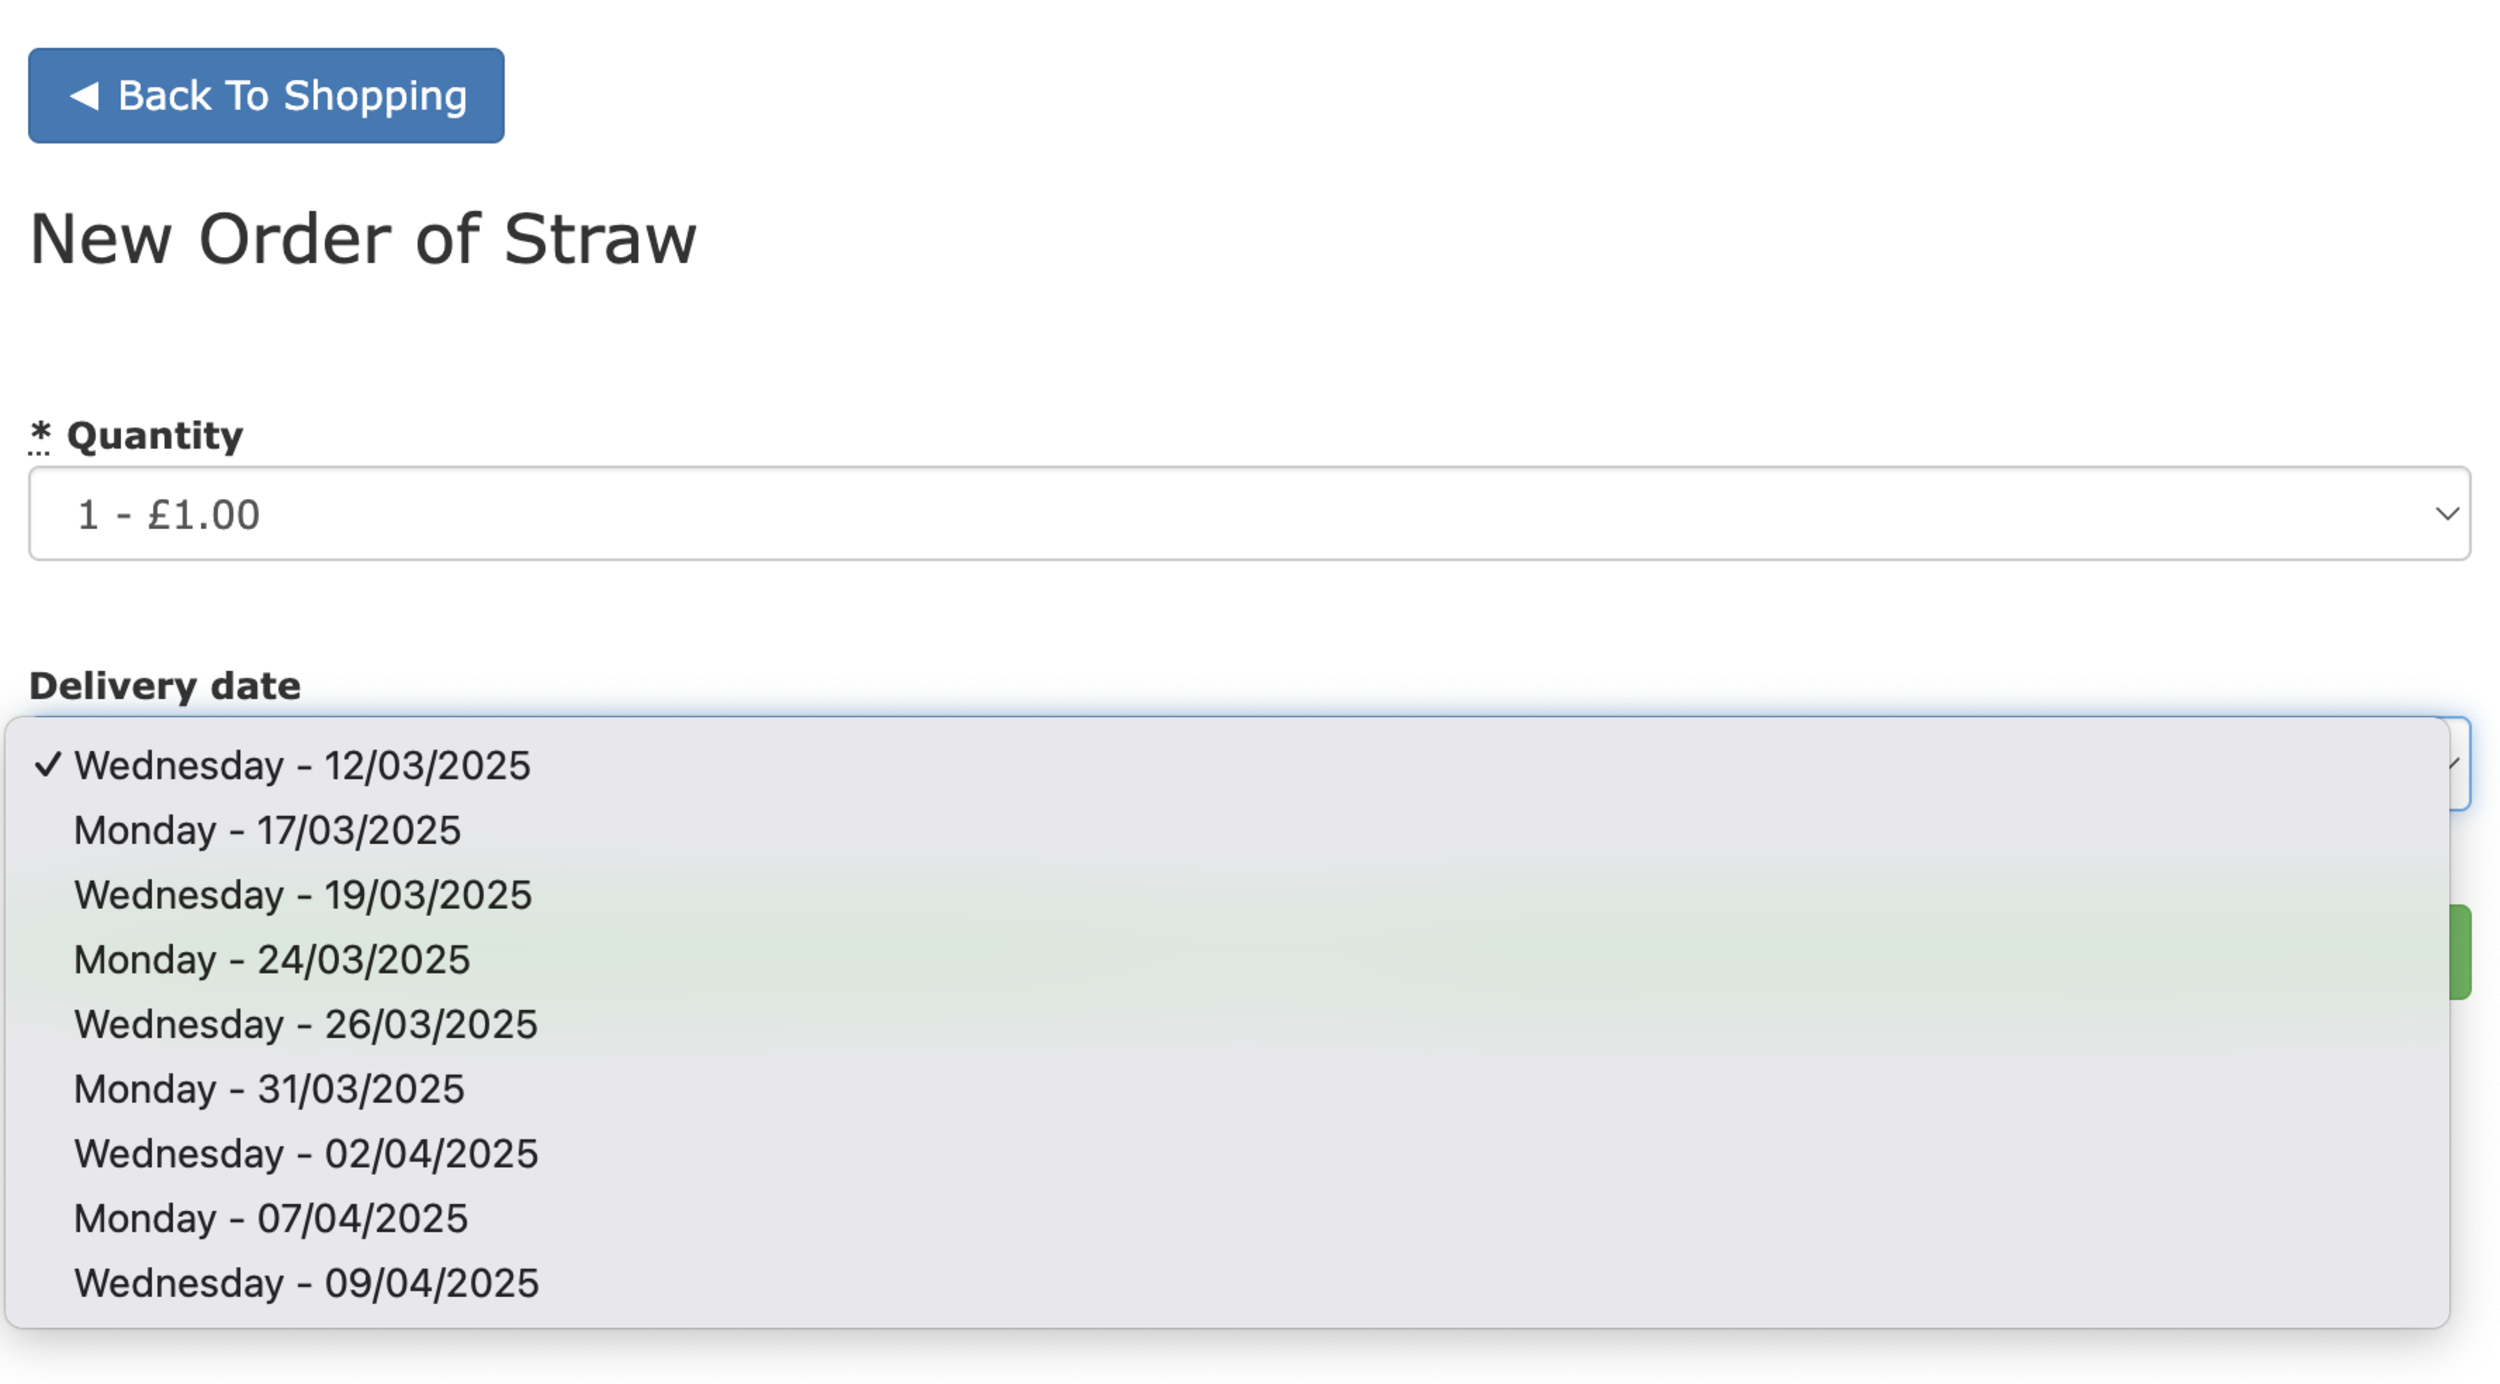
When customers shop on your site, they'll now see available delivery dates based on your configured patterns. The date selector will only show dates that match your delivery rules, making it clear when they can expect their items.
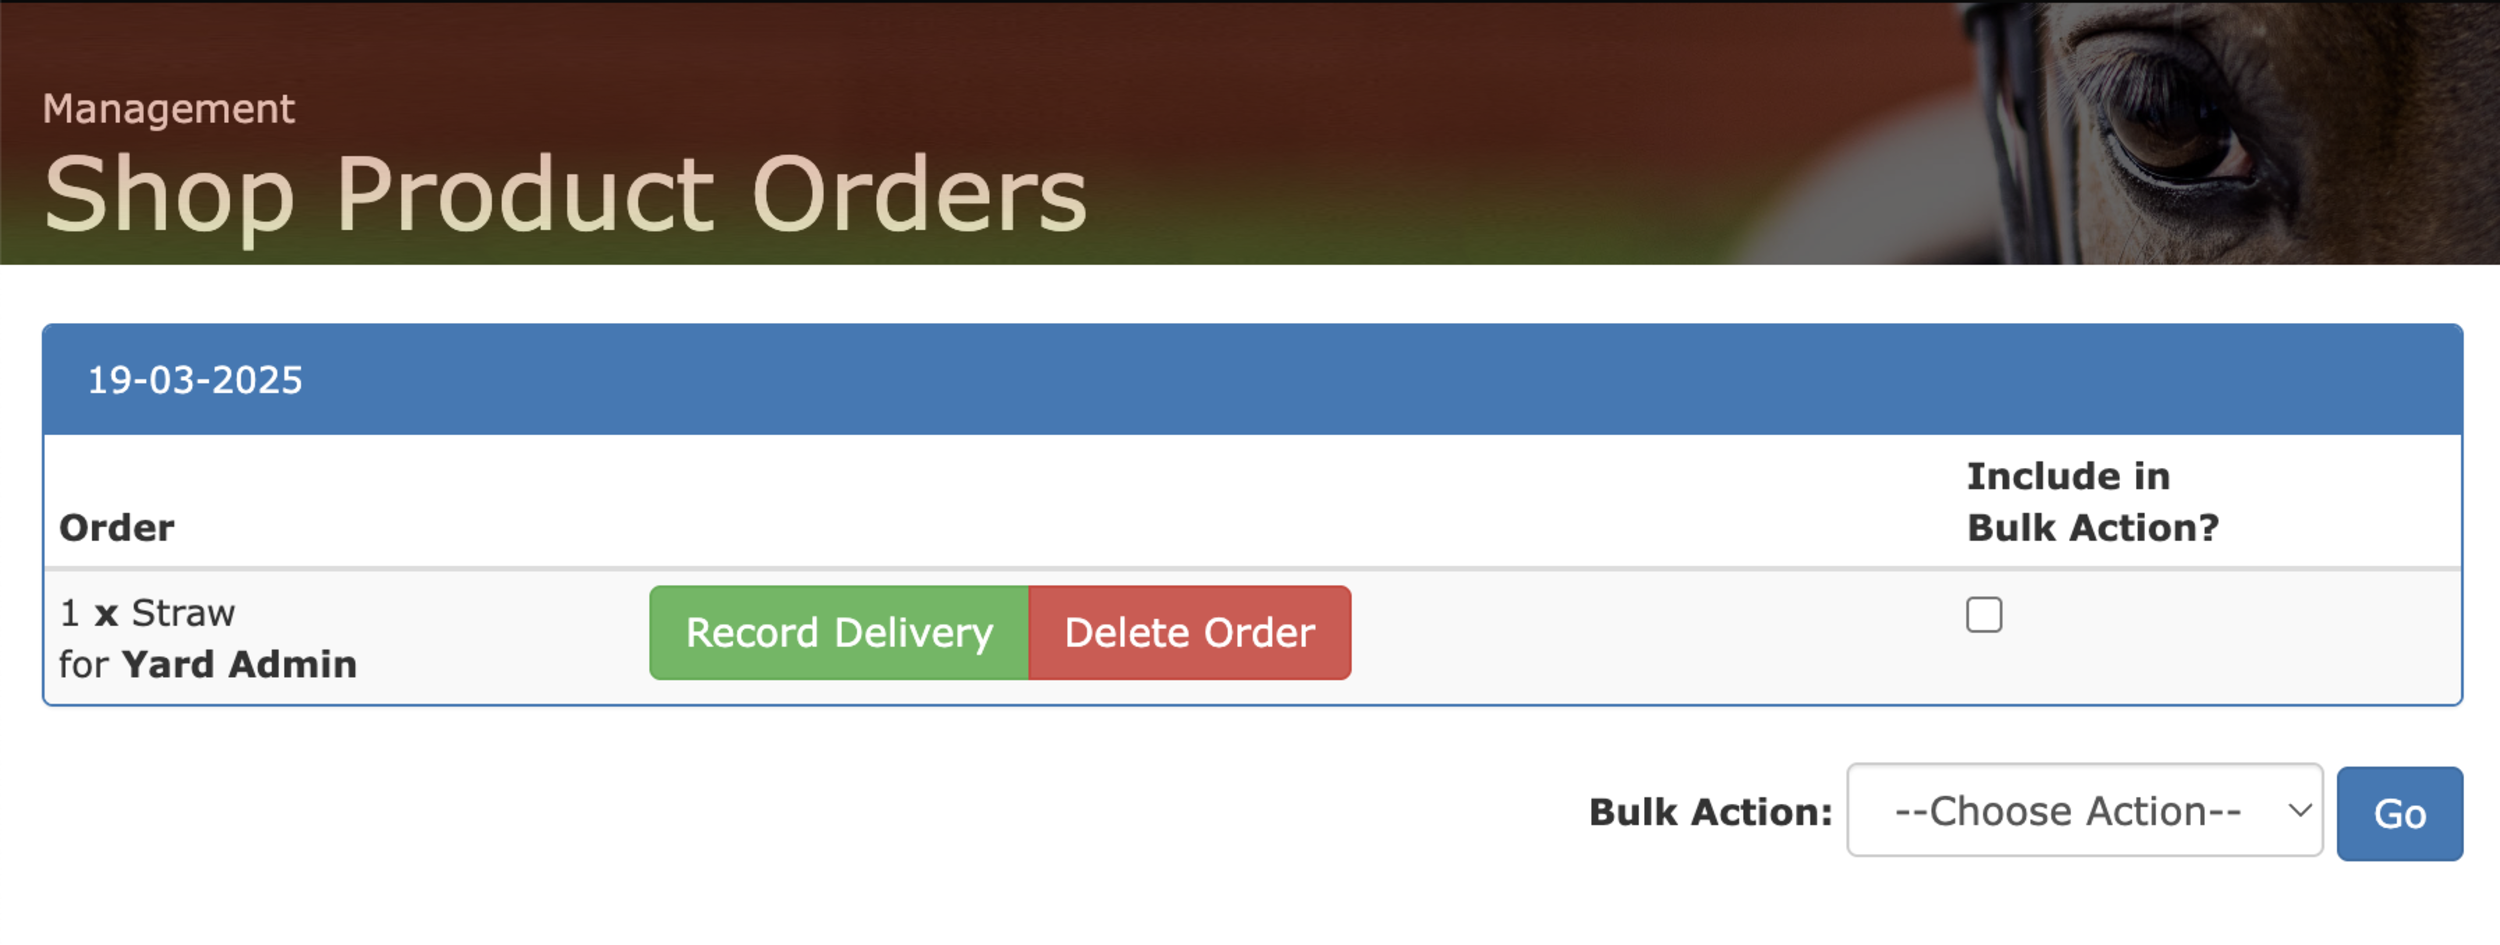
In the Shop Product Orders management screen, you can now see orders organized by delivery date. This makes it easier to plan your fulfilment schedule and manage your inventory effectively.
This feature is available now to all At The Yard shop owners. Log in to your admin panel today to start configuring delivery options for your products!

Ever found yourself wondering why an invoice was removed months ago? Or had a livery owner question a charge that seems to have vanished from their account? Managing the finances of a busy yard requires meticulous record-keeping, and today we're making that just a little bit easier.
Previously, when you needed to remove an invoice or charge in At The Yard, that information disappeared completely. It was simple but limiting—rather like mucking-out by throwing everything away instead of separating the good bedding for reuse!
Thanks to your feedback, we've implemented a much more sophisticated approach: our new void system. This allows you to maintain a complete financial history whilst still removing charges when needed.
Instead of the delete button sending your financial records into the digital equivalent of a muck heap, the new void function works more like putting them in a clearly labelled filing cabinet:
Before: Invoice/Charge deleted → All information gone forever
Now: Invoice/Charge voided → Removed BUT record kept with your explanation
This seemingly small change brings substantial benefits for yard managers:
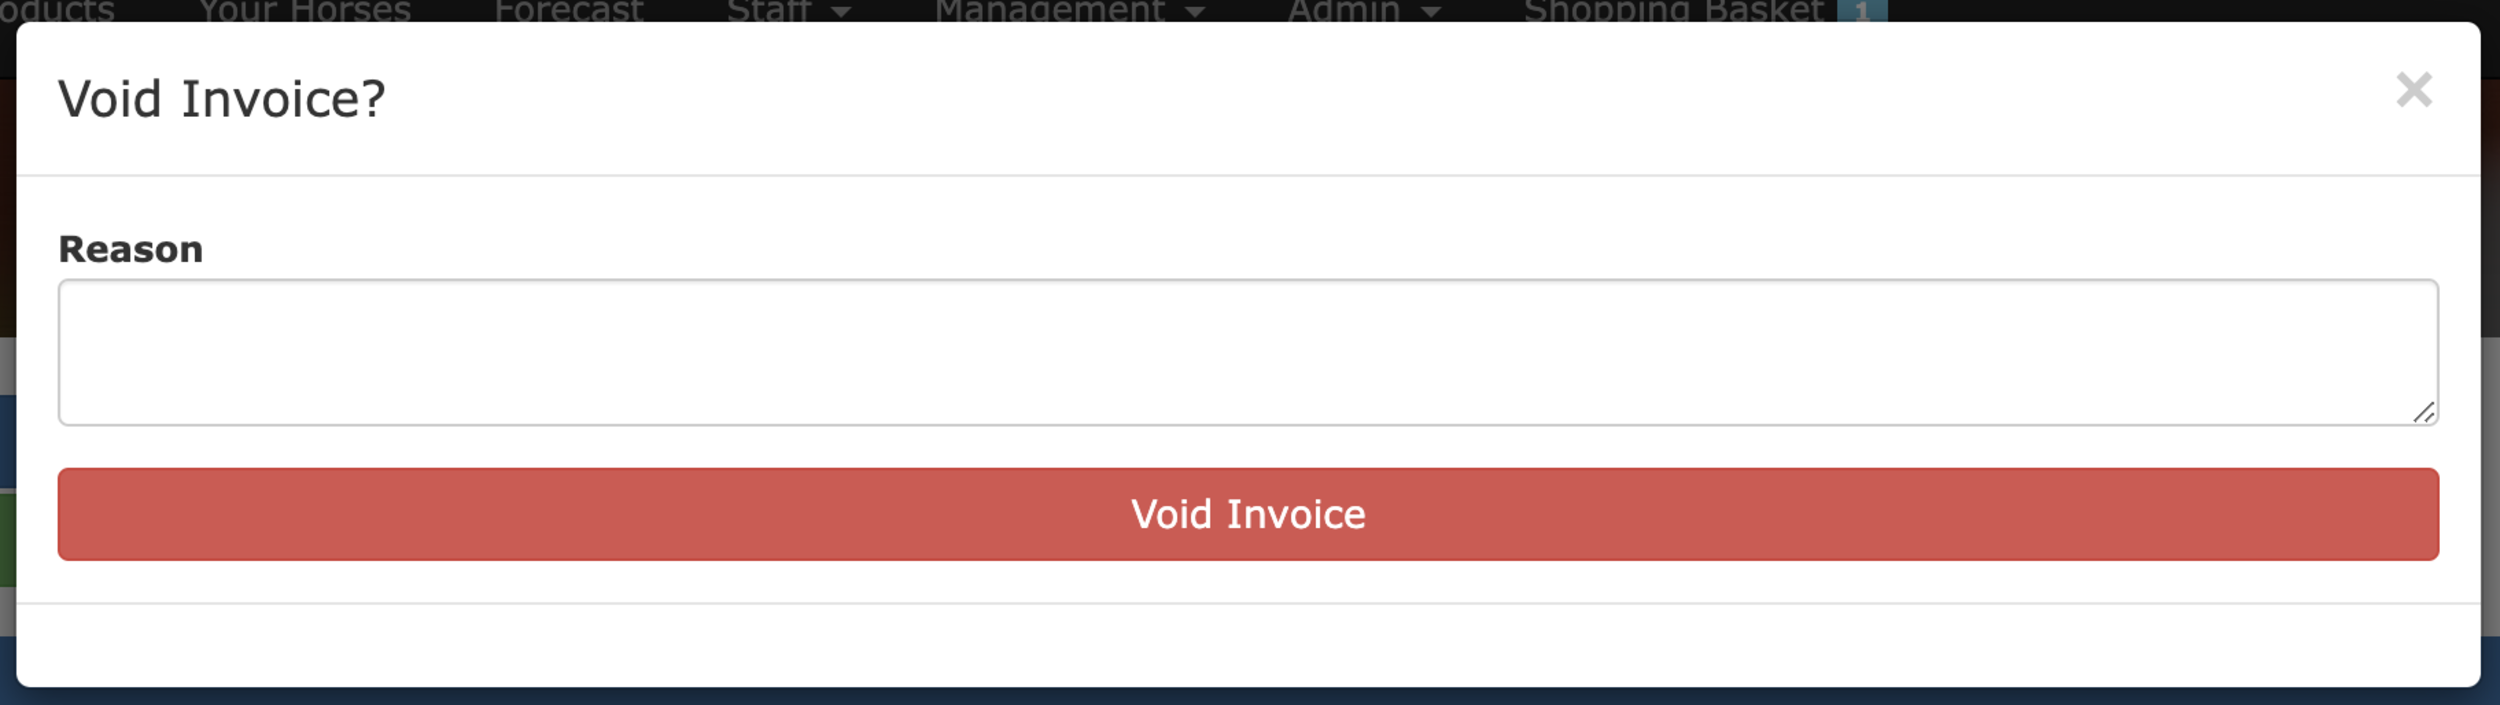
Using the new system is refreshingly straightforward:
That's it! The charge no longer affects your accounts, but the information remains accessible in your financial history.
Running a successful livery yard means balancing excellent horse care with sound business practices. This update reflects our commitment to helping you maintain that balance with minimal additional effort.
We understand that you'd rather be in the arena or stables than puzzling over financial records, which is exactly why we've made this process both more powerful and just as simple to use.
The void system is automatically available to all At The Yard users starting today. No training is needed—just look for "Void" where you used to see "Delete."
Has this new feature made your yard management easier? Do you have ideas for other improvements? We'd love to hear from you, get in touch with your account manager today.