
Blog

Over the last year we’ve seen our customers starting to use the booking system in At The Yard to schedule riding lessons. To make this easier we’ve been periodically adding features to make using it for this scenario more effective. One example of this development is the Request system we implemented a while ago which allows a user to request a booking and for you to approve, deny or suggest an alternative.
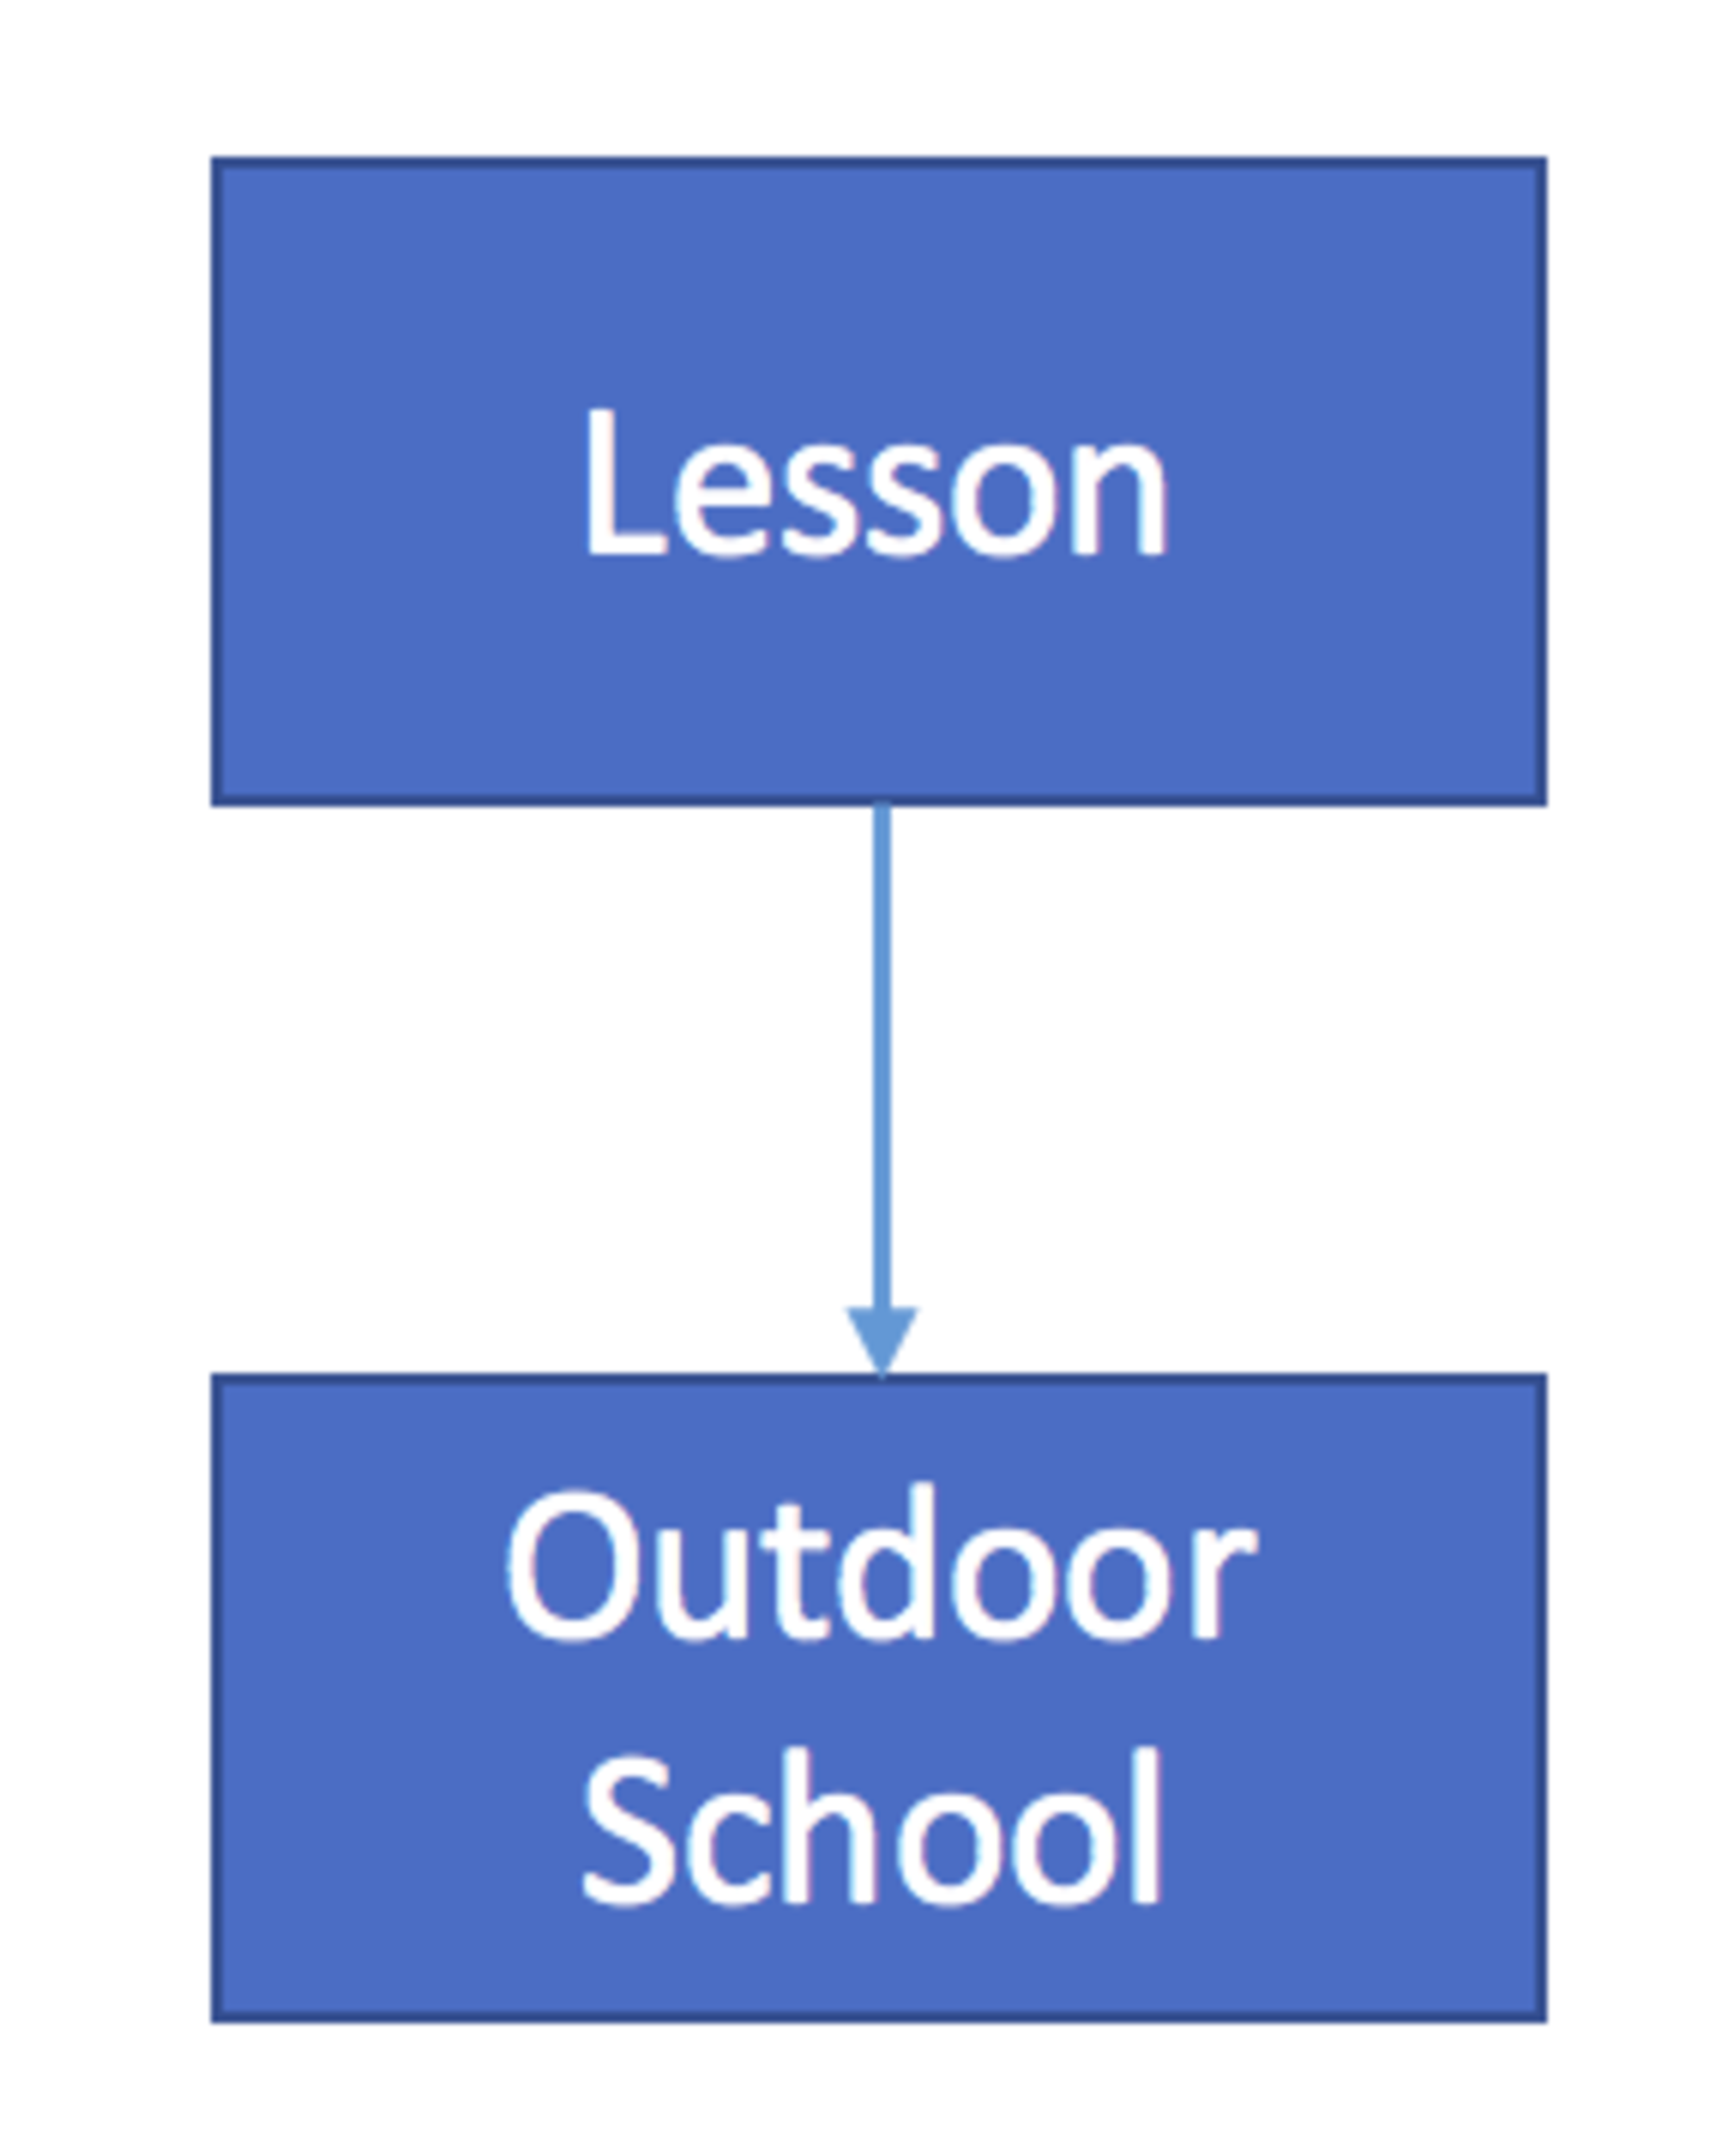
When booking a riding lesson you also need to ensure that another facility (such as the outdoor school) is available at the same time (it’s not much good having a lesson if you’ve got nowhere to ride). Until now you’ve had to manually do this process, either by booking it before approving the request or by asking your customer to also request/book the necessary facilities when booking the lesson.
Whilst this has worked, it’s been an area that we’ve wanted to improve for a while. We want customers to just book the lesson and have all the dependencies booked automatically at the same time.
To make this possible we are today releasing the a feature called Composite Bookings.
Composite Bookings, literally meaning bookings made up of several parts, takes away the extra steps that have been involved in booking a lesson up-to now. It supports the ability to have multiple dependencies (e.g you can require the outdoor school and also for an instructor to be accessible) or simply just one dependency (e.g like a school in our original example).
Once setup, however simple or complicated your dependencies, it’ll automatically book everything needed. Your customers simply need to book the one thing they care about. In this case, the lesson!
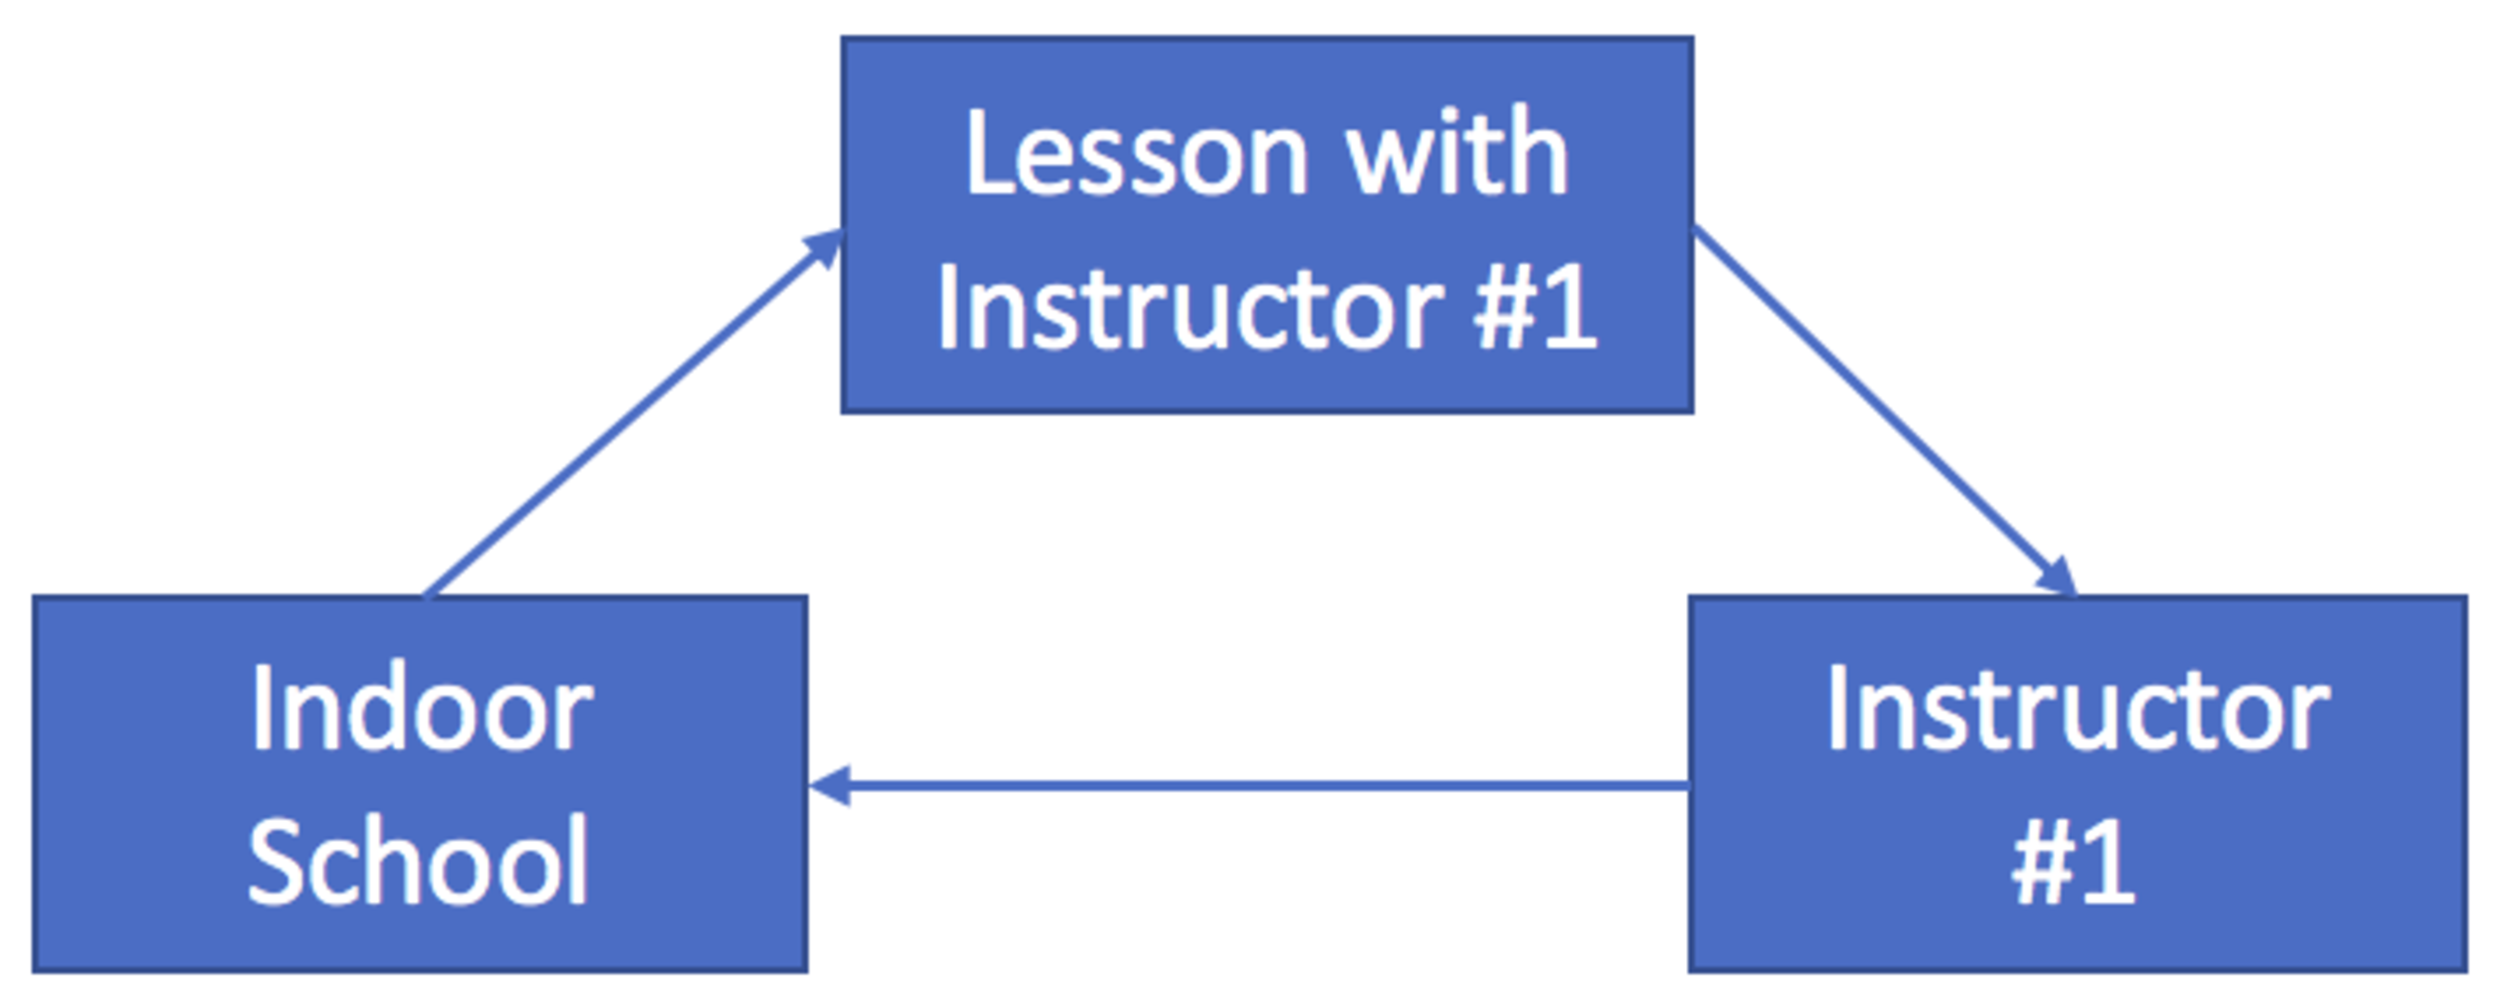
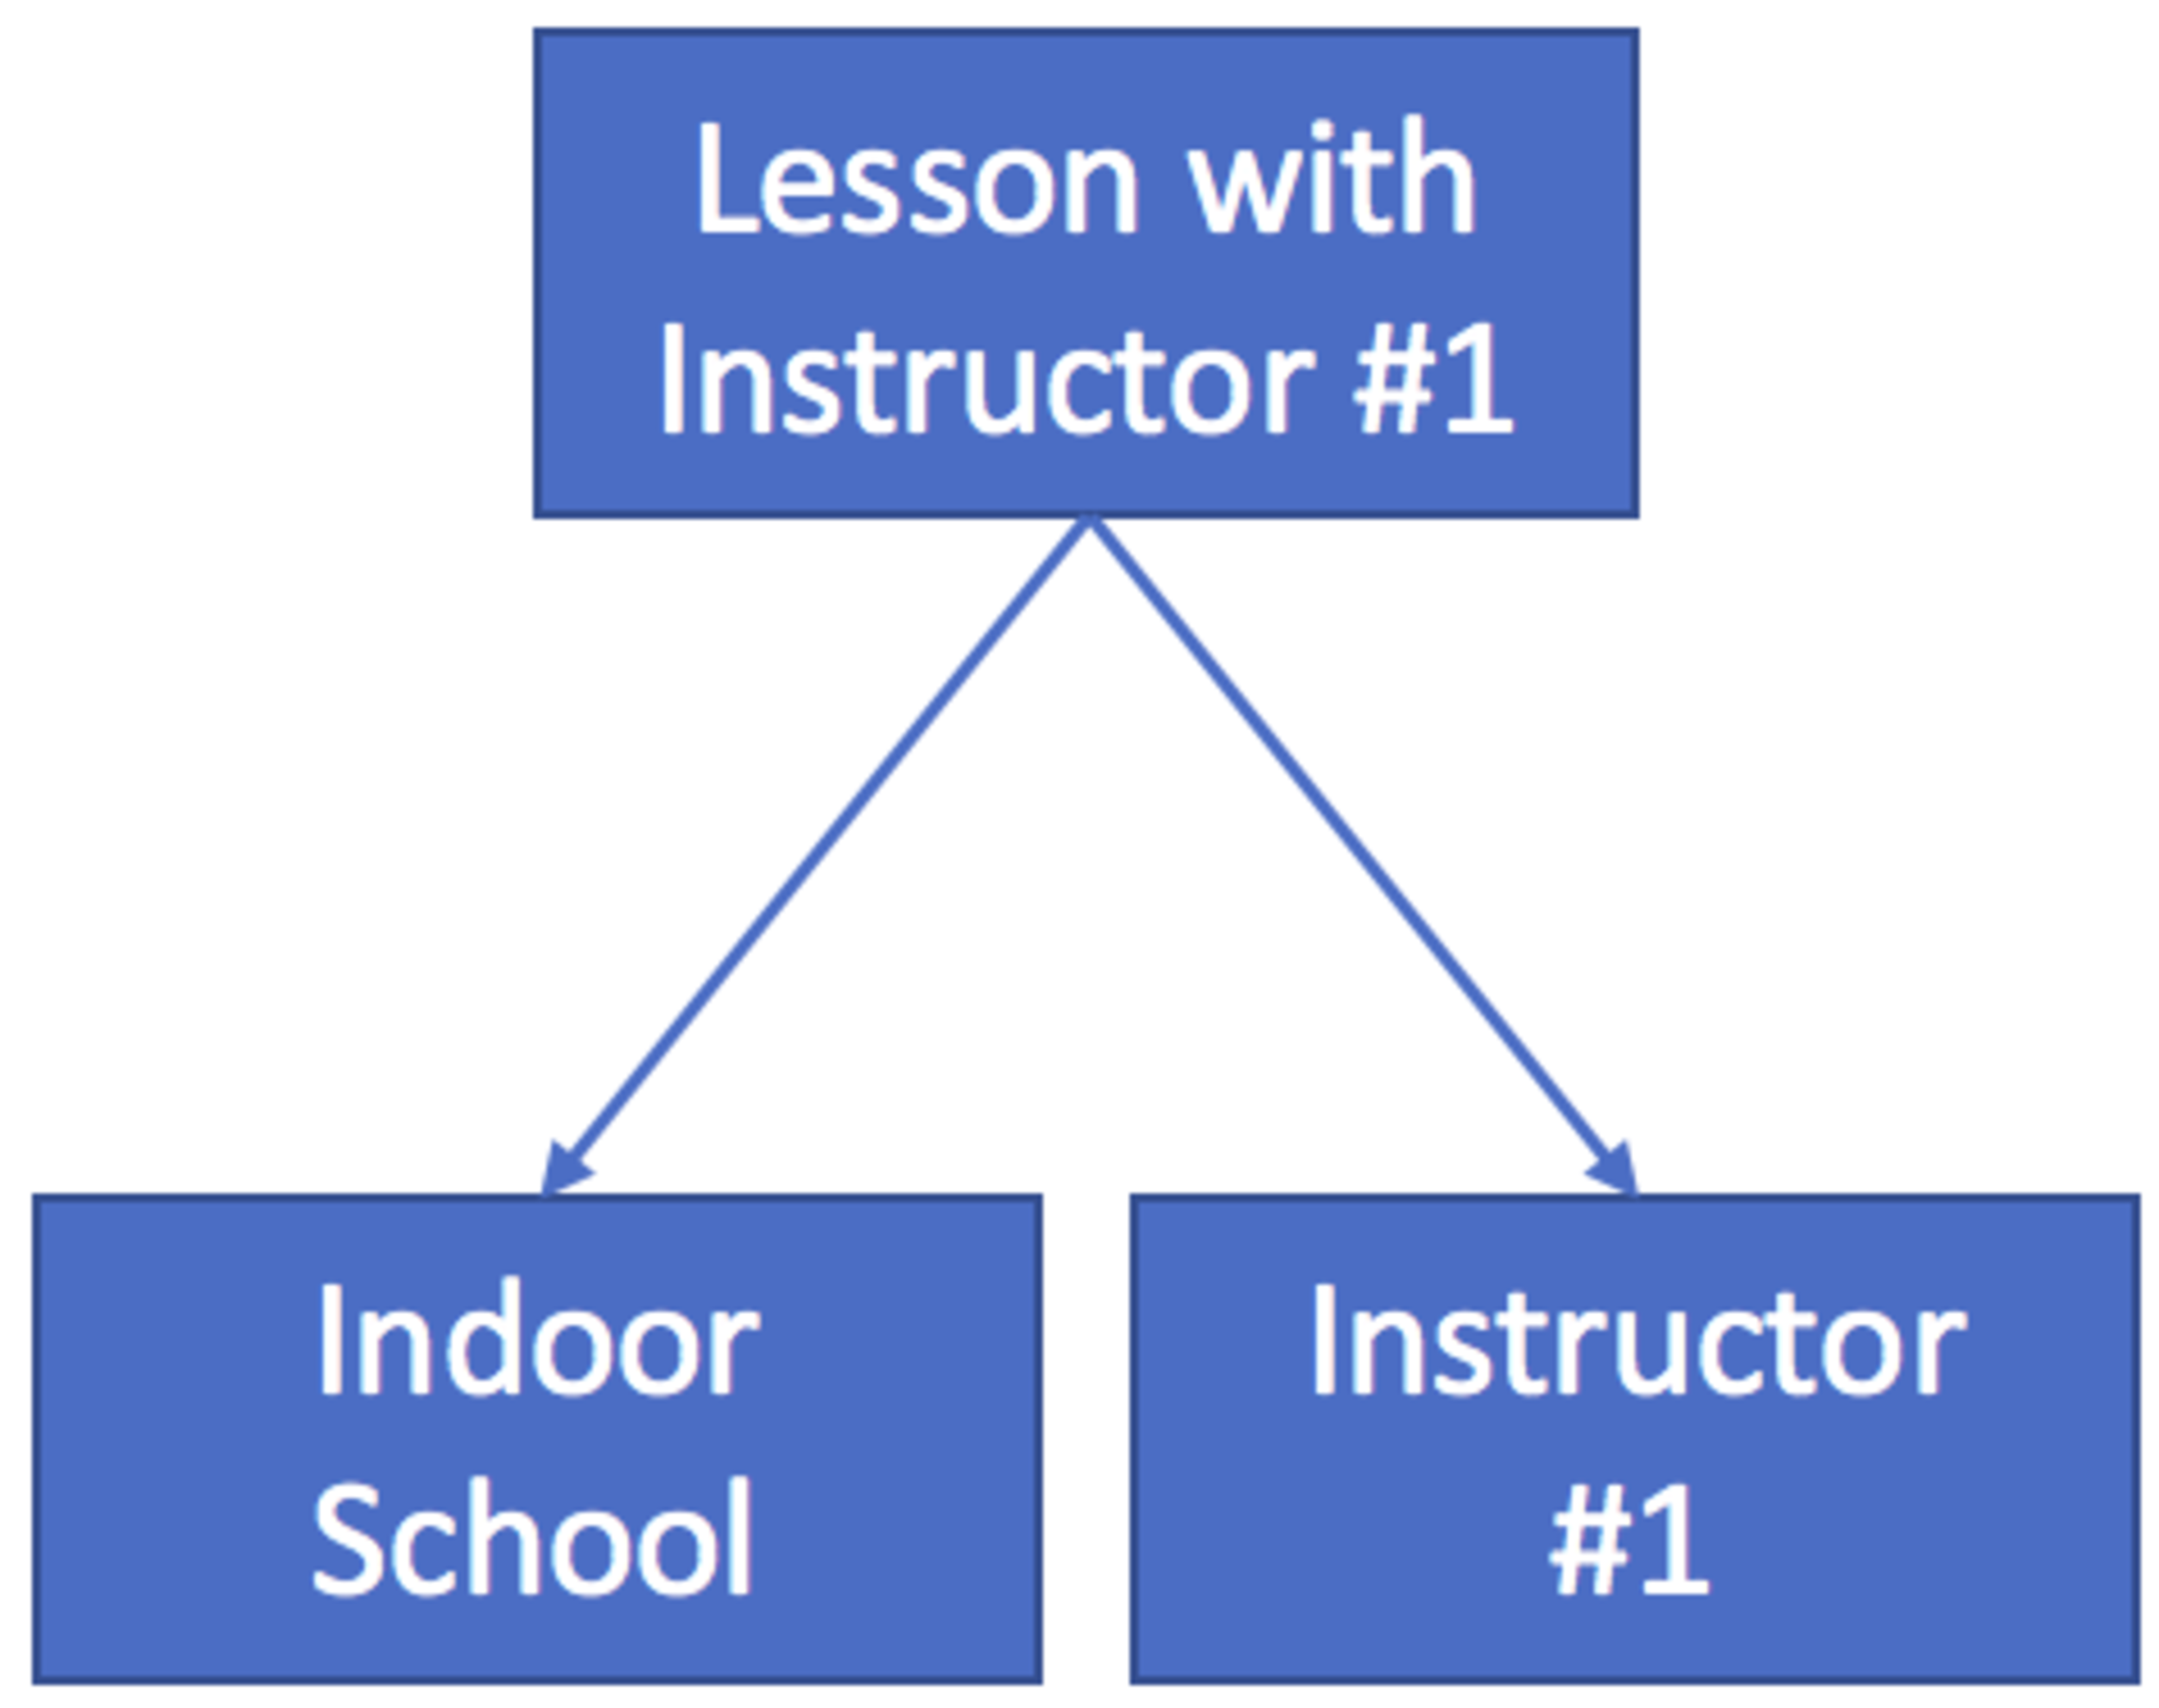
This setup process only needs to be done once by the yard admin. It’ll define the relationships between different facilities. Each facility can be involved in multiple dependency chains (e.g. Both Lesson with Instructor #1 & Lesson with Instructor #2 can both depend on the Indoor School being free). The one restriction that we impose is that you cannot have loops in your dependencies (as show in the diagram) - but don't worry it’ll let you know if you try and form a loop.
To start the setup process go to Admin -> Facilities Note: You’ll need to create all your facilities before creating the dependancies. To setup the dependancies for a facility, click on Edit for the respective facility. On the dialog which opens, scroll down to the Dependant Facility section. To add a dependancy click on the Green + button. You can then select the dependancies for this facility (shown in the diagram below for our example “Lesson with Instructor Number 1”). This can be repeated as many times as necessary.
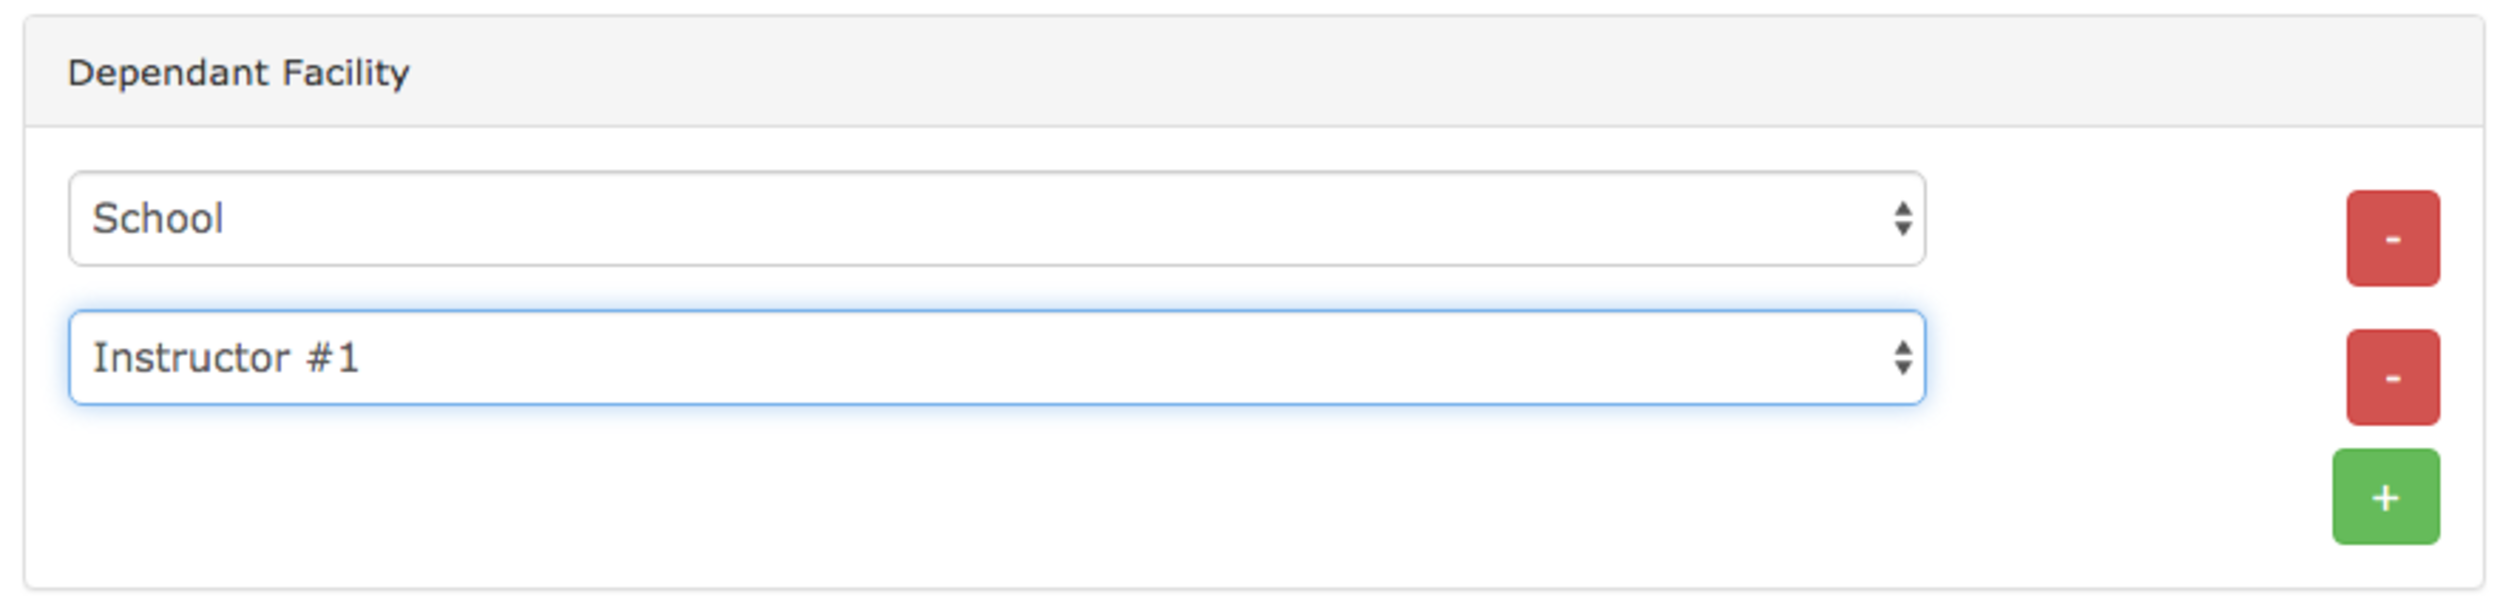
Once you’ve finished choosing the dependancies click on Update Facility. This will set your dependancies and from then on, in our example, any bookings for “Lesson with Instructor Number 1” will automatically make a corresponding booking for the School and for Instructor #1.
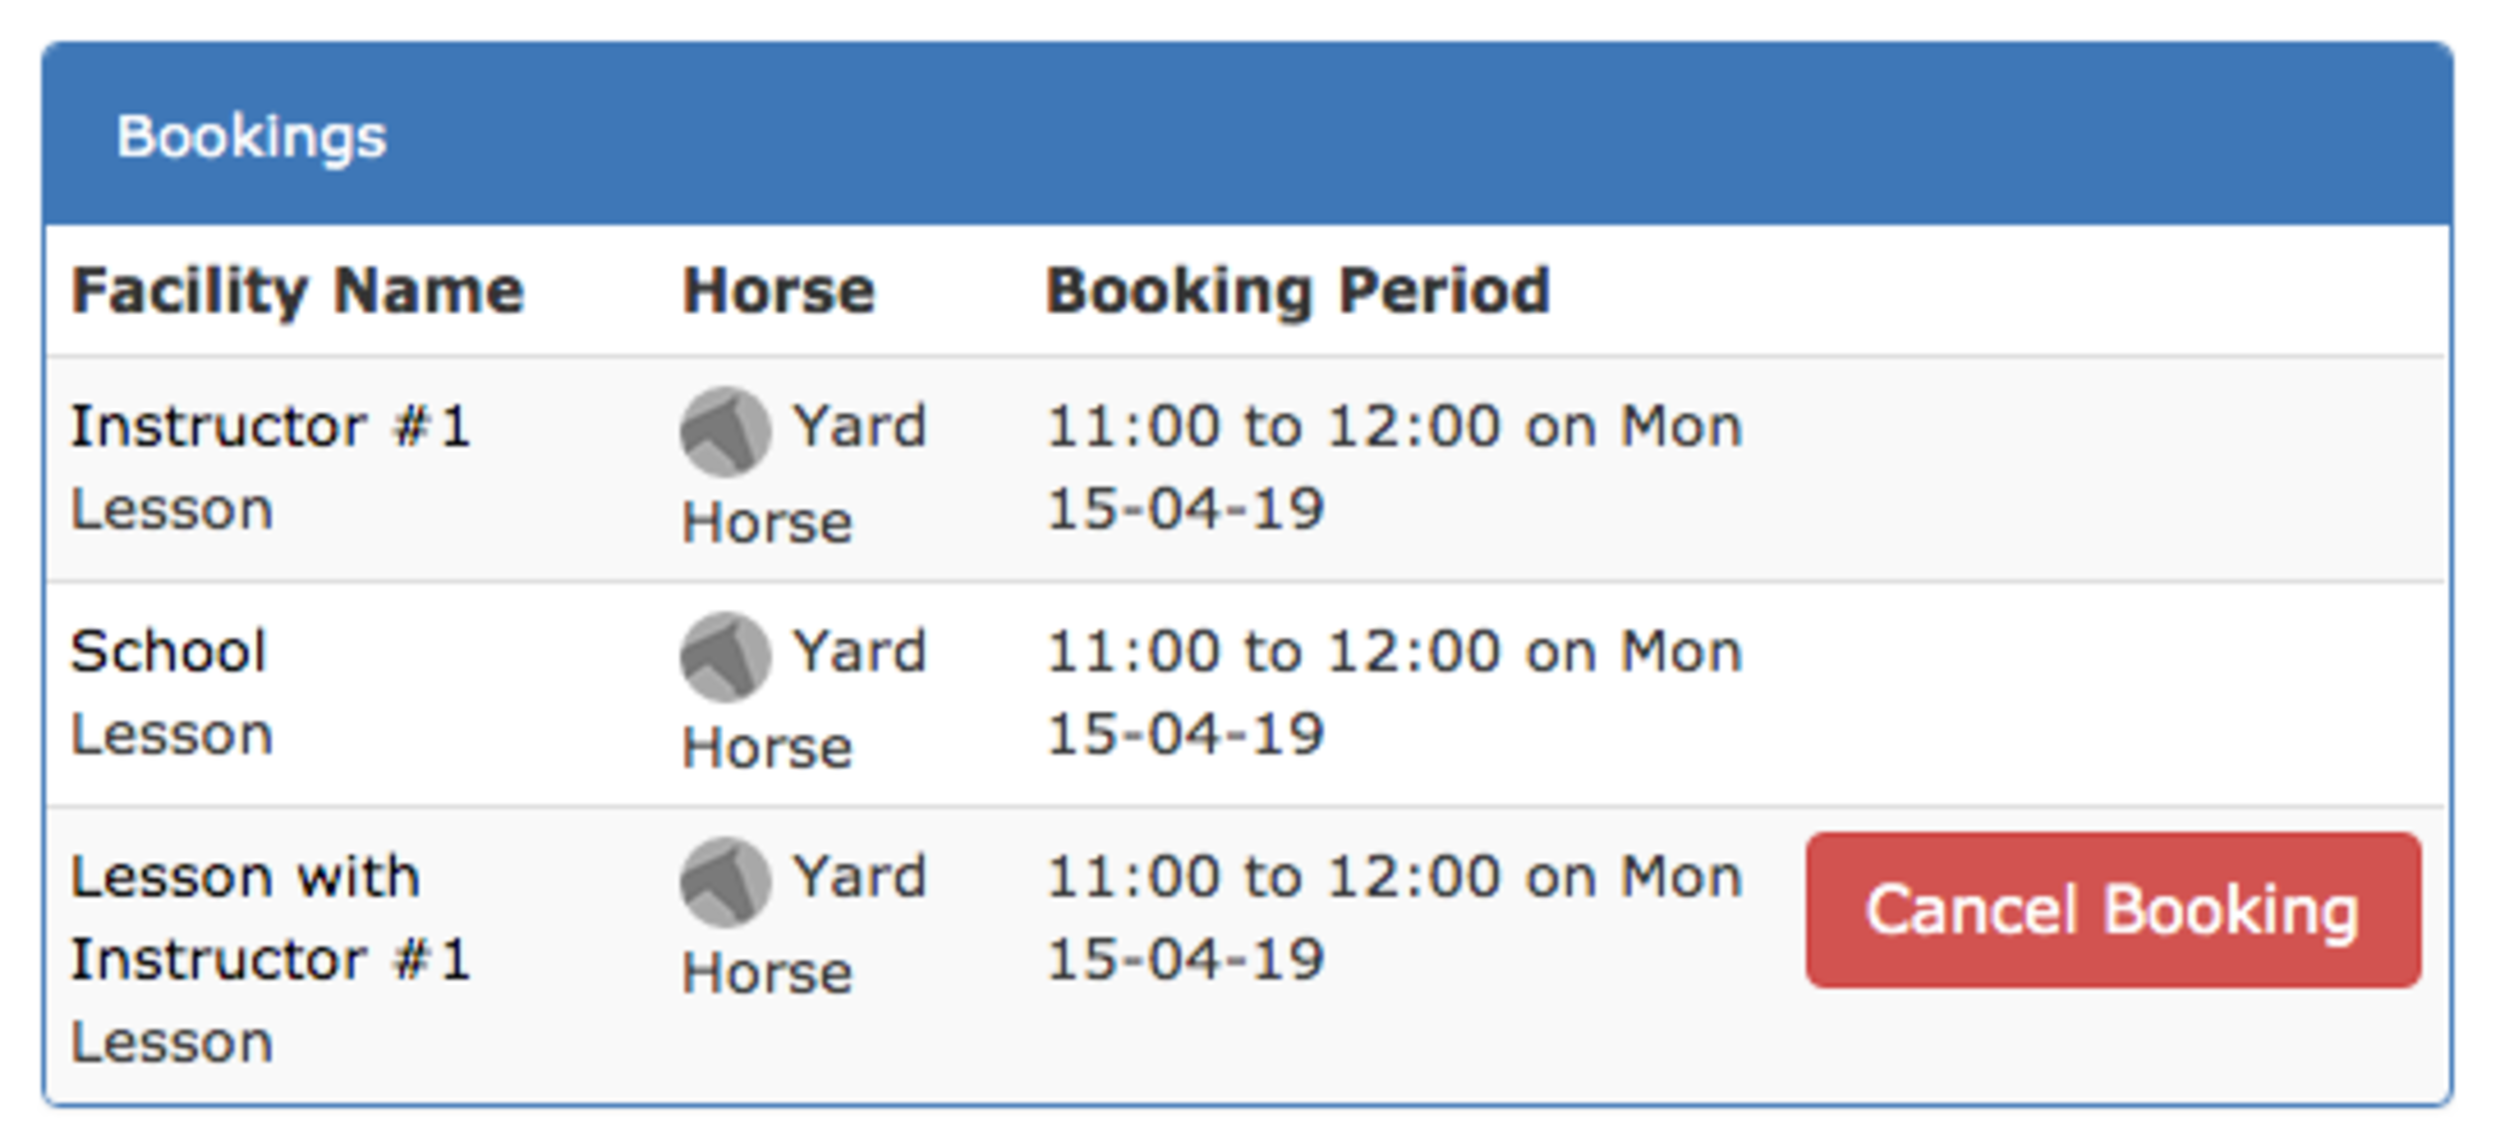
The process of making a composite booking as a customer/member/livery is exactly the same as they’re already used to. They just go to the booking screen, select what they want, choose a time and then click on book. The difference is it’ll book all the other required facilities at the same time.
This result is shown in the diagram on the right/above. You’ll note that there is no Cancel Booking on the automatically made bookings. They’ll be removed automatically if/when the Cancel Booking button is pressed on the primary booking (in this case Lesson with Instructor #1).
Reading this post you’ll notice that there are a few ‘inconsistencies’ in the way we use the term Facility(ies). For example whilst a Lesson would more logically be called a service we’re still calling it a facility. This discrepancy occurs because within At The Yard Services are typically date based (e.g. booking for a muck out for a date or a selection of dates) where as Facilities are time based (e.g. you have slots available to book and they select time from those slots). This discrepancy won’t cause issues for your users but we thought we’d note it here to remove any confusion that may arise when setting up.
The next enhancements to the booking system will be attaching a ‘booking schedule’ to each horse. This means you’ll also be able to ensure that the horse they’ll be using for a lesson will be available at the same time as a lesson. This is great for facilities which have horses available to use as part of a customers membership.
Check back soon for more updates or follow us on Facebook where we post notifications of updates to At The Yard.
Running a yard requires a team of people to make it a success. This means you'll likely be hiring regular staff, bringing in helpers or using freelancers to help with the day to day running of the yard.
To help make life easier we’ve introduced tools into At The Yard to help you and your staff keep track of the hours they work. This makes it quicker and easier to pay them (which is great for both you and them) whilst ensuring the amounts are accurate and fair.
In the rest of this article we’re going to take a look at how to use this new feature.
Contents
You can access the staff work recording area by clicking on the Staff Menu and clicking on Record Work. You’ll be greeted with the page shown below. You can enter your worked hours and review your previous hours.
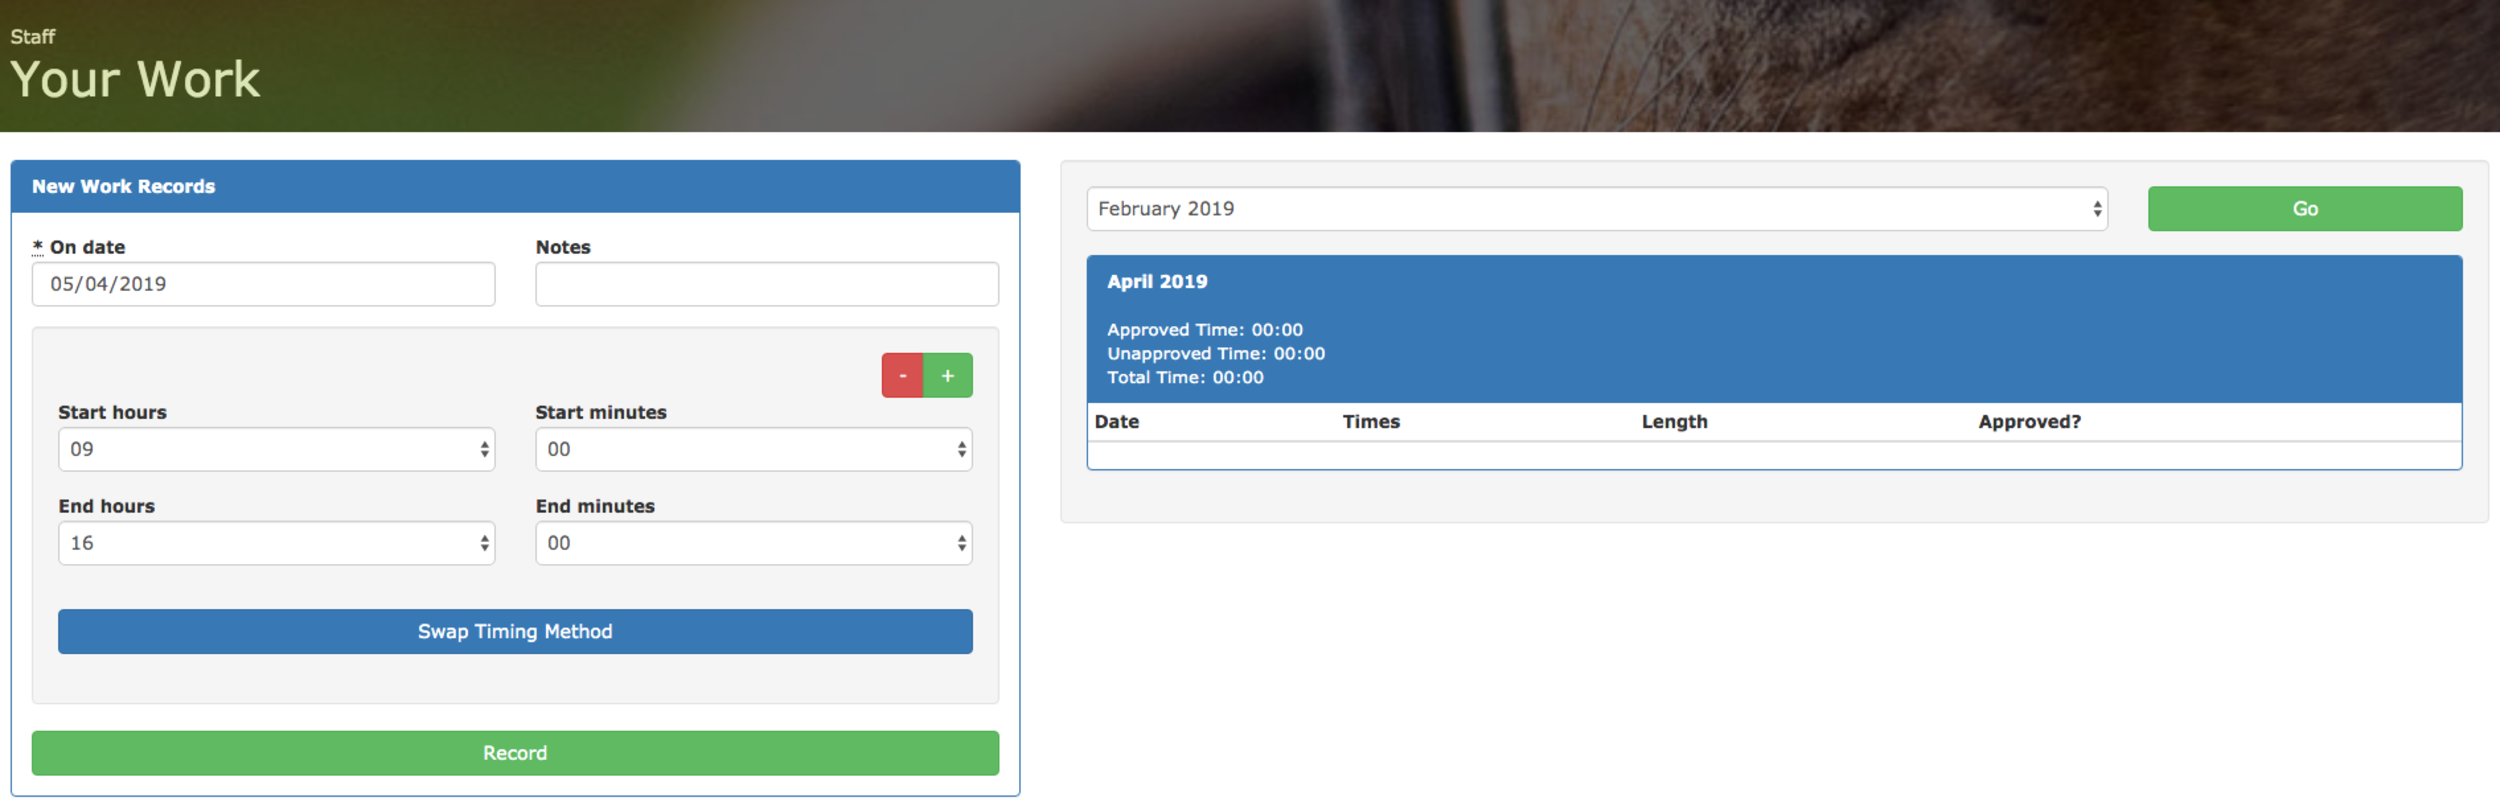
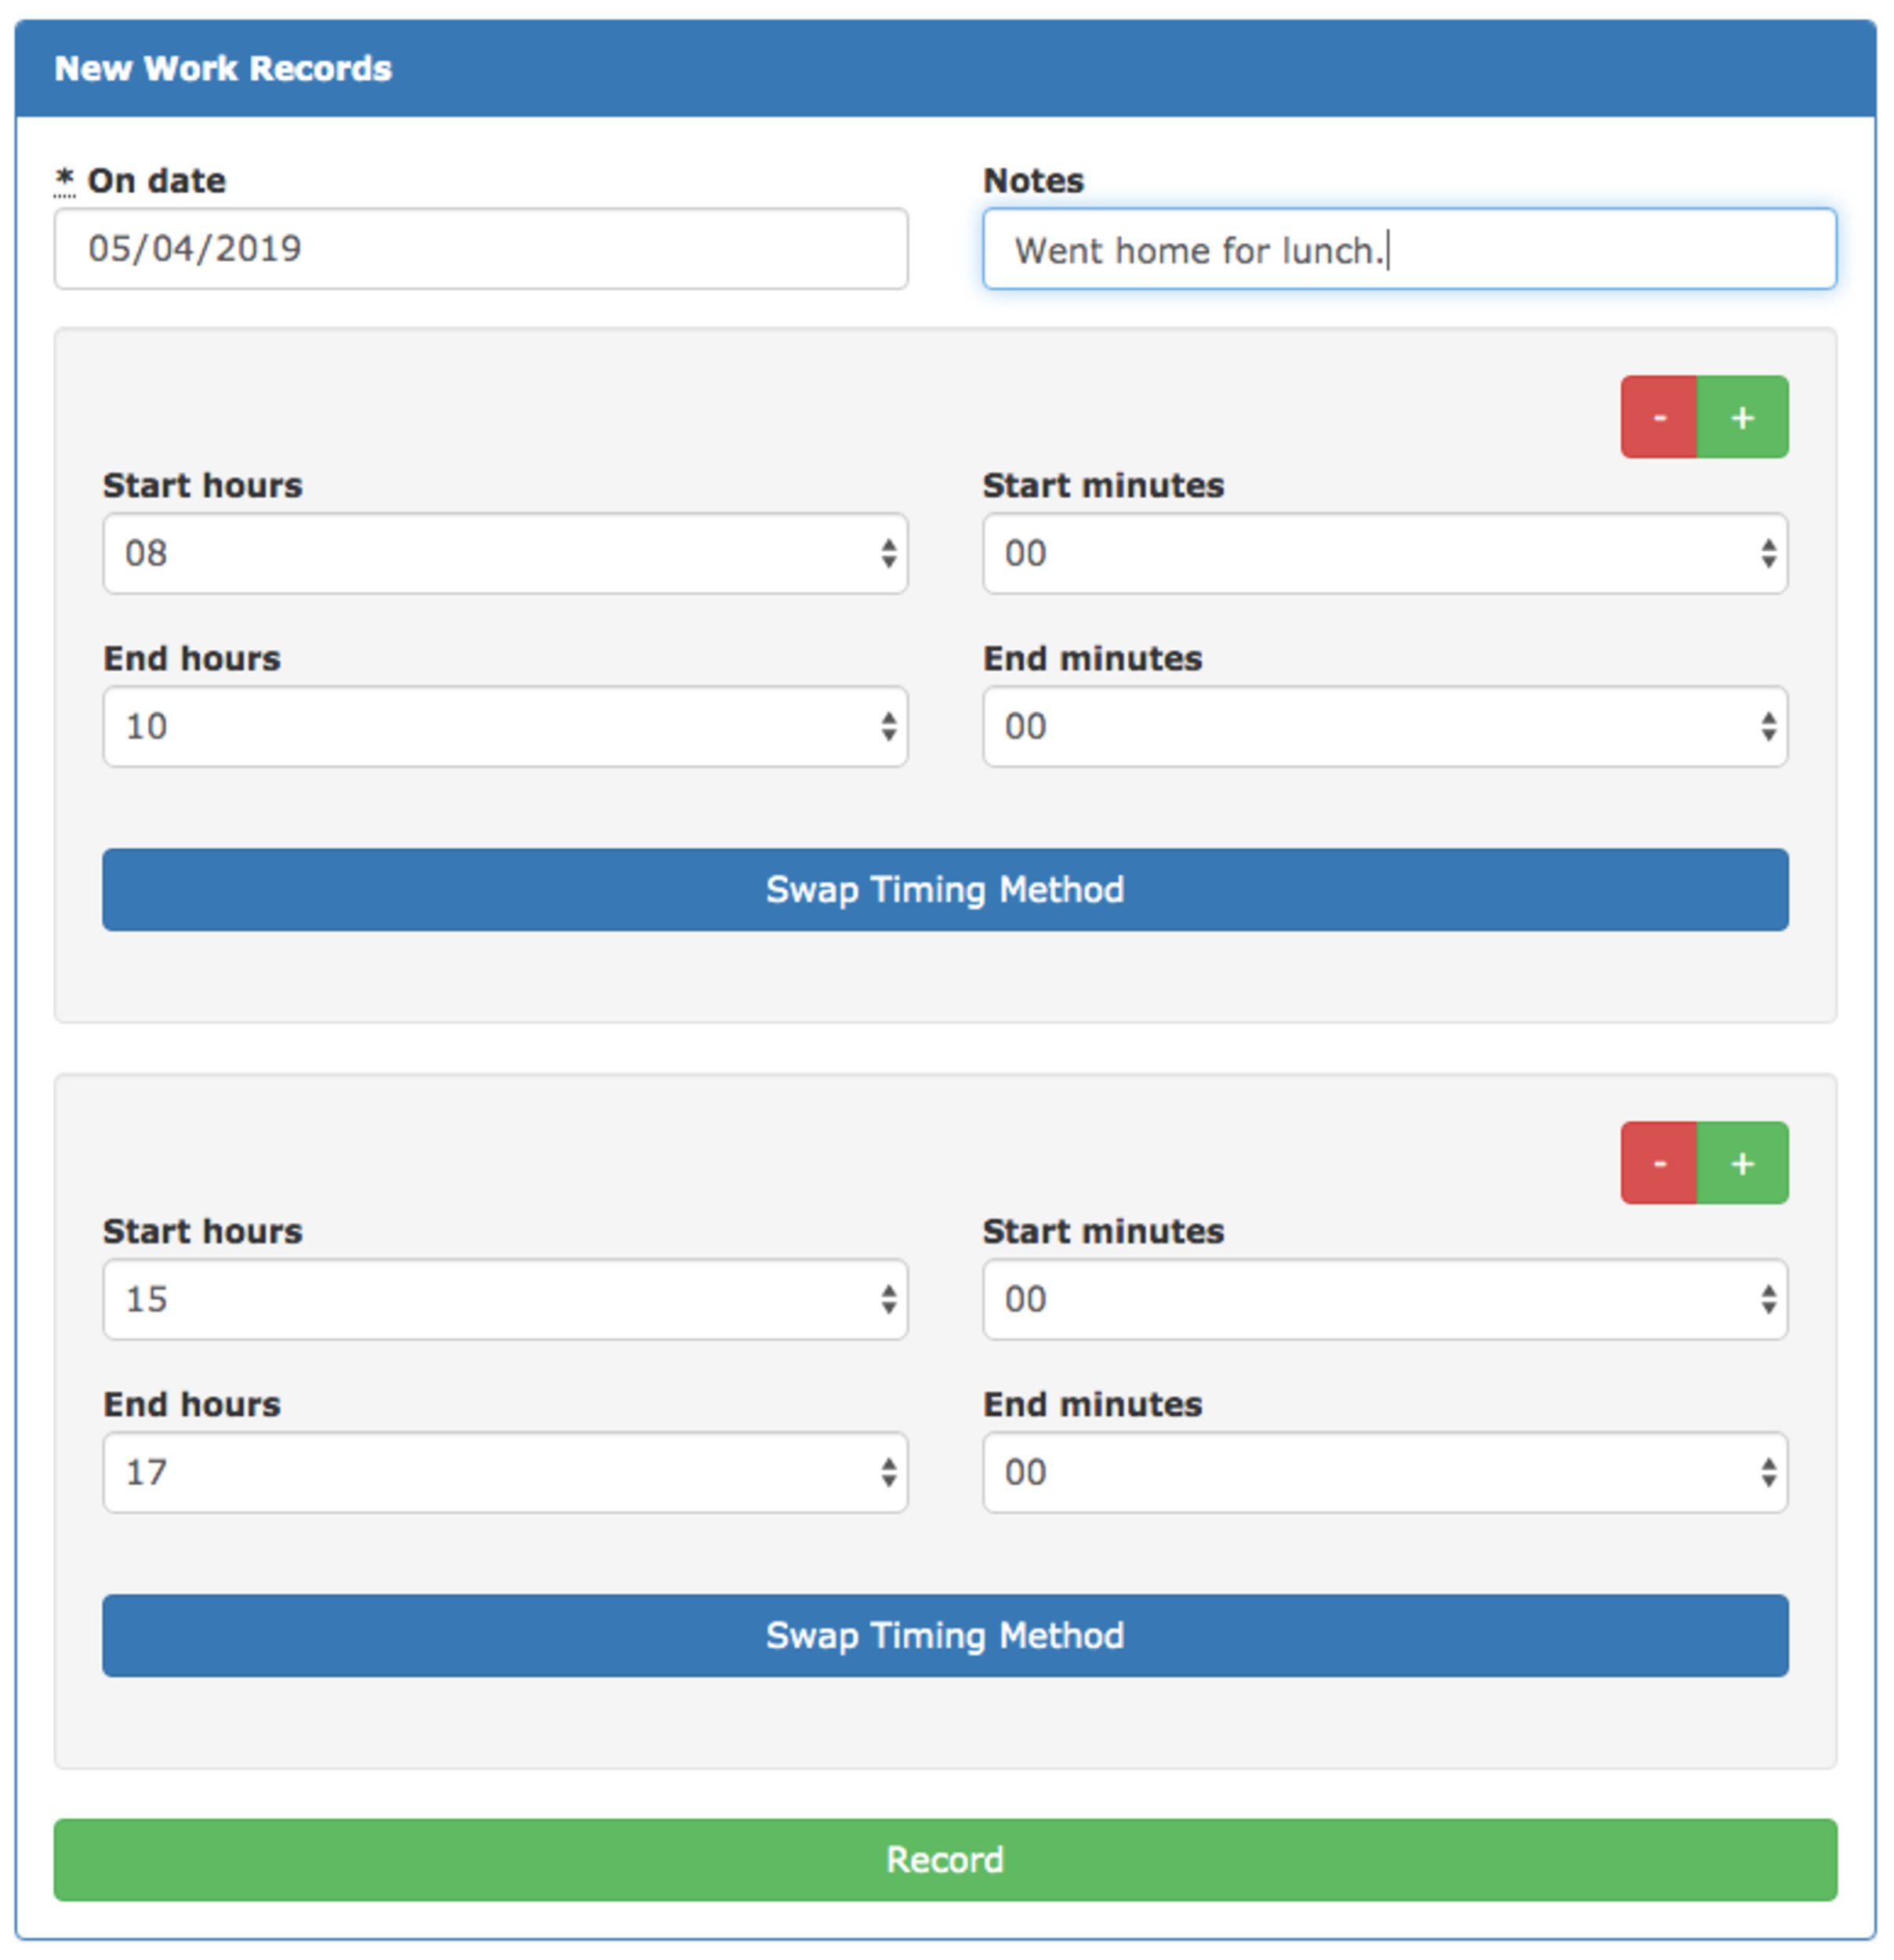
The left hand side of the screen is dedicated to entering your hours. Staff can do this at the end of the day and can enter multiple times at once by clicking the green + button (this is great if they take a break for lunch etc). When they’ve entered all their work hours for the day all they need to do is click Record and the hours will be saved.
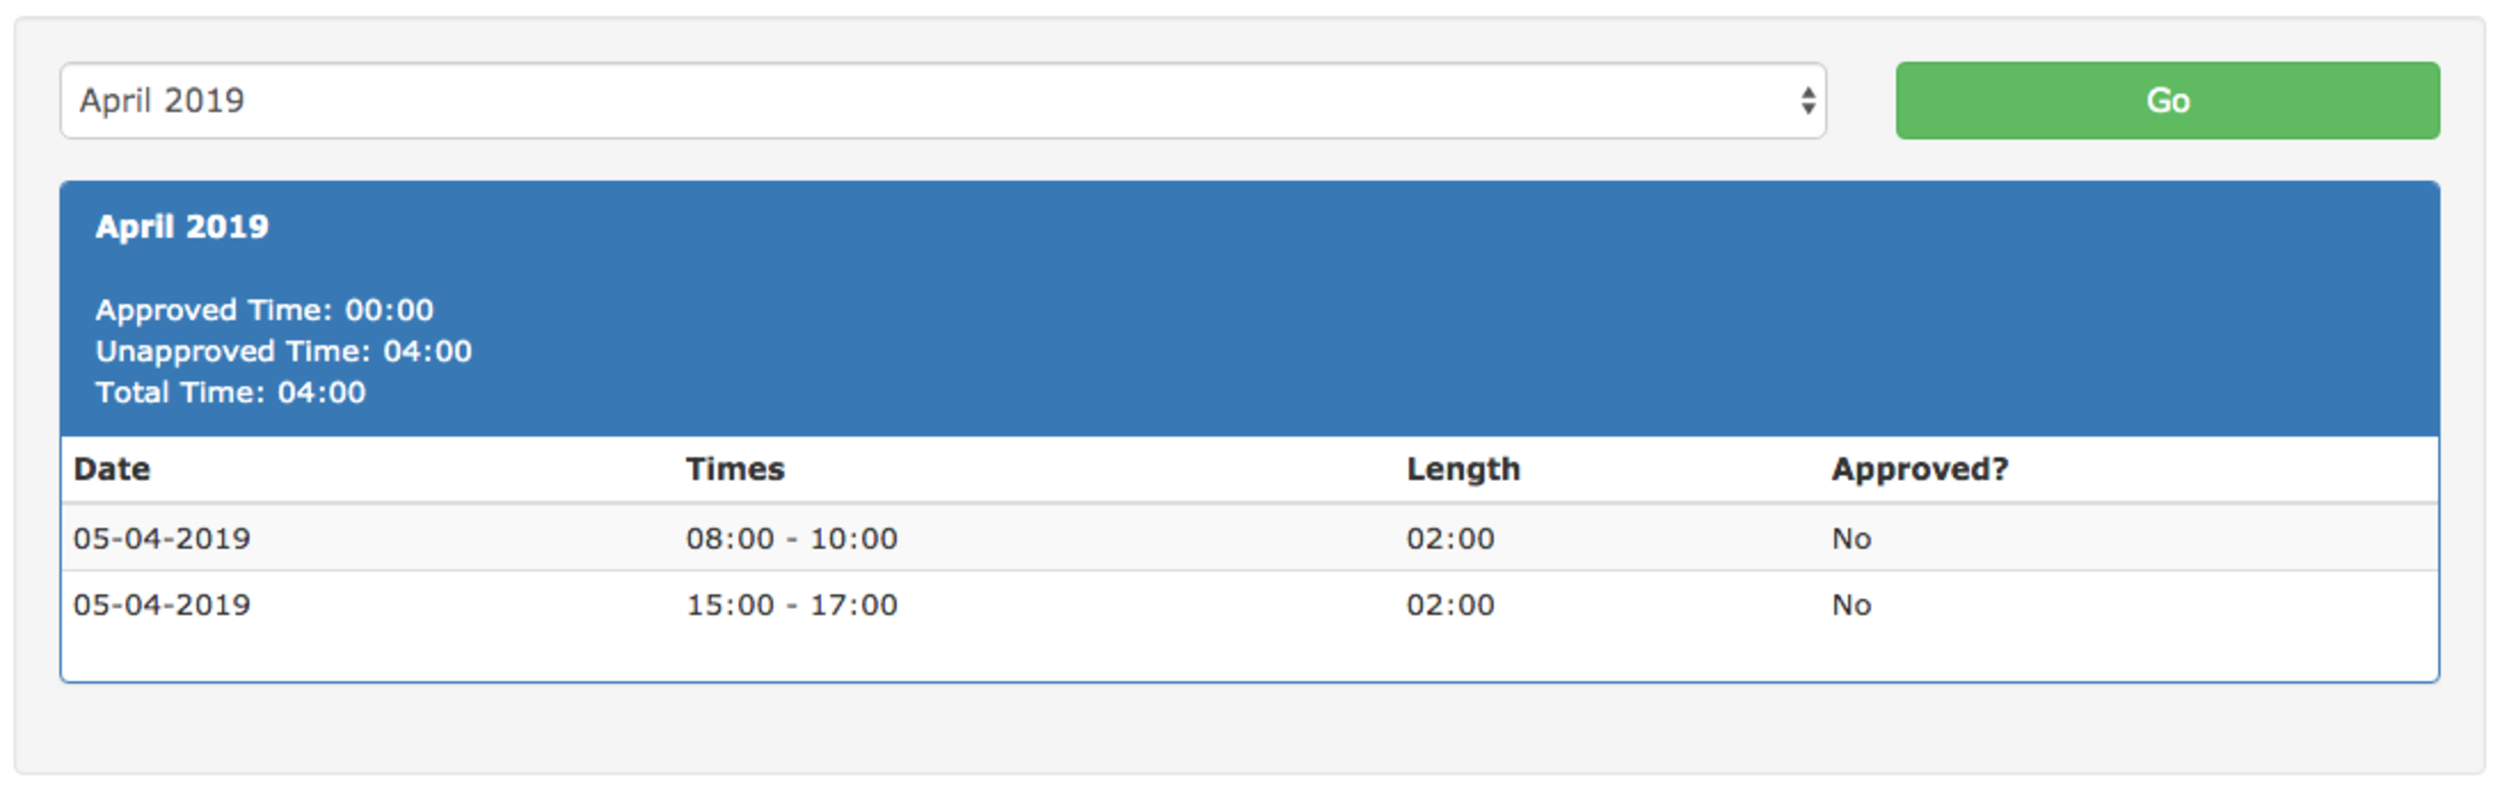
Once you’ve entered your worked hours you’ll see them on the right hand side of the screen. There is also a label to let you know if it’s been approved by your yard manager or not. When they approve the hours this will be updated.
In the menu click on Admin and Edit Staff Rates. This will bring you to the Staff Pay Rates section where you can review your current staff pay rates and create new ones. The rate set at the time a staff member records their hours will be used to automatically calculate the total pay owed to them. Because of this it’s important to set up your staff with the correct pay rate before they record any hours.

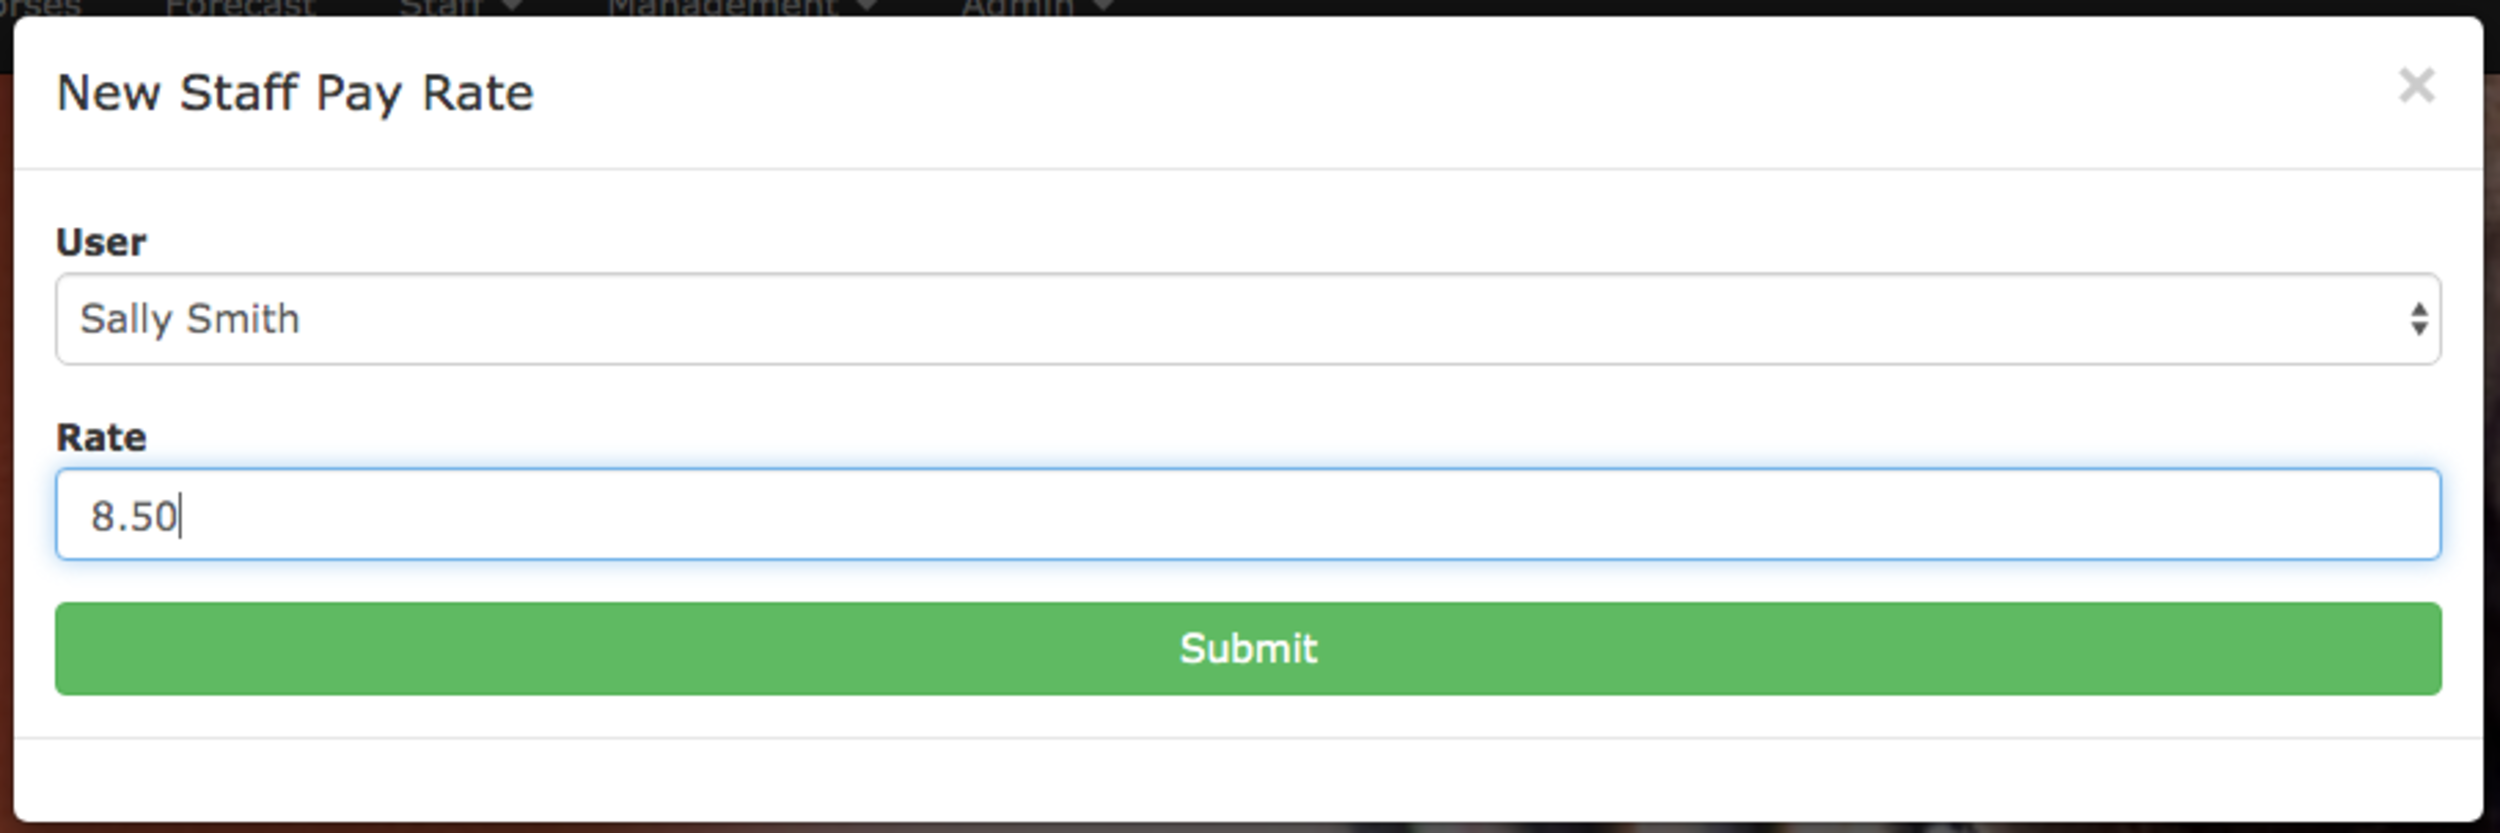
To create a new Staff Pay Rate click on New Staff Pay Rate and it’ll open a new dialog. In the dialog you can choose the staff member and set their rate. When you’re ready click Submit and it’ll be ready to go.
Click on Admin and Review Staff Hours. This will bring you to the staff hours review page. Here you can record additional hours on behalf of staff members (useful if they’ve forgotten to enter any). You can also see all the records staff have recorded and approve them. Finally you can create time sheets (which can be printed). The timesheet will show all the hours worked and the total pay owed to the staff member.
This is the same process as listed above for a staff member. The only difference is that you need to select the member of staff it’s for. If you need to make multiple records just enter one, click Record and repeat.
On the right hand side of the screen you can see all the recorded hours for the month (you can swap months by choosing a different month from the drop down box and clicking go).
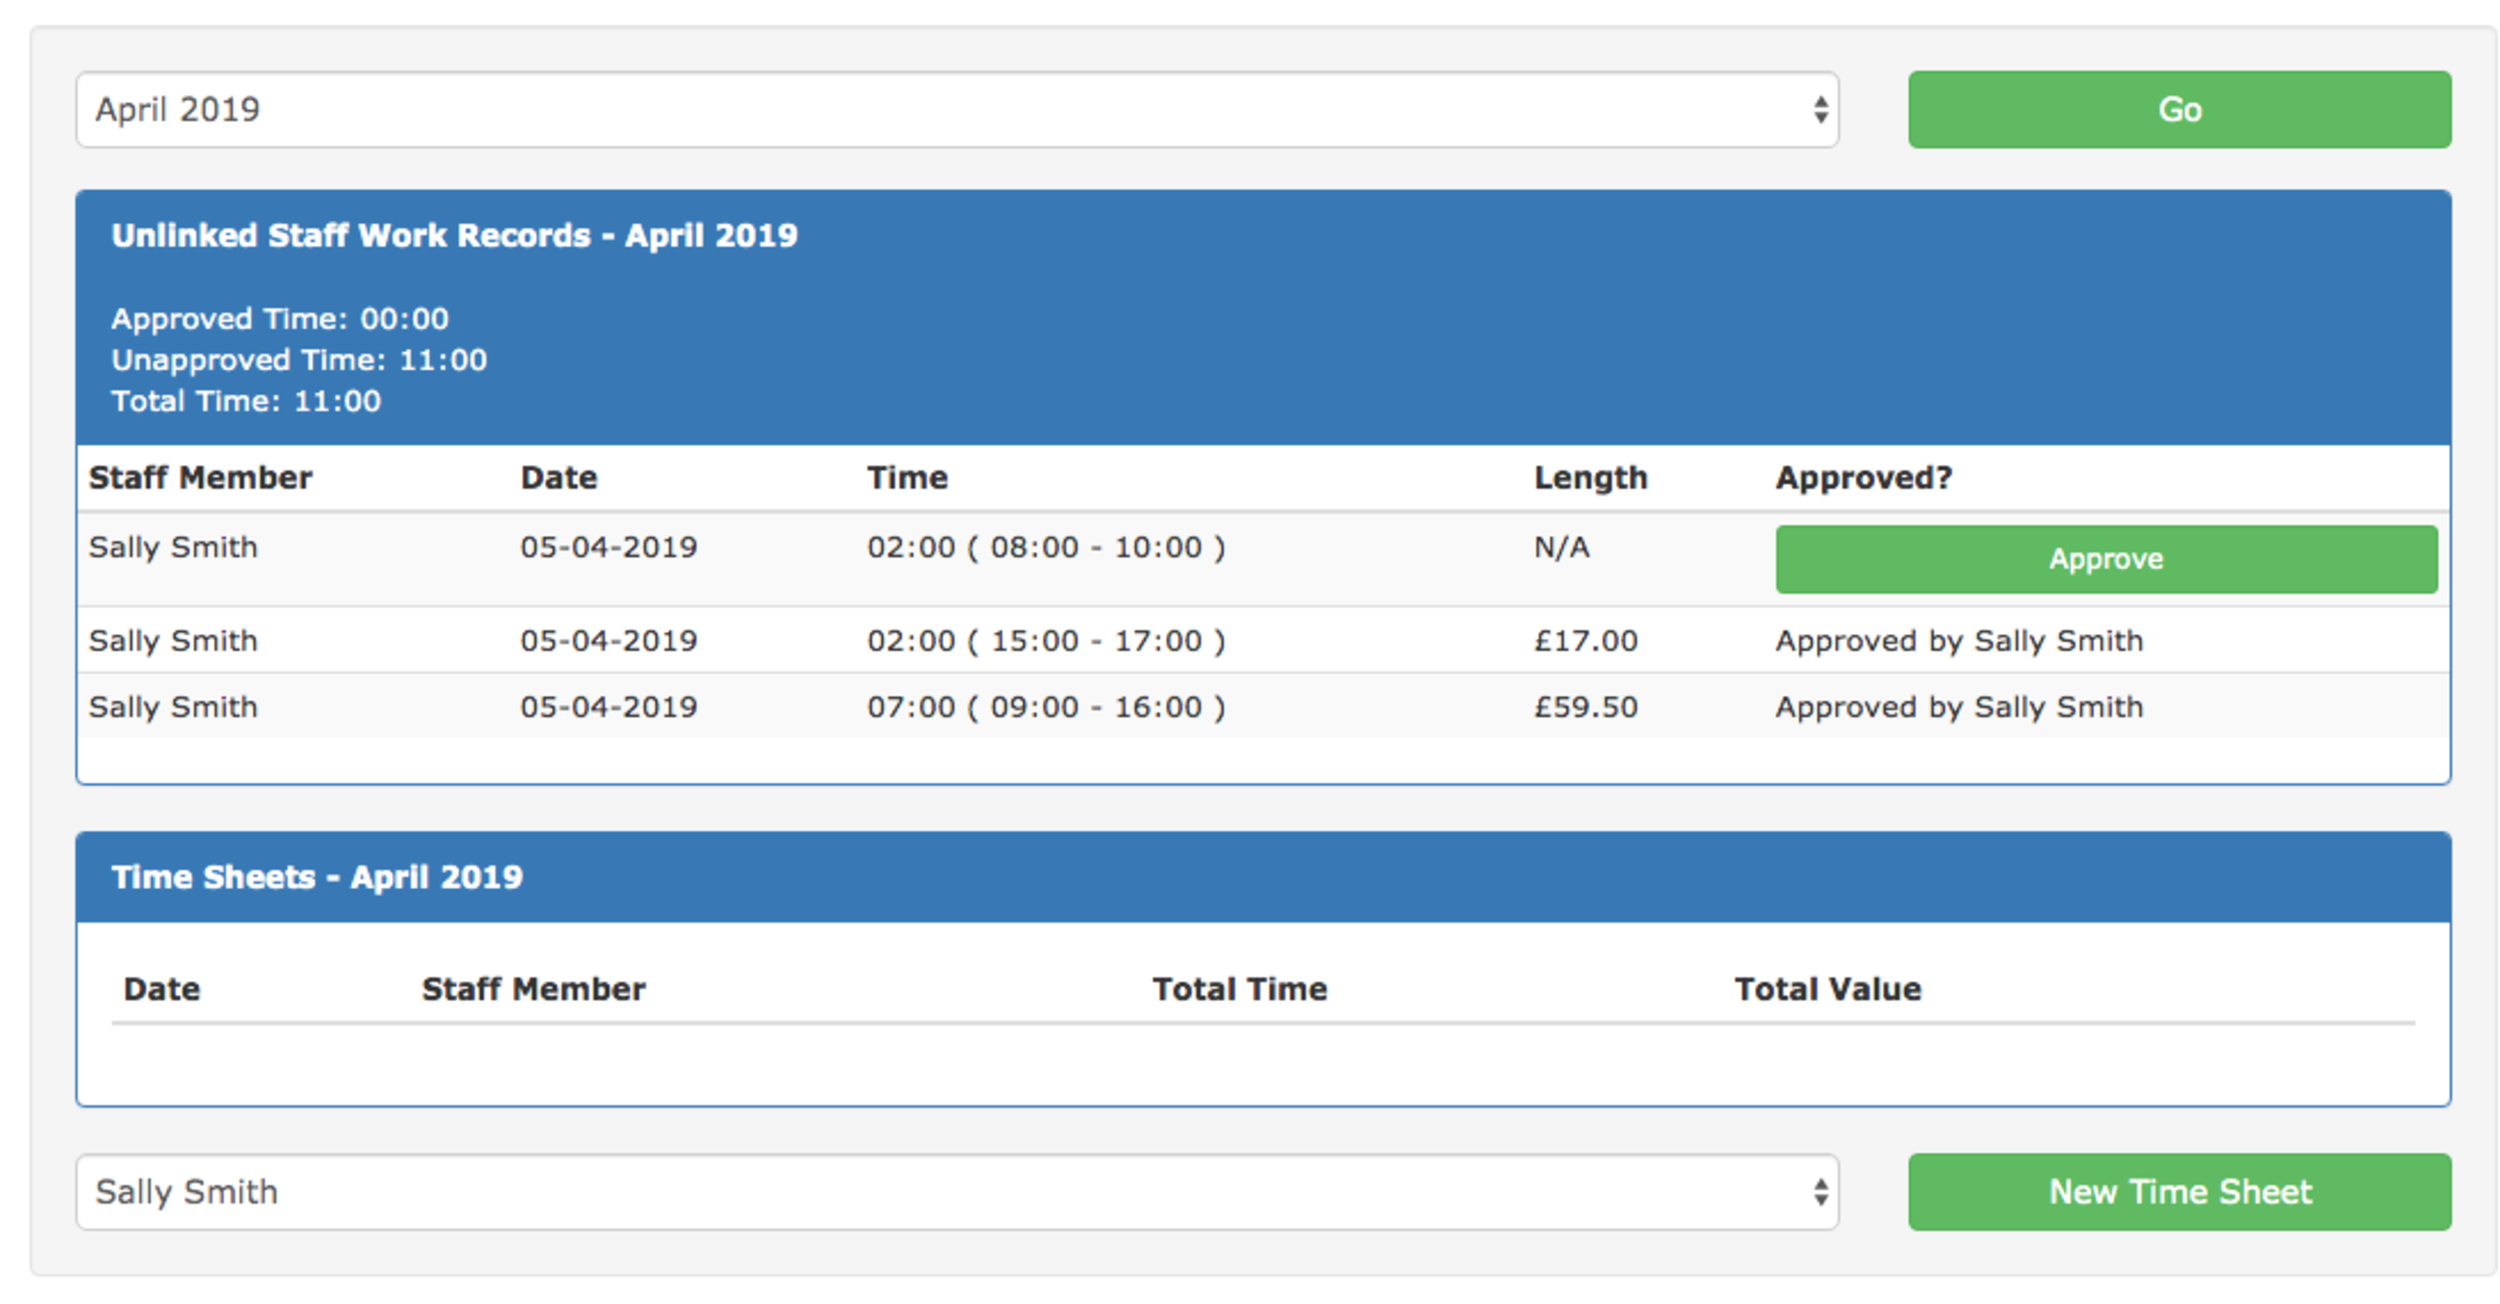
To approve a record click Approve. It’ll swap to ‘Approve by Your Name’. Once approved the record will be eligible to be added to a time sheet.
To begin the process of making a time sheet for a user select the users name and click on New Time Sheet.
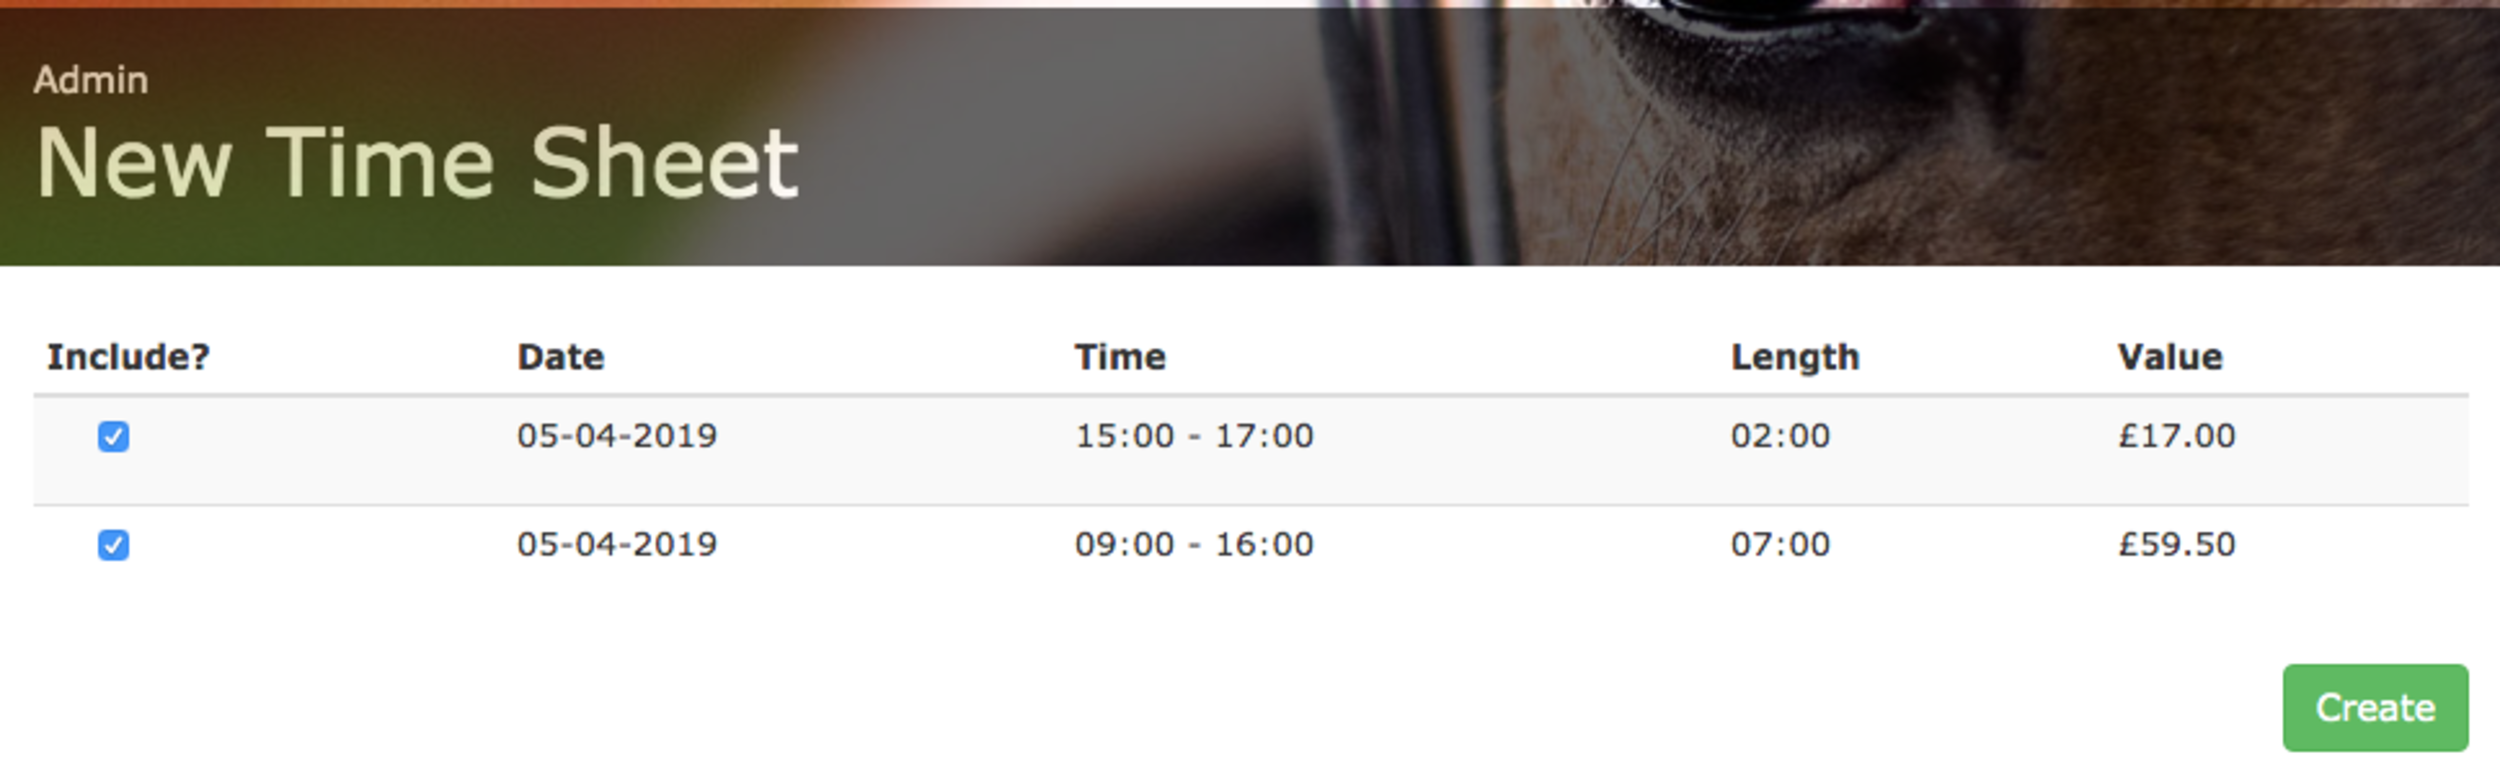
You’ll see all the staff work records that have been approved and are not yet linked to a time sheet. If you want to exclude a record from this time sheet you can untick the box under Include?. Once you’ve finished selecting the staff work records you wish to use click on Create.
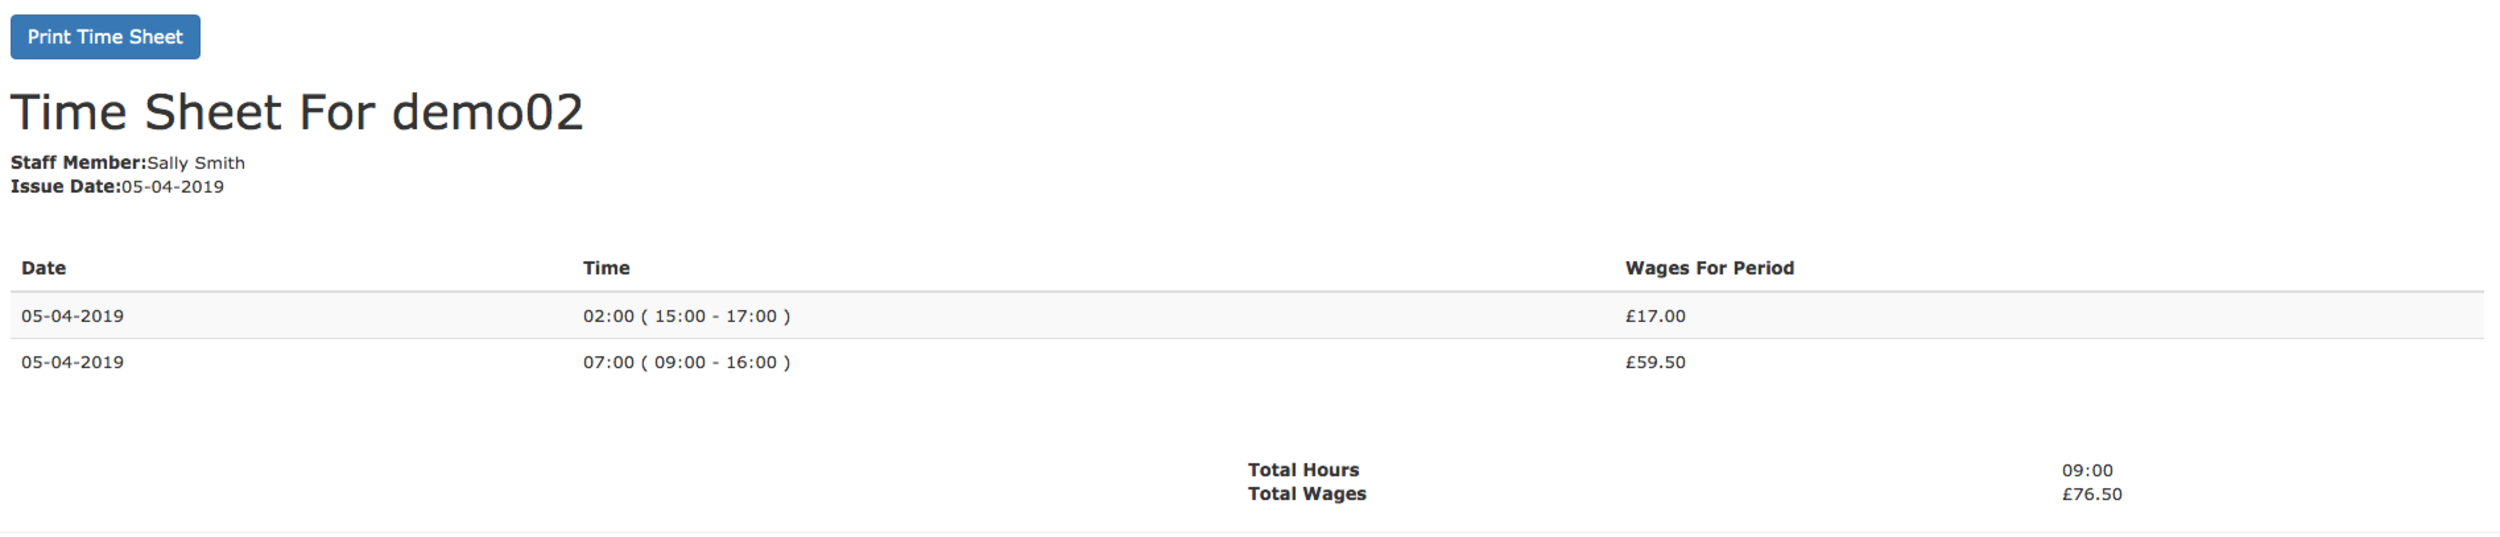
This will create the time sheet and take you back to the review page. You’ll see a new time sheet has been added. For each time sheet you can see the total time worked and the pay owed to the staff member.

If you click on Show it’ll bring up the time sheet and show you all the details. Please Note: This is only a timesheet and does not act as a Pay Slip. If you need to issue a Pay Slip you’ll need to use appropriate tools for that.
This new addition will give you the tools you and your staff need to easily and quickly keep track of the hours worked. It makes it easy to calculate the pay owed and reduces errors for both parties.
P.S. If you've stumbled across this page and have your own livery yard we'd love to show you more. This was one of our #FeatureFocusFriday posts where we highlight a feature in At The Yard but there’s much more to see. Please visit our contact page and get in touch to find out more.
A few weeks ago we added the ability to share horses; between liveries, to the whole yard or for a syndicate group of owners.
All the sharing options are setup in the management horse view. To get to this view go to the menu and click Management -> Yard Horses and click on Show on the horse you’re sharing.
Scroll down and find the Add Share button to set it up. On this page you’ll have all the sharing options in the system with which you can configure your shares. The rest of this post will look at the different sharing scenarios available to you.
This scenario is used when you have a livery on your yard who has a private sharer. You can set the sharer an account up and then share your liveries horse to the new sharers account. The sharer will then be able to book lessons, purchase products etc. with/for that horse.
This scenario can be used for yards which offer yard horses as part of a membership to the yard. Once setup every user at the yard can access the shared horse to book facilities (the school) or order services (a lesson) with/for that horse.
Syndicate horses are horses that are owned by a group of users. A key element of these horses is that everything involved in the horses upkeep must be billed to the horse and then split amongst the syndicate owners. When it comes to billing time At The Yard will automatically split the bill amongst the syndicates. Take a look at the video below to see how.
P.S. If you've stumbled across this page and have your own livery yard we'd love to show you more. At The Yard is the game changing equine livery yard management app that we promise will save you time and money. Please visit our contact page and get in touch.
Following on with our tradition of being late with #FeatureFocusFriday today (a Saturday 😂) we’re looking at how to change the size of the logo used on your invoices. It’s really quick and easy but can have a significant impact on the look of your invoices.
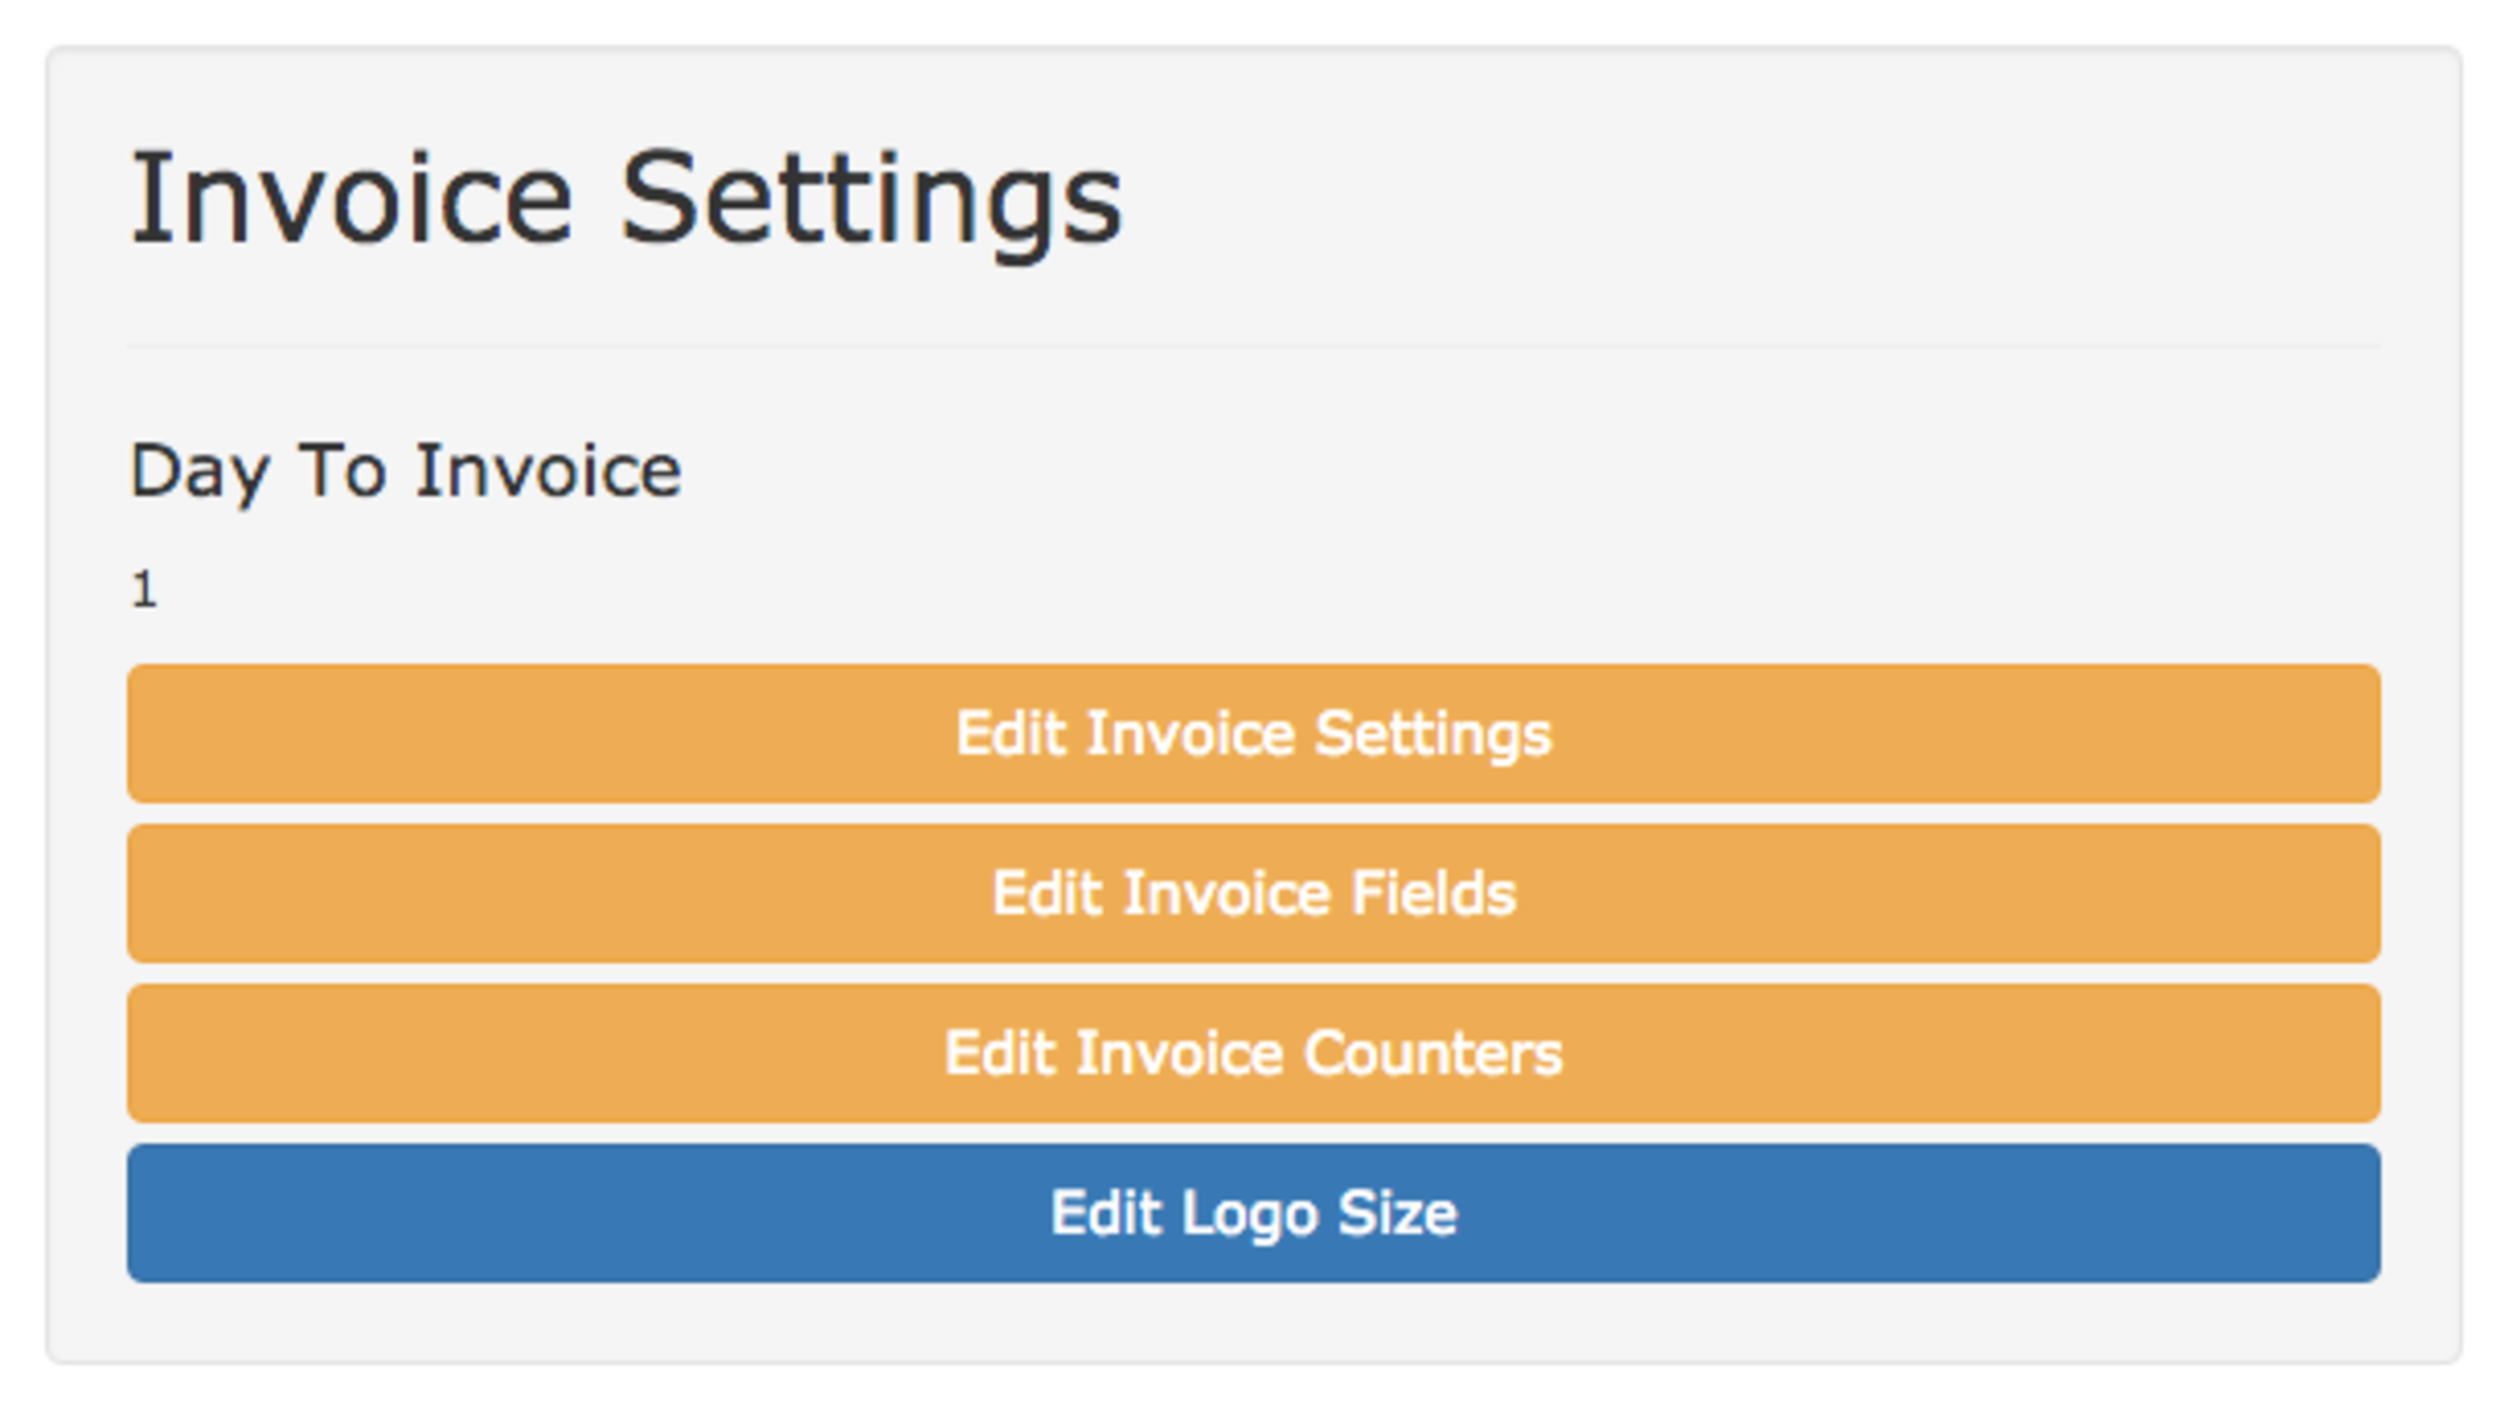
Move the slider back and forth to change the size of the logo. When you’re happy with it’s size click update.

“No Man is an Island”
— John Donne
No man (or women) is an island and either is a yard owner. It takes many people from the owner, to grooms through to perhaps your bookkeeper or accountant. With At The Yard you can add all your team to the system with their own account.
This guide will show you how to setup an additional admin user but the same principle can be used to create users with any roles (e.g staff users).
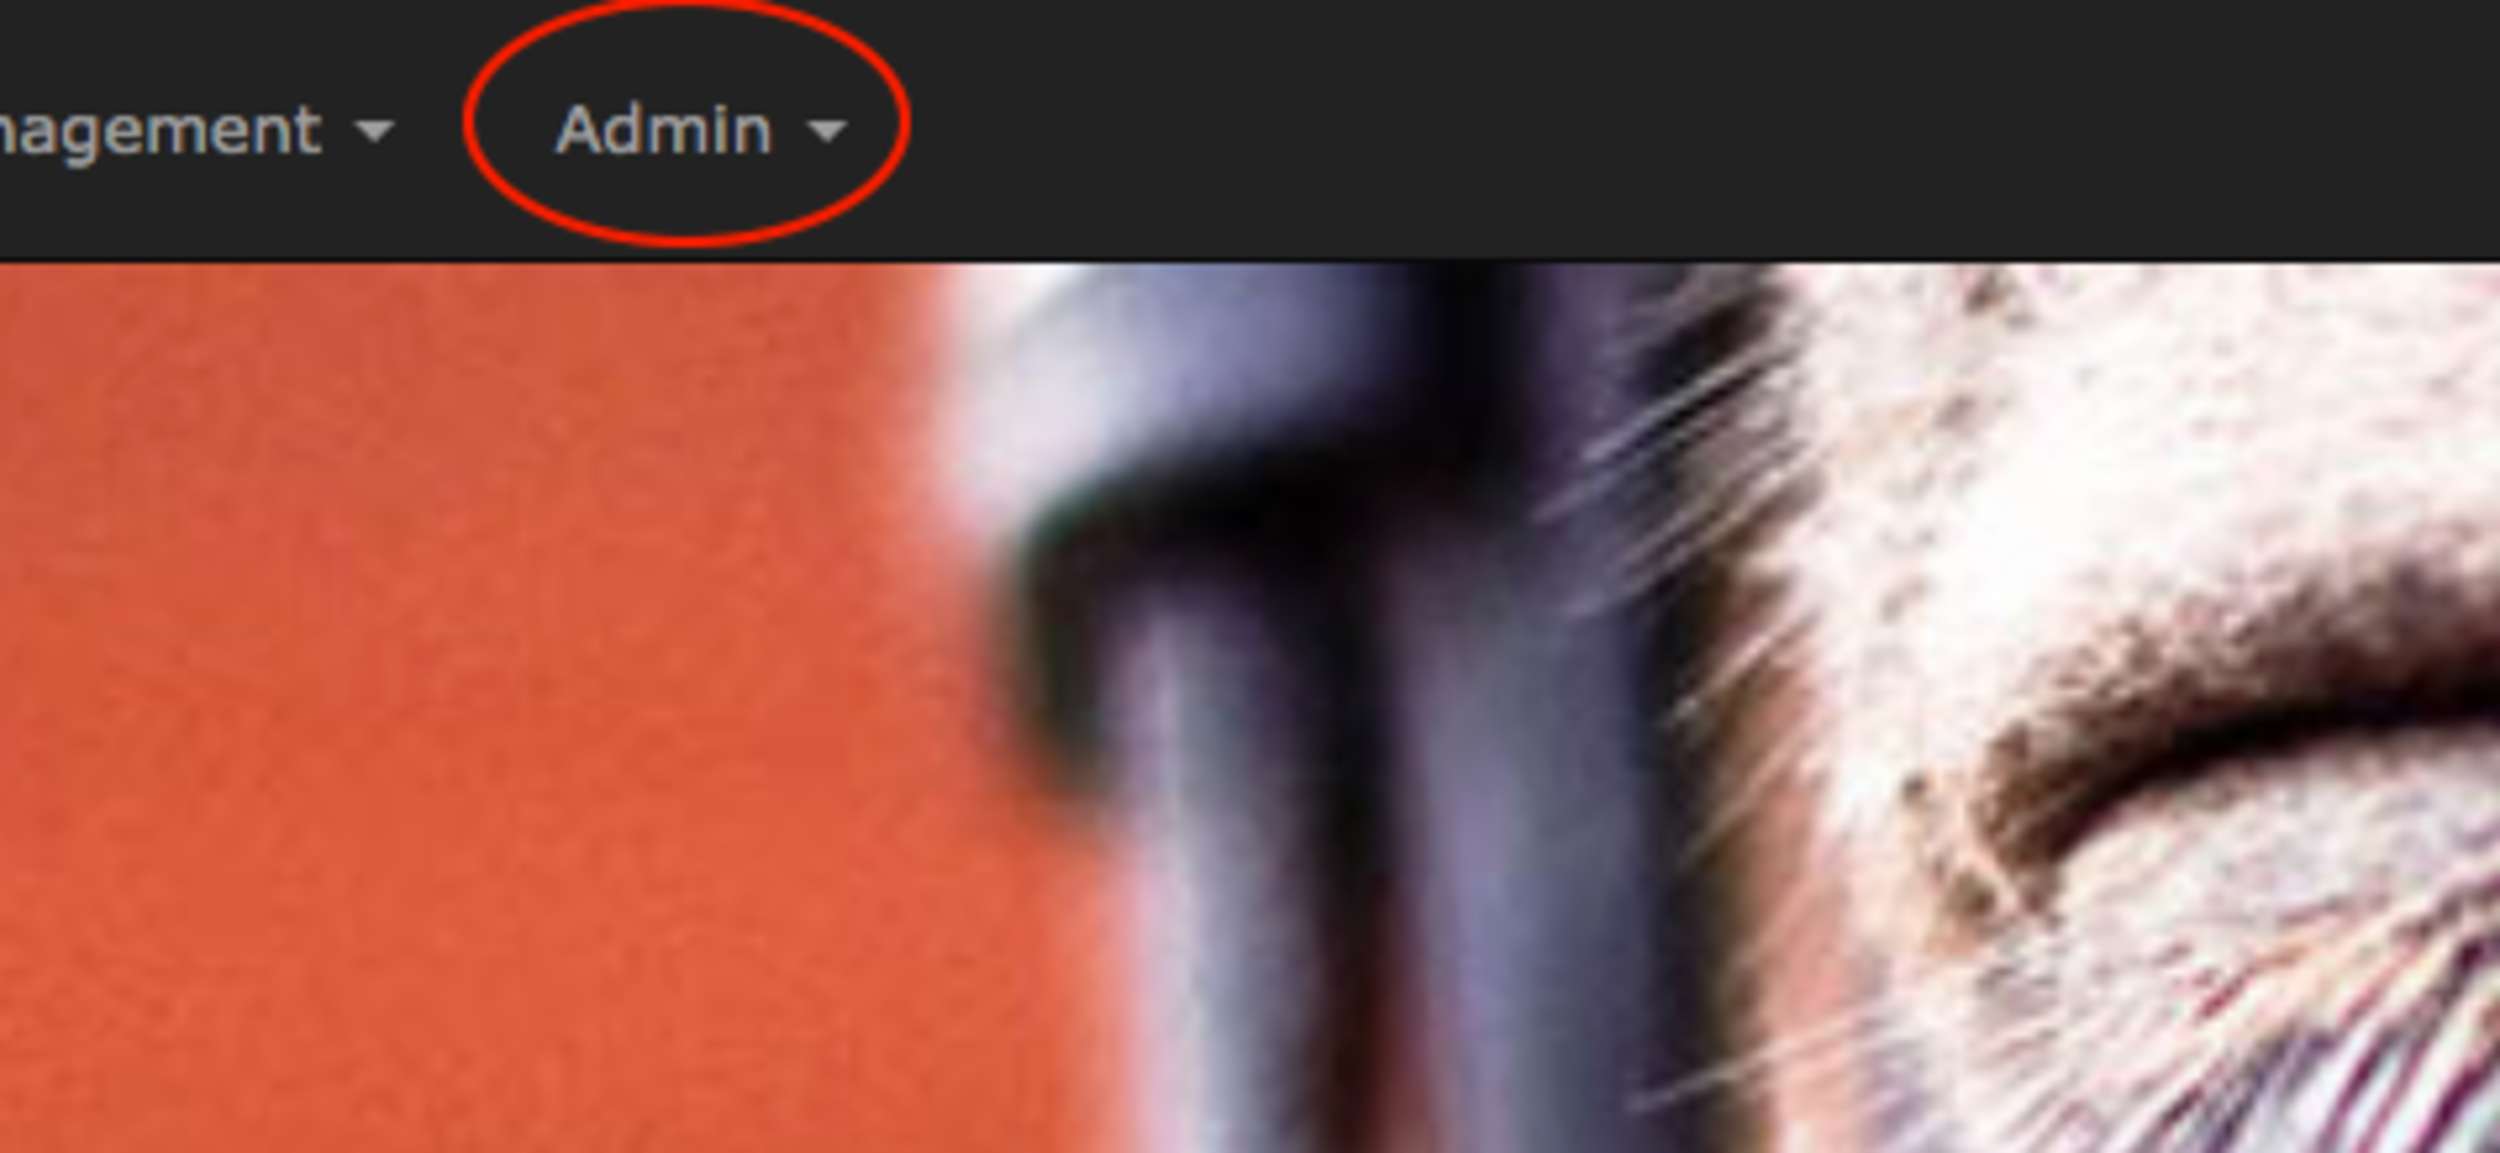
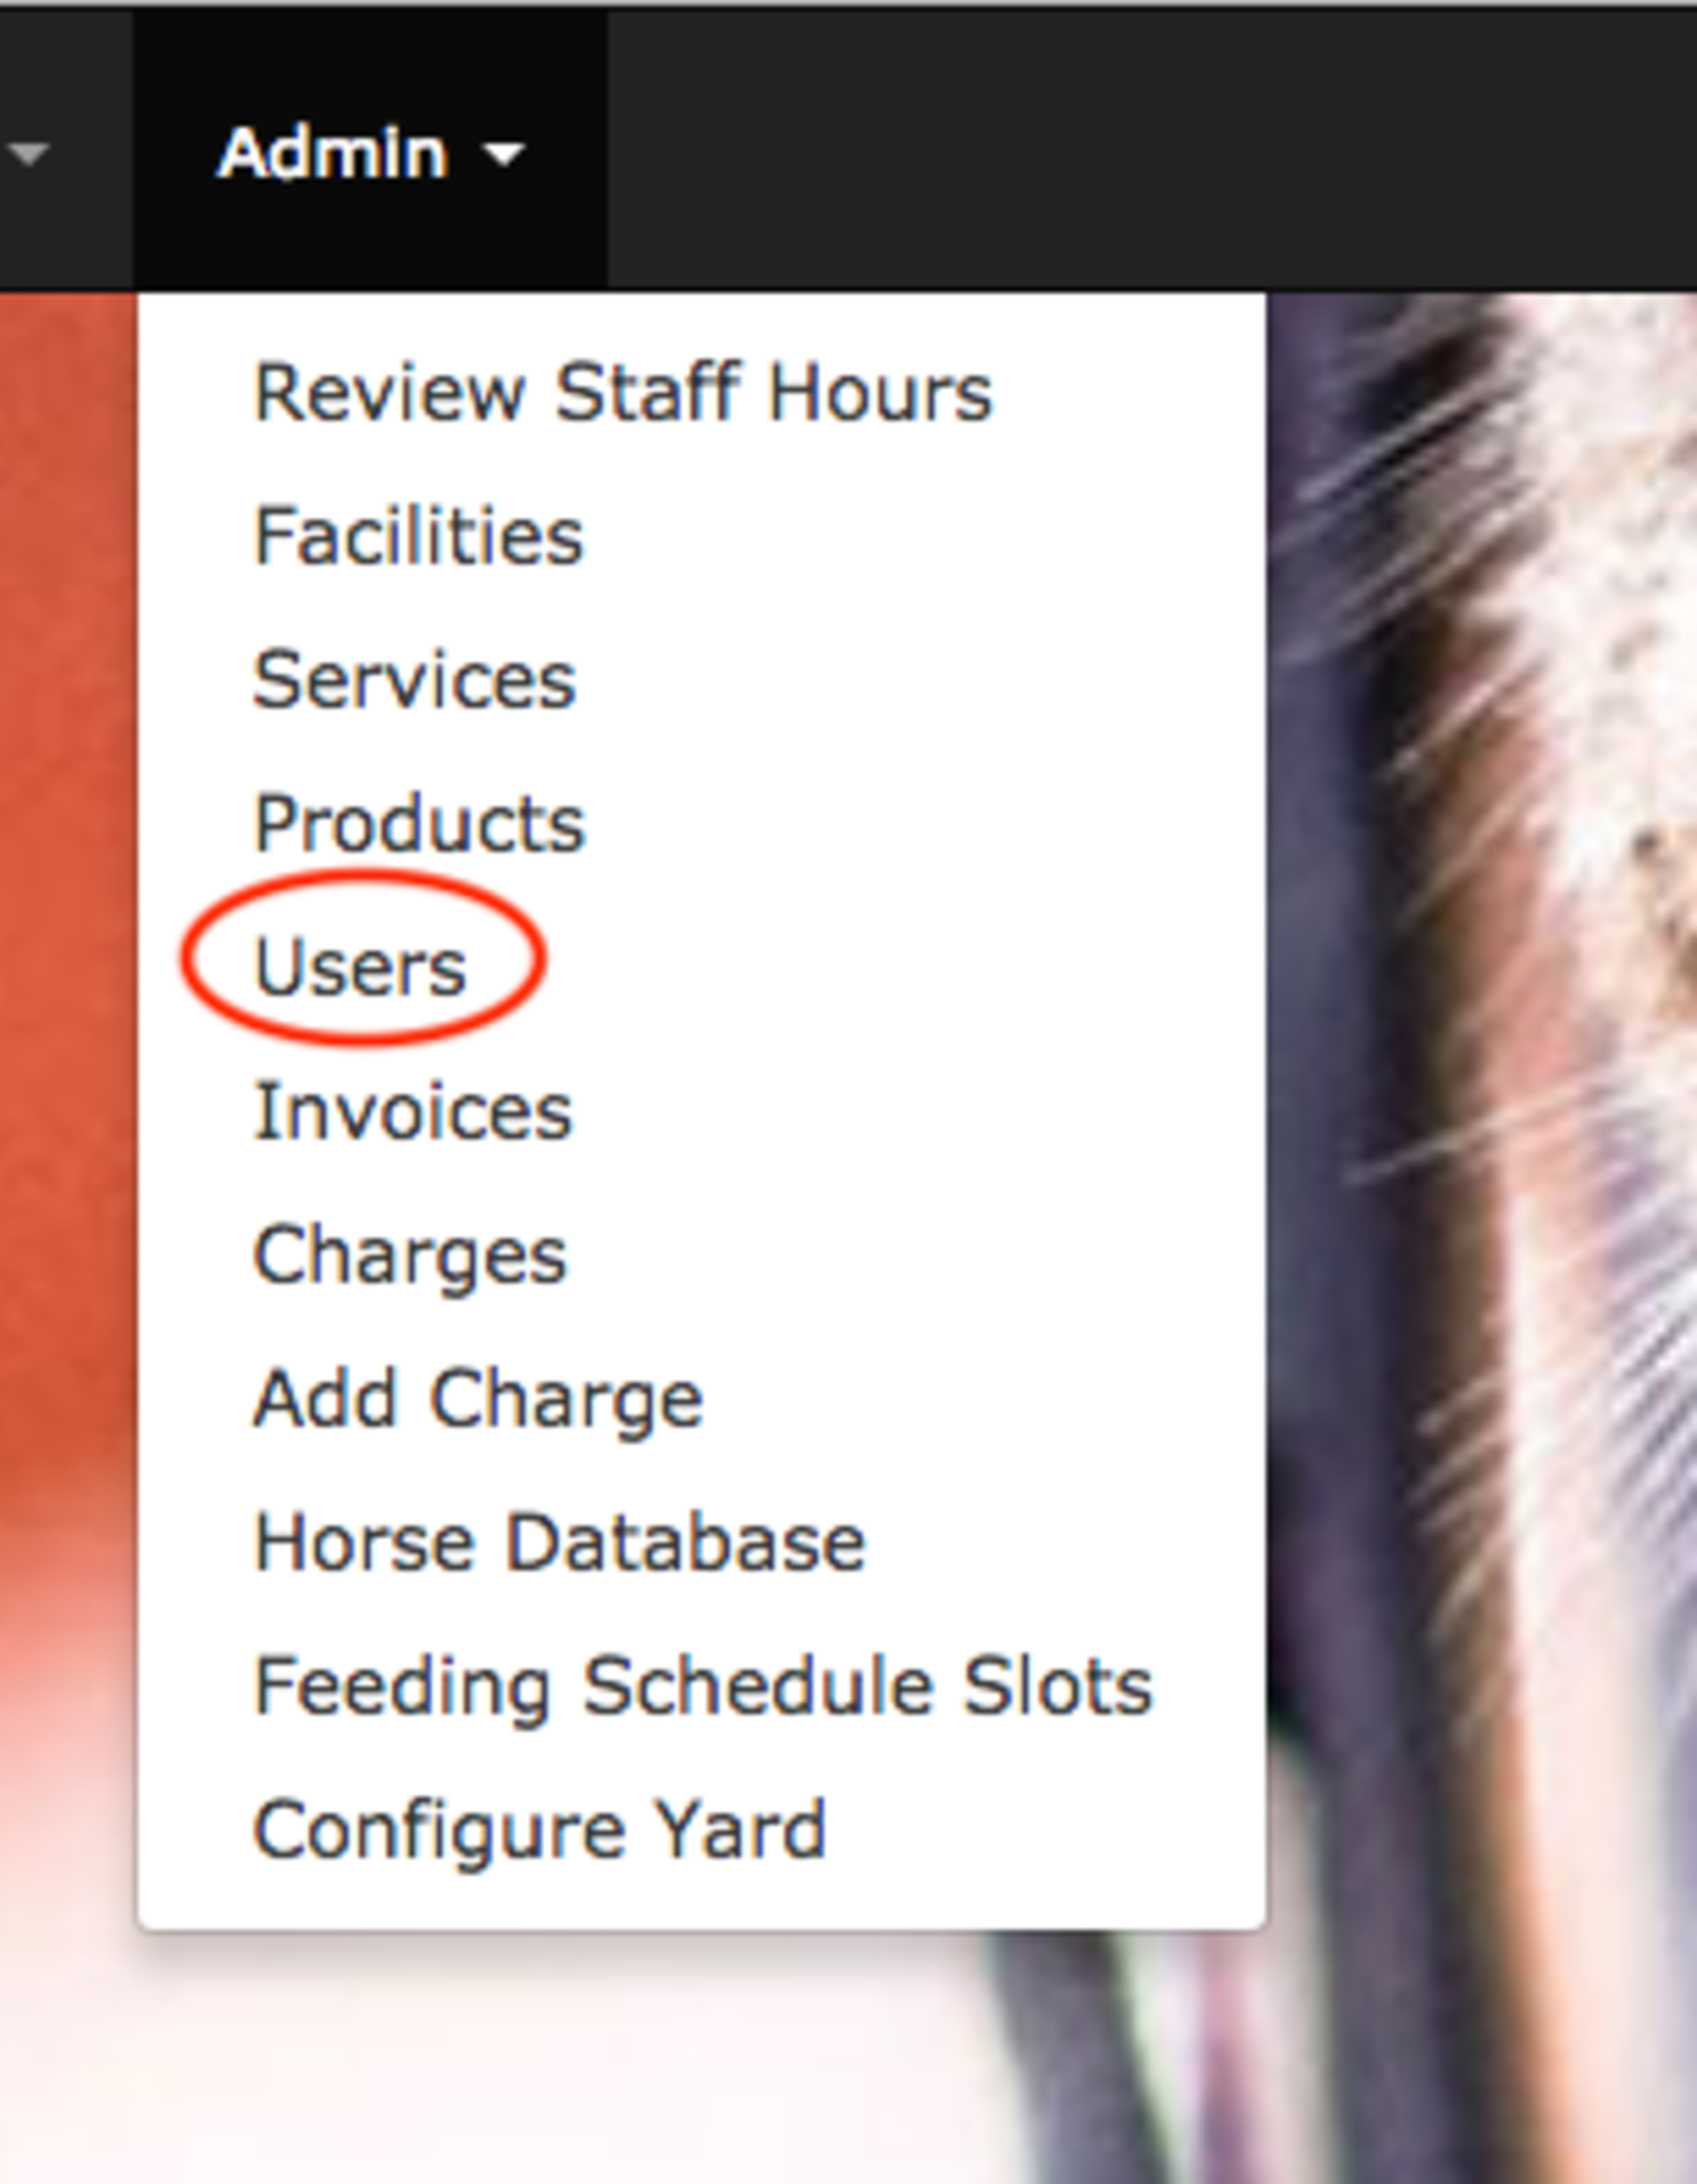
Step 1 - Go to the Admin Users Page
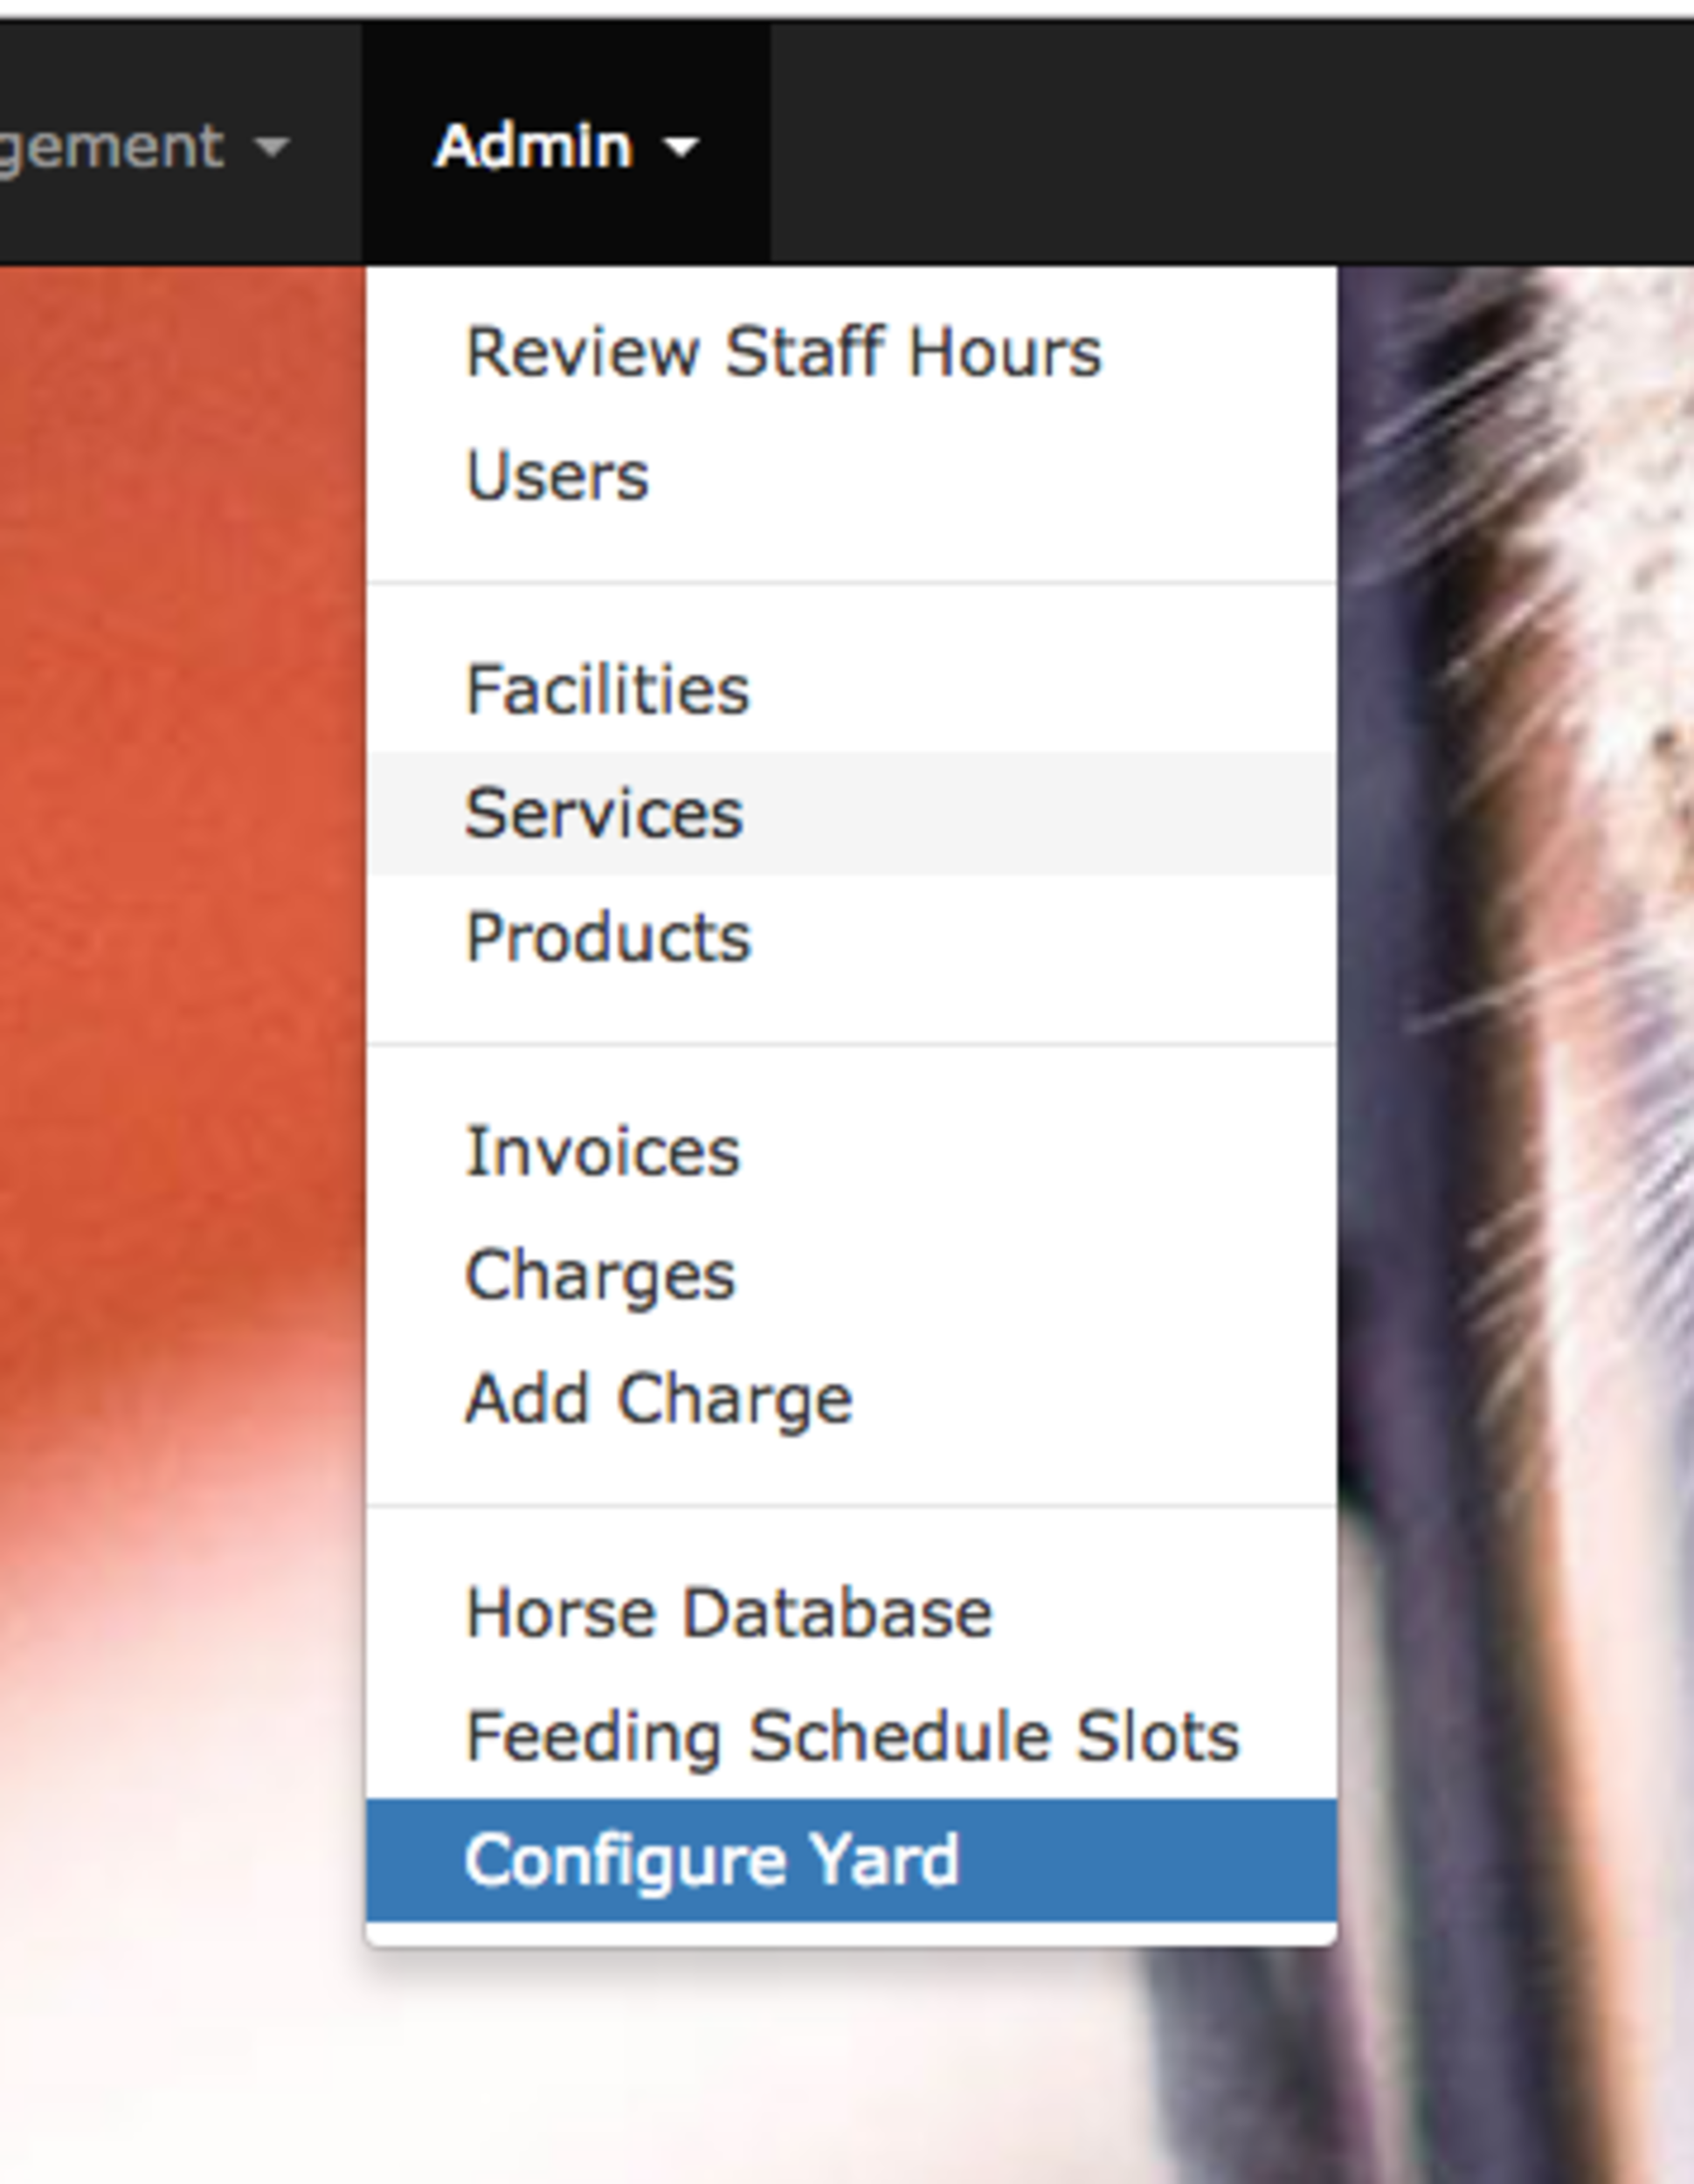
Click on the Admin button and click on Users.
Step 2 - Creating a new user
Note: You may be able to skip this step if you’ve already created your user and only wish to make that user an admin.
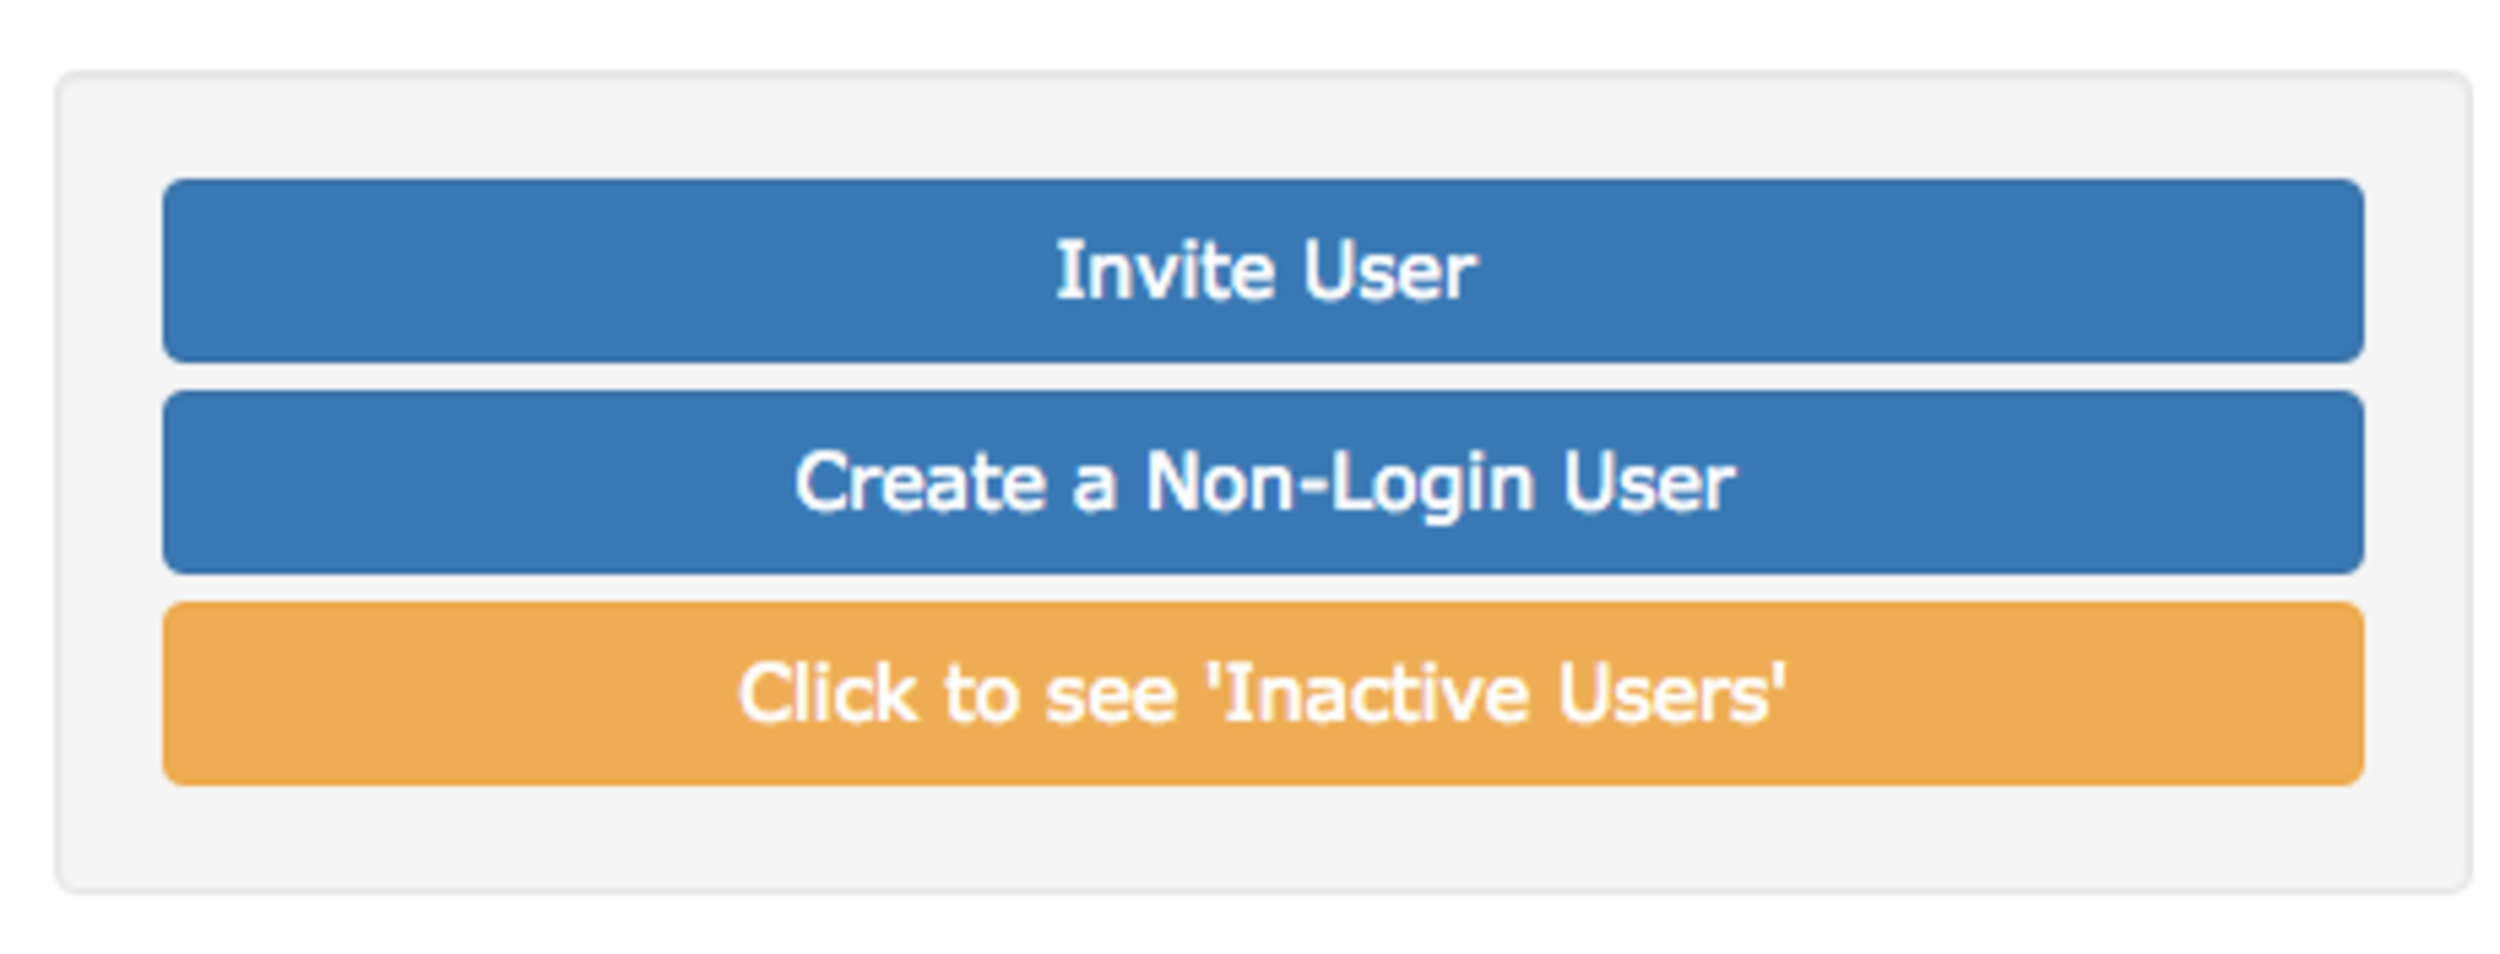
Click on ‘Create a Non-Login User’.
Fill in the new users information.
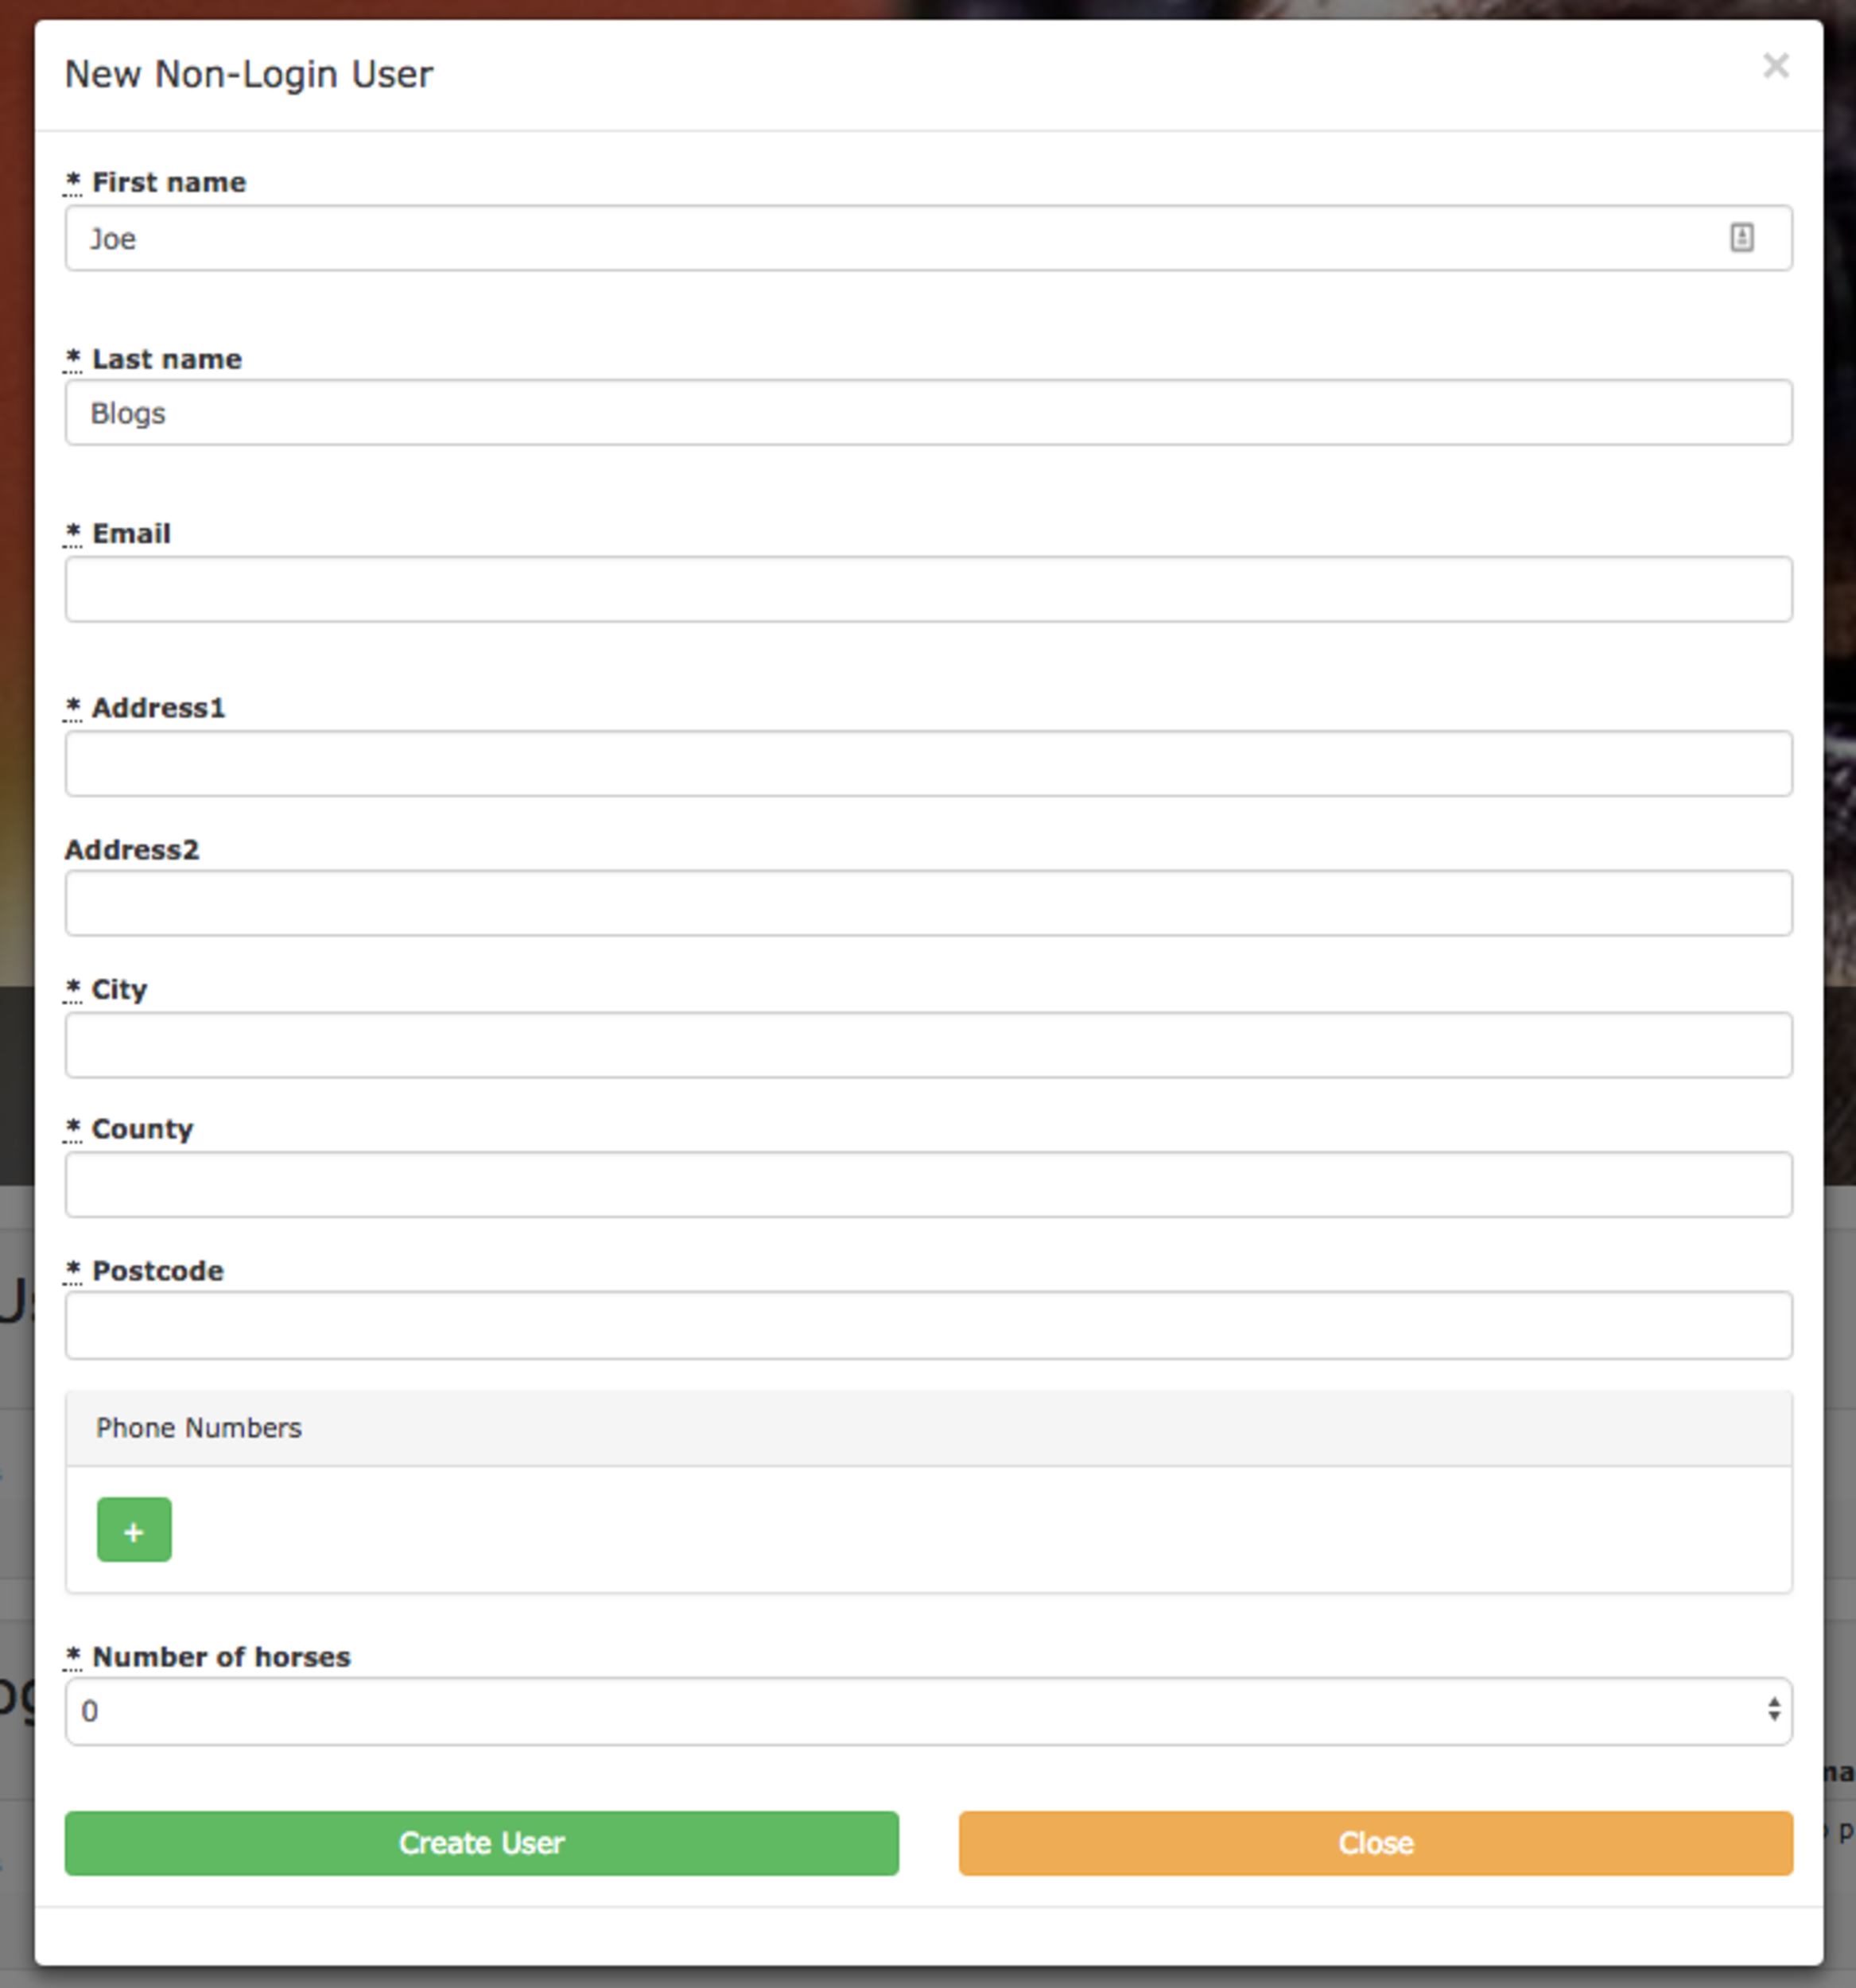
When finished click on ‘Create User’. It’ll go back to the admin users page. Find your new users and click on ‘Manage User’

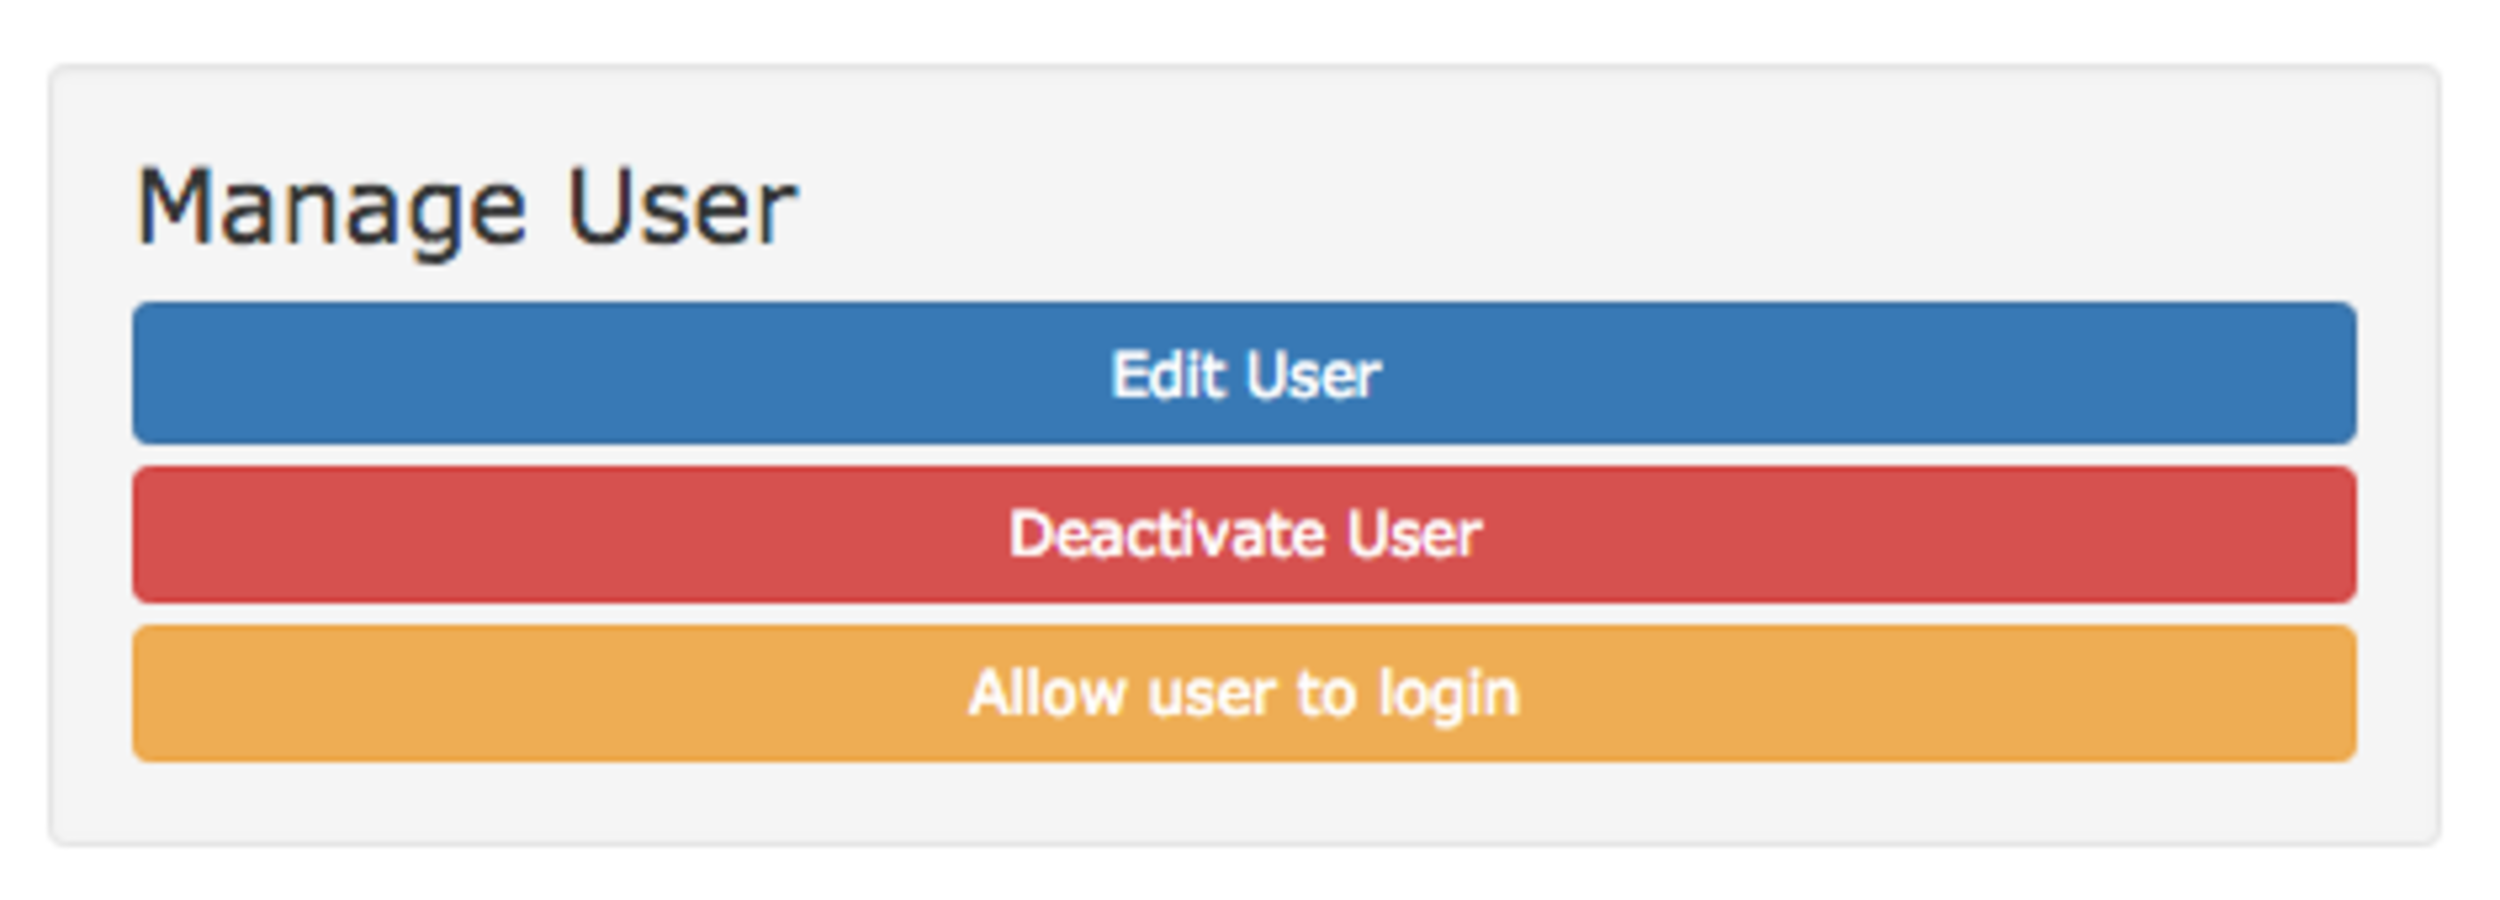
Navigate through the page to find the ‘Manage User’ box, within that box click on ‘Allow user to login’.
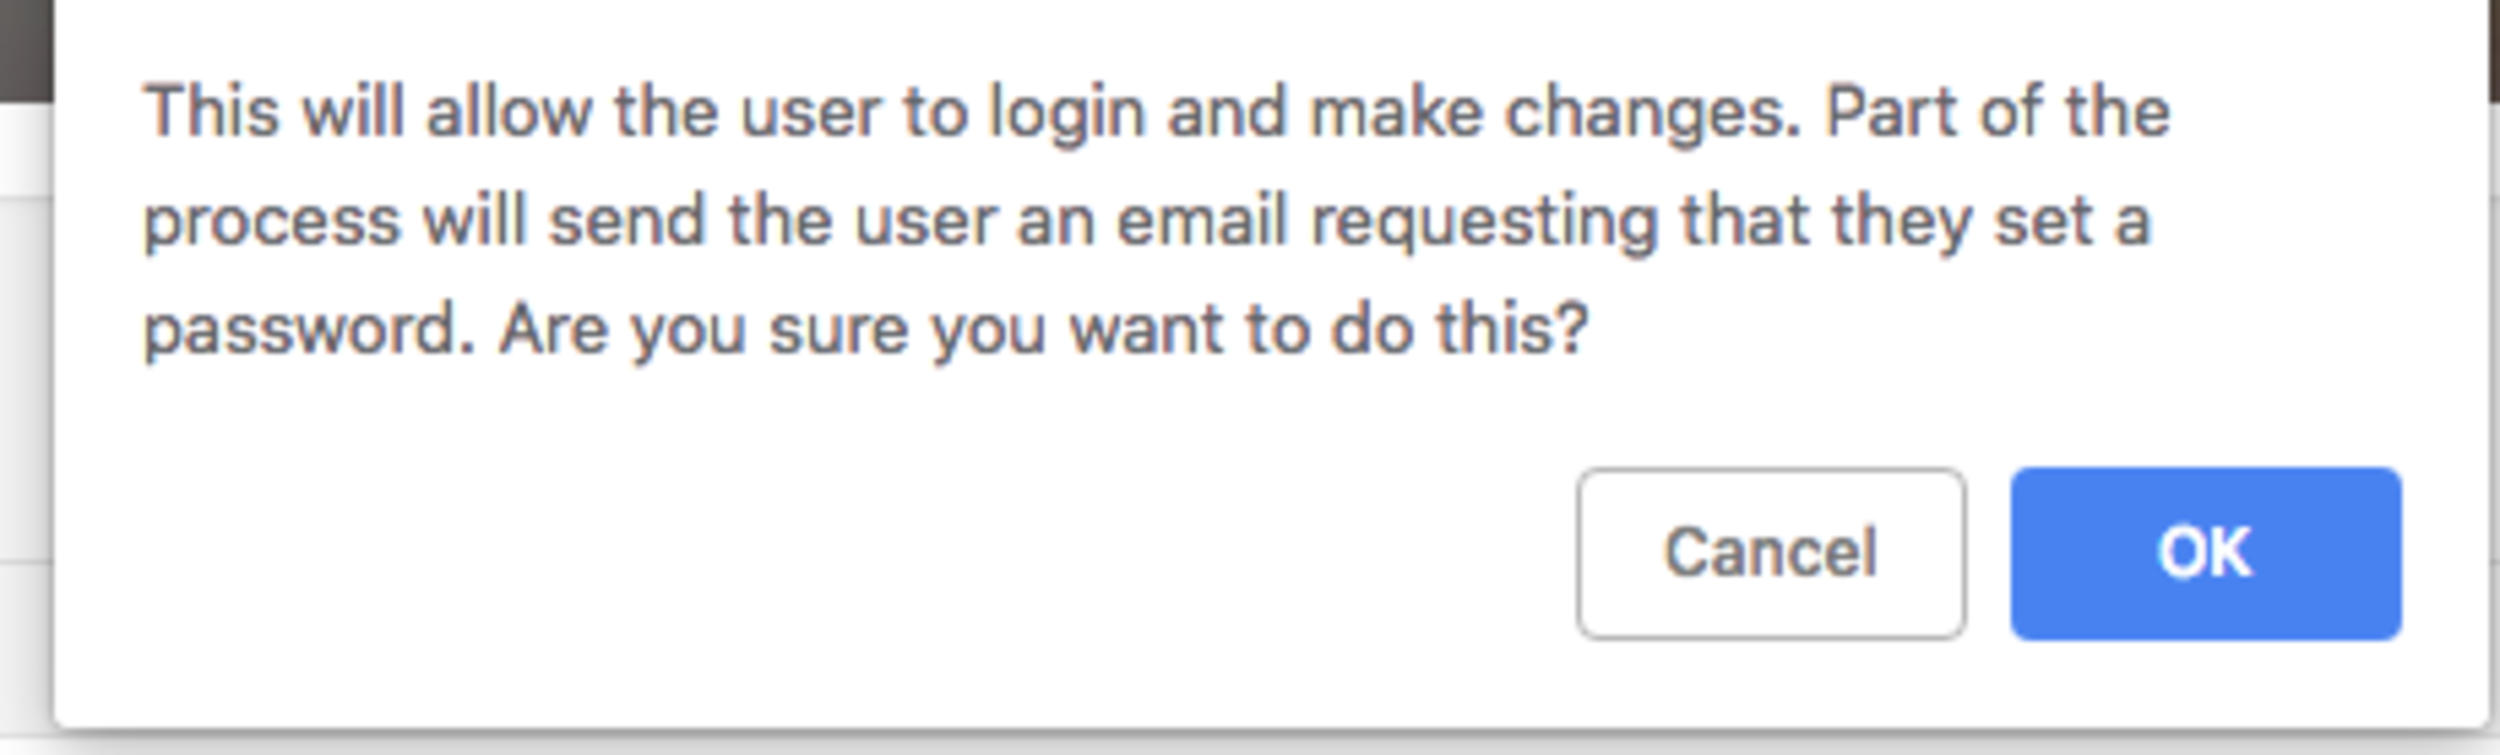
At this point you’ll need to log out of your original At The Yard account by clicking on your name and clicking Sign Out.
You’ll have received an email asking you to set a password. Simply follow the instructions and you’ll have a new user in the system.
You will then need to then log out of your new account and log back into your original admin account before proceeding with step 3.
Step 3 - Making the user an admin
Once you’ve logged back in as your original admin user go back to the Admin Users page and find your new user. Once again click on ‘Manage User’ at the end of their row. This will load the new user management page. Find the Manage User box and this time click on ‘Edit User’.

Scroll to the bottom and find the section call ‘User Roles’, by default it’ll only have the User box ticked. Select all the boxes for the roles your new user requires. It is our recommendation to include all roles (apart from Assistant) for an admin user (e.g for an admin user tick Admin, User, Manager and Staff).
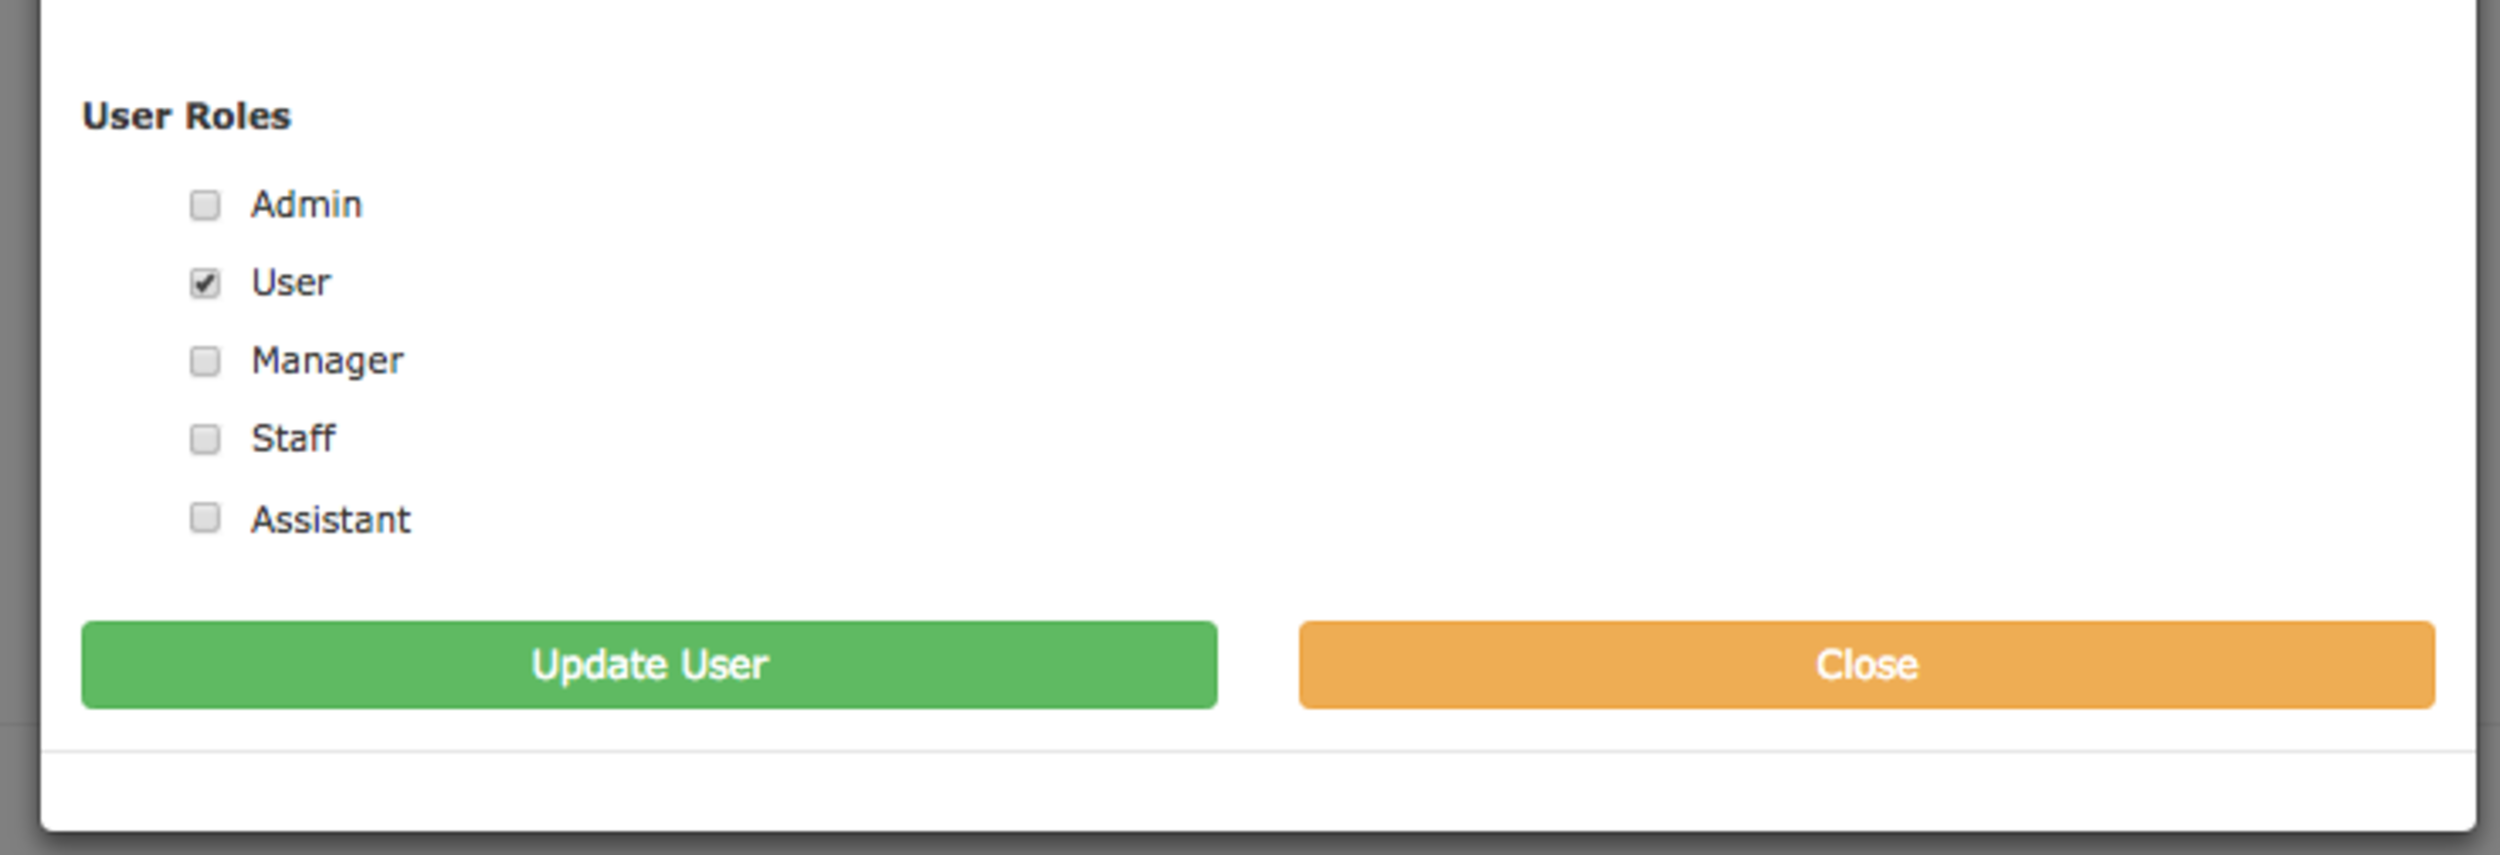
Click on ‘Update User’ and that will save the users new roles.
The user has now been made an admin. You can log out of your original account and login with your new user and you’ll have access to everything you need to get your job done.